EasyManua.ls Logo

Carrier 30HXA - User Manual

Carrier 30HXA
28 pages
Print Icon
To Next Page IconTo Next Page
Loading...
Installation Instructions
CONTENTS
Page
SAFETY CONSIDERATIONS ...................1
INTRODUCTION ..............................1
INSTALLATION .............................1-27
Step 1 Inspect Shipment ...................1
Step 2 Rig and Place Unit ..................1
Step 3 Piping Connections .................9
COOLER FLUID, VENT, AND DRAIN
BRINE UNITS
PREPARATION FOR YEAR-ROUND
OPERATION
30HXA REFRIGERANT PIPING
30HXC CONDENSER CONNECTIONS
INSTALL PRESSURE RELIEF REFRIGERANT
VENT PIPING
Step 4 Make Electrical Connections .......14
FIELD POWER CONNECTIONS
FIELD CONTROL POWER CONNECTIONS
Step 5 Install Accessories ................26
ELECTRICAL
30HXA LOW-AMBIENT OPERATION
MINIMUM LOAD ACCESSORY
MISCELLANEOUS ACCESSORIES
Step 6 Leak Test Unit .....................26
30HXC UNITS
30HXA UNITS
Step 7 Refrigerant Charge ................26
30HXC UNITS
30HXA UNITS
SAFETY CONSIDERATIONS
Installing, starting up, and servicing this equipment can
be hazardous due to system pressures, electrical compo-
nents, and equipment location. Only trained, qualified
installers and service mechanics should install, start up, and
service this equipment.
When working on the equipment, observe precautions in
the literature, and on tags, stickers, and labels attached to the
equipment.
Follow all safety codes.
Wear safety glasses and work gloves.
Use care in handling, rigging, and setting bulky
equipment.
INTRODUCTION
These instructions cover installation of 30HX liquid chill-
ers with electronic controls and units with factory-installed
options (FIOPSs).
IMPORTANT: This equipment generates, uses, and can
radiate radio frequency energy. If not installed and
used in accordance with these instructions, this equip-
ment may cause radio interference. The equipment has
been tested and found to comply with the limits of a
Class A computing device as defined by the FCC
(Federal Communications Commission, U.S.A.) Regu-
lations, Subpart J of Part 15, which are designed to
provide reasonable protection against such interfer-
ence when operated in a commercial environment.
INSTALLATION
Step 1 Inspect Shipment
Inspect unit for dam-
age upon arrival. If damage is found, file a claim with the
shipping company right away. Do not store units in an area
exposed to weather because of sensitive control mecha-
nisms and electronic devices.
Locate unit indoors. When considering unit location, con-
sult National Electrical Code (NEC, U.S.A.) and local code
requirements. Allow sufficient space for wiring, piping, and
service. Install unit in an area which will not be exposed to
subfreezing weather. See Fig. 1-4 for clearance details.
Allow the following clearances for service access:
Front .............................. 3ft(914 mm)
Rear ............................... 3ft(914 mm)
Top ............................... 2ft(610 mm)
Ends ............... tube removal at one (either) end;
3 ft (914 mm) at opposite end.
Be sure surface beneath the unit is level and is capable of
supporting the operating weight of the unit. See Fig. 5 and
Tables 1A and 1B for unit operating weights. If necessary,
add supporting structure (steel beams or reinforced concrete
slabs) to floor to transfer weight to nearest beams.
Step 2 Rig and Place Unit
Rig unit from the top heat exchanger only. Rigging from
the bottom heat exchanger will cause the unit to be lifted
unsafely. Personal injury or damage to the unit may
occur.
Do not remove unit from skid until unit is in its
final location. Rig from the rigging holes provided in the top
heat exchanger. See Fig. 1-5 for rigging and center of grav-
ity information. Lower the unit carefully onto the floor or
roller. Push or pull only on the skid, not the unit. If the
unit is moved on rollers, use a minimum of 3 evenly-spaced
rollers.
Copy continued on page 9.
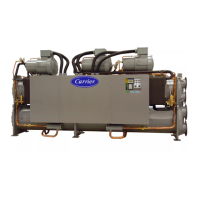
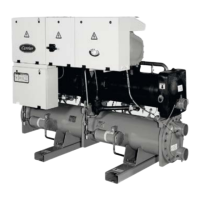
30HXA,HXC076-186
Water-Cooled and Condenserless Chillers
50/60 Hz
Manufacturer reserves the right to discontinue, or change at any time, specifications or designs without notice and without incurring obligations.
Book 2
Tab 5c
PC 903 Catalog No. 563-052 Printed in U.S.A. Form 30HX-1SI Pg 1 5-96 Replaces: New
Question and Answer IconNeed help?

Do you have a question about the Carrier 30HXA and is the answer not in the manual?

Summary

Safety Considerations

Introduction

Installation

Inspect Shipment

Inspect unit for shipping damage.

Rig and Place Unit

Guidelines for unit rigging and placement.

Piping Connections

Information on cooler, vent, drain, and refrigerant piping.

Make Electrical Connections

Field power and control power connection procedures.

Install Accessories

Details on optional unit accessories.

Leak Test Unit

Procedure for performing a unit leak test.

Refrigerant Charge

Procedures for refrigerant charging the unit.

Packaged Service Training

Overview

This document provides installation instructions for the 30HXA and 30HXC 076-186 Water-Cooled and Condenserless Chillers, operating at 50/60 Hz. These instructions cover the installation of 30HX liquid chillers equipped with electronic controls and units with factory-installed options (FIOPSs).

Function Description

The 30HX chillers are designed to provide chilled fluid for various applications. The 30HXC units are water-cooled, utilizing a condenser for heat rejection, while the 30HXA units are condenserless, requiring connection to a remote condenser. Both types feature semi-hermetic, twin-screw compressors for efficient operation. The units are equipped with a cooler, which is a shell and tube heat exchanger with enhanced copper tubes, responsible for chilling the fluid. For 30HXA units, an oil separator is also included in the refrigerant circuit.

The chillers incorporate electronic controls to manage operation, capacity steps, and various safety features. Capacity control is achieved through multiple steps, with standard units offering 6 steps and optional units offering 8 steps. Minimum step capacity is 20% for standard units and 10% for optional units. The units use R-134a refrigerant.

Usage Features

  • Fluid Connections: The cooler fluid inlet (return) is the lower of the two cooler connections, and the outlet (supply) is the upper connection. For 30HXC units, the condenser fluid inlet is the lower of the two condenser connections, and the outlet is the upper. Weld flanges are provided for field-supplied piping connections.
  • Refrigerant Piping (30HXA): For condenserless 30HXA units, field-supplied refrigerant piping connects the unit to remote condensers. Care must be taken to avoid excessive pressure drops in both the discharge (hot gas) and liquid lines. Pressure relief refrigerant vent piping is also required, with flares provided for relief fittings on both the low and high sides.
  • Electrical Connections: Units require field power connections, with voltage and phase configurations varying by model. Control circuit power is also required, typically 115-1-60 or 230-1-60, depending on the main power supply. Terminal blocks are provided for power wiring, and some units may have factory-installed non-fused disconnects.
  • Control Features: The units are equipped with various control features, including a control transformer, cooler pump/flow switch interlock, cooler pump control, expanded display panel, remote alarm, remote on-off, pulldown control, occupancy scheduling, demand limit control, temperature reset (from occupied space or outdoor-air temperature), dual set point control, condenser water sensors, and Level II communications (Carrier Comfort Network).
  • Low-Ambient Operation (30HXA): For 30HXA units operating in outdoor ambient temperatures below 60°F (15°C), an accessory Motormaster® III control is required.
  • Minimum Load Accessory: If minimum load operation is necessary, an appropriate accessory package should be installed.
  • Year-Round Operation: For areas where piping or the unit is exposed to freezing temperatures, freeze-up protection is recommended using inhibited ethylene glycol or other suitable corrosion-resistant antifreeze solution, along with electric heater tapes.

Maintenance Features

  • Service Access: Recommended clearances for service access are 3 ft (914 mm) at the front and rear, 2 ft (610 mm) at the top, and tube removal at one end (3 ft (914 mm) at the opposite end).
  • Cooler Head Removal: The piping arrangement should allow for offsetting the piping to permit cooler head removal for maintenance.
  • Fluid System Drainage: Drain connections are located at all low points of the fluid system to permit complete drainage for servicing.
  • Air Vents: Field-supplied air vents should be installed in the fluid system at the highest point to facilitate servicing and air purging.
  • Screen Strainers: A screen strainer with a minimum of 20 mesh should be installed ahead of the cooler inlet (and condenser inlet for 30HXC units) to prevent debris from damaging internal tubes.
  • Flexible Connections: Flexible connections on cooler and condenser piping are recommended to reduce vibration transmission.
  • Leak Testing: Units are shipped with a refrigerant charge (full for 30HXC, holding for 30HXA), and a leak test should be performed upon arrival and after installation of field piping.
  • Refrigerant Charging: For 30HXA units, the complete system (including remote condenser and interconnecting piping) must be field-charged. Liquid charging is the recommended method.
  • Gasket Handling: When installing fluid piping, ensure gaskets between weld flanges and fluid heads have holes carefully cut along designated perforations and are coated with a thin layer of oil to ensure a good seal.
  • Flange Alignment: When bolting weld flanges to fluid heads, ensure the holes align completely to prevent impaired fluid flow.

Carrier 30HXA Specifications

General IconGeneral
TypeAir-Cooled Chiller
RefrigerantR-134a
Compressor TypeScrew
Full Load Efficiency0.65 kW/ton
Part Load Efficiency0.48 kW/ton
Voltage Options460V/3Ph/60Hz
Operating Temperature Range20°F to 125°F
Energy Efficiency Ratio (EER)10.5
Sound Level75 to 85 dB(A)

Related product manuals