7
Remote Control Operation -- Quick Start
NOTE: When transmitting a command from the remote control to
the unit, be sure to point the remote control toward the LED
display on the front panel of the unit. The unit will confirm receipt
of a command by sounding an audible beep.
1. Turn the unit on by pushing the “ON/OFF” button.
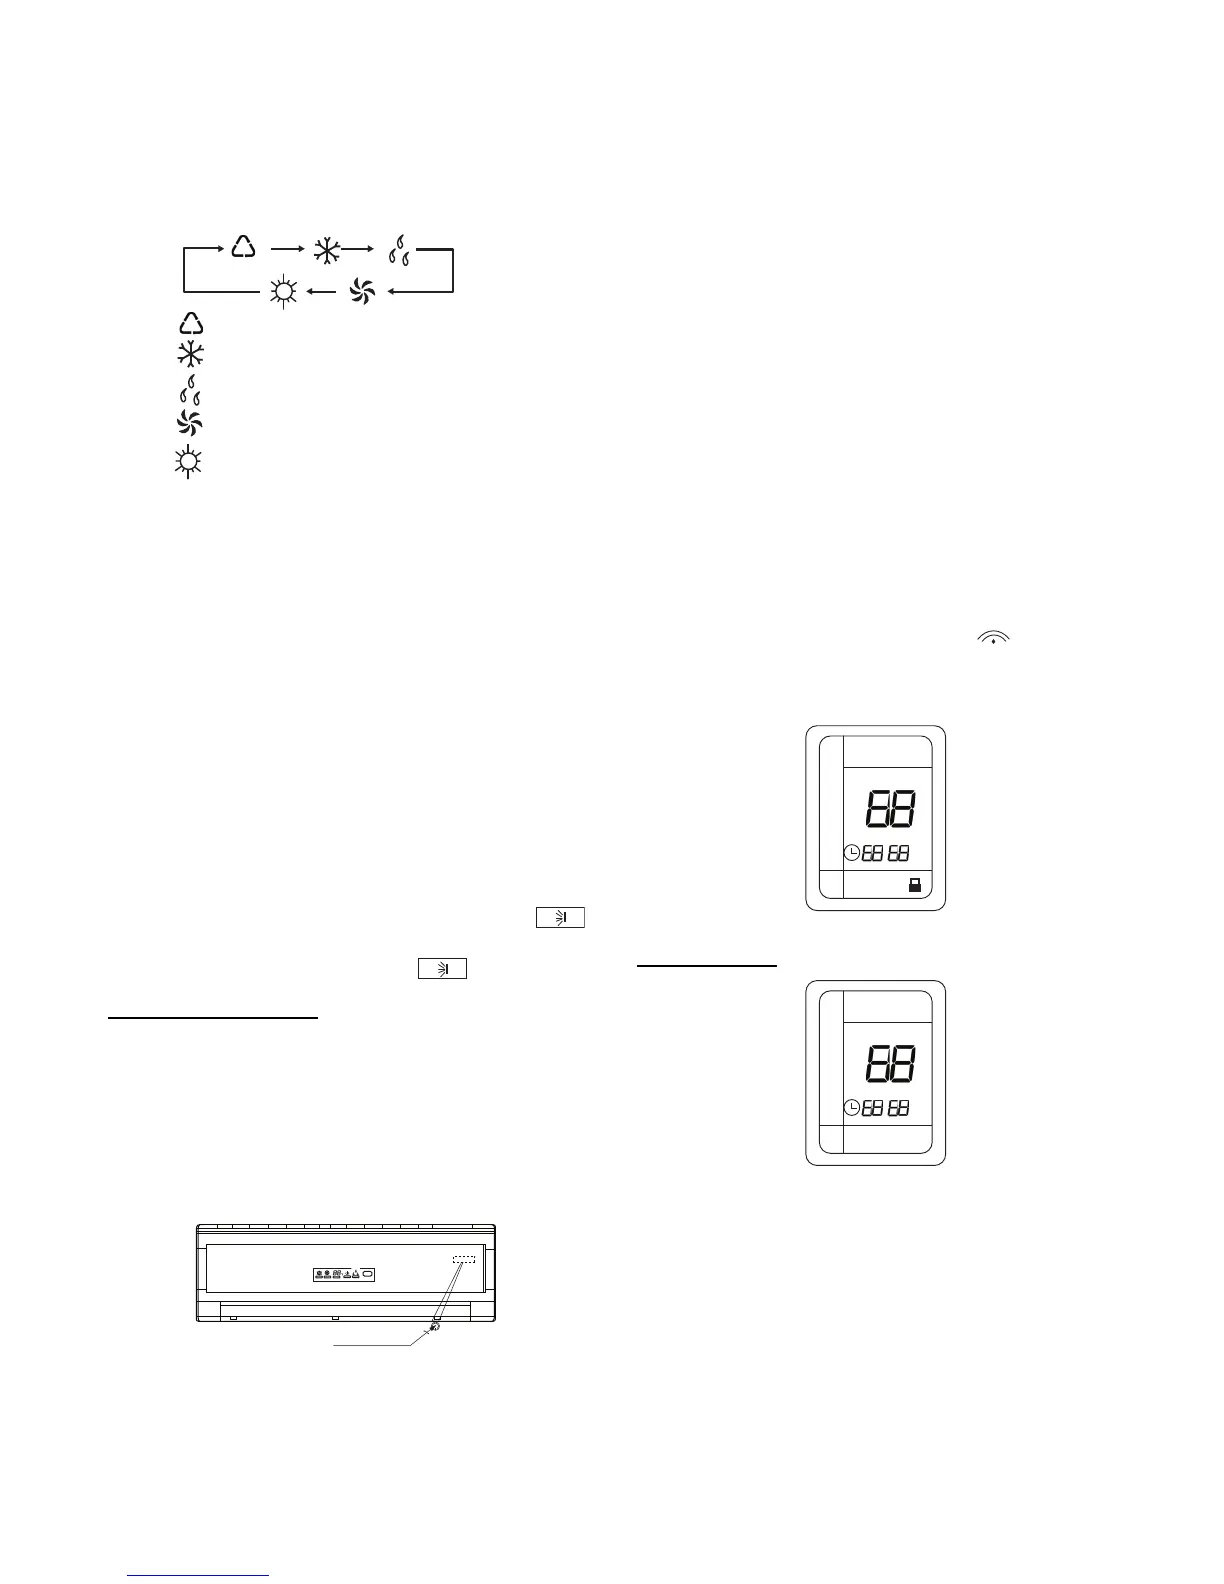
2. Select the desired mode by pushing the “MODE” button.
AUTO
COOL
DRY
FAN
HEAT
(only for cooling and heating unit)
A09628
NOTE: Cool only units have no heat mode.
NOTE: On a multi--split system (38/40GXM), simultaneous
cooling and heating is not allowed. Setting the mode (cool or
heat) on the first indoor unit (unit that is turned on first) will
determine the allowable mode on the other fan coils. If there is
a mode conflict, E7 error will be displayed on the unit with the
conflict. Turn unit off and select allowed mode.
3. Select the temperature set point by pointing the control to-
ward the unit and pressing the “TEMP” and then the “+”
or “--” buttons until the desired temperature appears on
screen.
4. Select the desired fan speed by pressing the “FAN” button.
NOTE: If unit is operating in Dry mode, low fan speed will be
displayed and the fan speed cannot be changed.
5. Set the airflow direction. When the unit is turned on, the
louvers default to the cooling or heating position. The user
can adjust the default louver position by pushing the
”SWING” button. The louver will start to swing. If a sta-
tionary position is desired, push the
“swing” button.
Emergency Operation
If the remote control is lost, damaged, or the batteries are
exhausted, the AUTO button on the unit can be used to
temporarily operate the unit.
Open the front cover panel and press the AUTO button once
briefly when the system is off.
To stop emergency operation, push the AUTO button once. The
emergency operation can also be stopped by pushing the
“ON/OFF” button.
AUTO button
A08300
NOTE: The above drawing indicates location of the AUTO
button on 40GXM units. On 40GXC(Q) units, the AUTO
button is located on the back of the front cover.
The following occurs when the AUTO button is pushed:
S 77_F(25_C) will be displayed on display panel.
S Unit will run in FAN ONLY mode if return air temperat-
ure is between 68_F(20_C) and 77_F(25_C).
S Unit will run in HEATING if return air temperature is
less than 68_F(20_C).
S Unit will run in COOLING if return air temperature is
greater than 77_F(25_C).
S Fan speed will be set to AUTO
S SWING will be on.
REMOTE CONTROL FUNCTIONS
The remote control is the interface between the user and the
high--wall systems. Commands are entered by the user to control
the system. Any command that has been entered with the remote
control will remain in the memory until it is changed by the user
or the batteries are replaced.
NOTE: Settings can be locked by pushing the “+” and “--”
buttons simultaneously. The lock indicator will be displayed
on remote control.
NOTE: While the remote control is locked, no commands can
be entered. To unlock remote control, press the “+” and “--”
buttons simultaneously.
When entering commands, point the remote control in the direction
of the LED display on the front panel. The
indicator will
appear for a short period of time on the remote control when the
command is entered. The unit will emit an audible beep when the
signals are received correctly.
OPER
º
F
º
C
HOUR
ON/OFF
:
A09635
On/Off Button
º
F
º
C
HOUR
ON/OFF
:
A09648
When the air conditioner is not in operation, the remote control
will display the last set point and time.
S Press the On/Off button to start the unit.
-- The unit will start in the last operating mode and set
point. The “OPER” indicator will appear. The “RUN”
indicator on the display panel turns green.
S Press button On/Off to stop the unit.
-- The “RUN” indicator light on the display panel will turn
red and the remote control will display the setpoint and
time. “OPER” will disappear.
NOTE: If the On/Off button is pressed too soon after a stop, the
compressor will not start for 3 minutes due to the inherent
protection against frequent compressor cycling.
 Loading...