29-EN 30-EN
– 15 –
Wiring between indoor and outdoor units
NOTE
y An outdoor unit that is interconnected to the indoor units automatically becomes the header unit.
q Wiring example
Outdoor Power supply
380V ~, 50 Hz
Outdoor Power supply
380V ~, 50 Hz
Circuit breaker Circuit breaker
Earth
terminal
Earth
terminal
S: The ground of
a shielded wire
S: The ground of a shielded wire
Outdoor unit
Header outdoor
Outdoor unit
Follower outdoor
Control wiring between outdoor units (Shield wire)
Control wiring between indoor and outdoor units (Shield wire)
Control wiring between indoor units (Shield wire)
Indoor unit Indoor unit Indoor unit Indoor unit
Earth Earth Earth Earth
Indoor power supply
220V ~, 50Hz
Circuit breaker,
Power switch
Pull box Pull box
Pull box
Group control
Remote controller Remote controller Remote controller
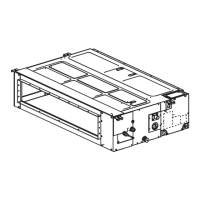
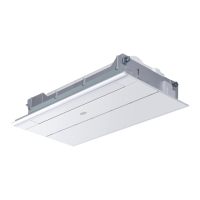
Wiring on the ceiling panel
According to the Installation Manual of the ceiling panel, connect the connector (20P: White) of the ceiling panel to
the connector (CN510: White) on P.C. Board of the electrical control box.
1. Remove the cover of the electrical control box by taking off the mounting screws (2 positions) and pushing the
hooking section. (The cover of the electrical control box remains hanged to the hinge.)
2. Connect the power supply wire and remote controller wire to the terminal block of the electrical control box.
3. Tighten the screws of the terminal block, and x the wires with cord clamp attached to the electrical control box.
(Do not apply tension to the connecting section of the terminal block.)
4. Using the attached heat insulation material, seal the pipe connecting port. Otherwise, dewing may be caused.
5. Mount the cover of the electrical control box without pinching wires.
(Mount the cover after wiring on the ceiling panel.)
L
N
R
(L)
S
(N)
Uv(U1) Uv(U2) A B
Indoor / Outdoor
inter-unit wire /
Remote controller
terminal block
Earth wire
Power supply wire
50 mm
70 mm
10 mm
10 mm
Notched section
Adhered surface
q Heat insulation to wiring
connecting port
Louver connector
(CN510: White)
Screws in 2 positions
Hinge
Power supply terminal block
Cord clamp
* Cable clamp can be attached on left side.
Wire type Specication
Cable clamping
position
Cabtyre
cable
3-core stranded
wire 2.5 mm²
Side D
Cabtyre
cable
4-core stranded
wire 1.5 mm²
Side C
Side D (Space: 8.5 mm)
Side C (Space: 4 mm)
Remote controller wiring
As the remote controller wire has non-polarity, there is no problem if connections to indoor unit terminal blocks A
and B are reversed.
q Wiring diagram
Terminal block for
remote controller
wiring of indoor unit
Remote controller wire
(Field supply)
Remote
controller unit
Terminal block
IM_1115350185.indb 15IM_1115350185.indb 15 26/6/2566 BE 14:5726/6/2566 BE 14:57
 Loading...