52C,P
SERIES
8
REINSTALL FRONT PANEL
1. Grasp the front panel firmly at the center of the
top and bottom of the panel, tilting it forward 5 to
10 degrees from the vertical. See Figure 4.
2. Place the top of the front panel onto the unit,
making sure the top engagement posts have
engaged the slots on the unit. The top edge of the
front panel should be flat against the top of the
unit.
3. Gently lower the front panel onto the chassis,
ensuring the conduit/cord is routed through the
panel notch. Magnetic latches at the bottom of the
front panel will secure the front panel to the unit.
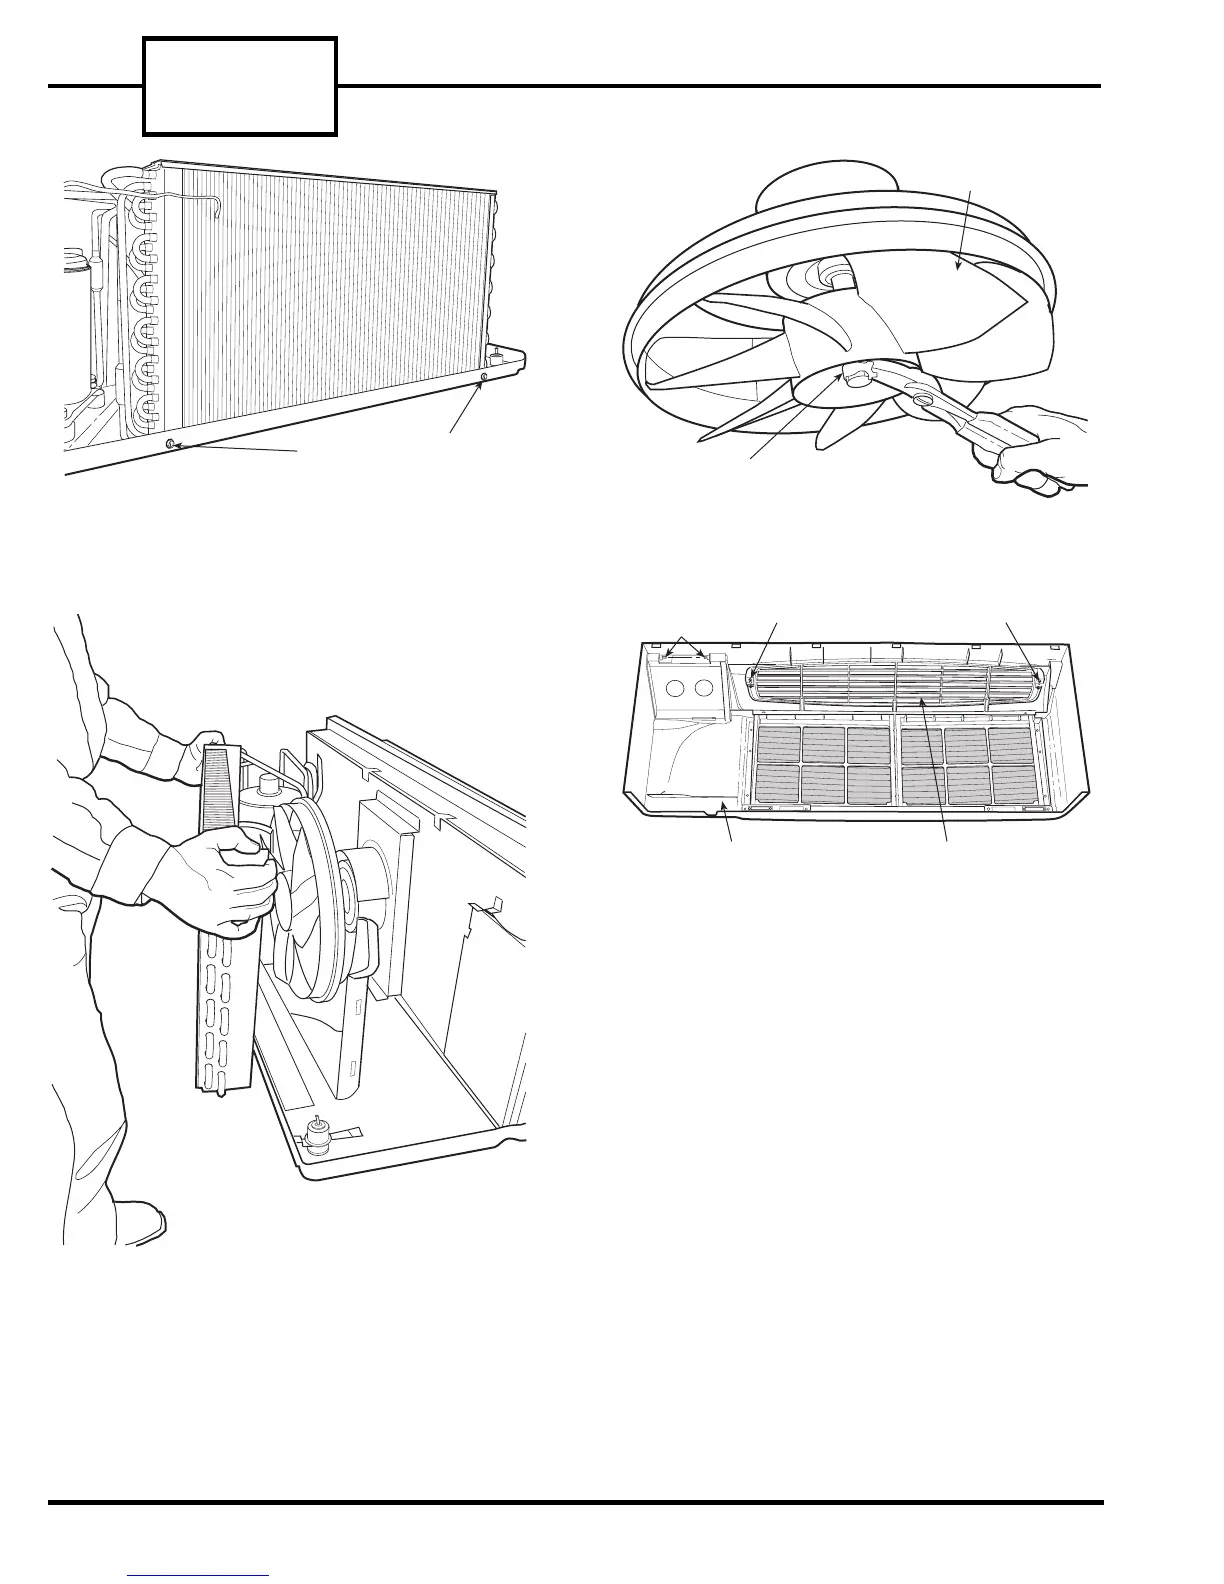
HUB CLAMP
CONDENSER
FAN
SCREW SCREW
DISCHARGE
GRILLE
FRONT PANEL
(BACK VIEW)
CONTROL DOOR
HINGE PINS
FIGURE 18 — REMOVING CONDENSER
FAN HUB CLAMP
FIGURE 19 — LOCATION OF SCREWS ON
DISCHARGE GRILLE
OUTDOOR COIL TUBE
SHEET SCREWS
FIGURE 16 — LOCATION OF OUTDOOR
COIL TUBE SHEET SCREWS
FIGURE 17 — REMOVING OUTDOOR COIL
FROM CONDENSER FAN
 Loading...