EasyManua.ls Logo

Carrier AquaEdge 19XR series User Manual

Carrier AquaEdge 19XR series
212 pages
To Next Page IconTo Next Page
Page #1 background imageLoading...
Page #1 background image
Manufacturer reserves the right to discontinue, or change at any time, specifications or designs without notice and without incurring obligations.
Catalog No. 04-53190045-01 Printed in U.S.A. Form 19XR,XRV-CLT-10SS Pg 1 12-16 Replaces: 19XR,XRV-CLT-9SS
Start-Up, Operation, and Maintenance Instructions
SAFETY CONSIDERATIONS
Centrifugal liquid chillers are designed to provide safe
and reliable service when operated within design specifi-
cations. When operating this equipment, use good judg-
ment and safety precautions to avoid damage to
equipment and property or injury to personnel.
Be sure you understand and follow the procedures and
safety precautions contained in the chiller instructions
as well as those listed in this guide.
DANGER
Failure to follow these procedures will result in severe per-
sonal injury or death.
DO NOT VENT refrigerant relief valves within a building.
Outlet from rupture disc or relief valve must be vented out-
doors in accordance with the latest edition of ANSI/
ASHRAE 15 (American National Standards Institute/
American Society of Heating, Refrigerating, and Air-
Conditioning Engineers). The accumulation of refrigerant
in an enclosed space can displace oxygen and cause
asphyxiation.
PROVIDE adequate ventilation in accordance with ANSI/
ASHRAE 15, especially for enclosed and low overhead
spaces. Inhalation of high concentrations of vapor is harm-
ful and may cause heart irregularities, unconsciousness, or
death. Misuse can be fatal. Vapor is heavier than air and
reduces the amount of oxygen available for breathing.
Product causes eye and skin irritation. Decomposition
products are hazardous.
DO NOT USE OXYGEN to purge lines or to pressurize a
chiller for any purpose. Oxygen gas reacts violently with
oil, grease, and other common substances.
NEVER EXCEED specified test pressures. VERIFY the
allowable test pressure by checking the instruction litera-
ture and the design pressures on the equipment nameplate.
DO NOT USE air for leak testing. Use only refrigerant or
dry nitrogen.
DO NOT VALVE OFF any safety device.
BE SURE that all pressure relief devices are properly
installed and functioning before operating any chiller.
RISK OF INJURY OR DEATH by electrocution. High
voltage is present on motor leads even though the motor is
not running when a solid-state or wye-delta mechanical
starter is used. Open the power supply disconnect before
touching motor leads or terminals.
WARNING
Failure to follow these procedures may result in personal
injury or death.
DO NOT USE TORCH to remove any component. System
contains oil and refrigerant under pressure.
To remove a component, wear protective gloves and gog-
gles and proceed as follows:
a. Shut off electrical power to unit.
b. Recover refrigerant to relieve all pressure from sys-
tem using both high-pressure and low pressure ports.
c. Traces of vapor should be displaced with nitrogen
and the work area should be well ventilated. Refrig-
erant in contact with an open flame produces toxic
gases.
d. Cut component connection tubing with tubing cutter
and remove component from unit. Use a pan to catch
any oil that may come out of the lines and as a gage
for how much oil to add to the system.
e. Carefully unsweat remaining tubing stubs when nec-
essary. Oil can ignite when exposed to torch flame.
DO NOT USE eyebolts or eyebolt holes to rig chiller sec-
tions or the entire assembly.
DO NOT work on high-voltage equipment unless you are a
qualified electrician.
DO NOT WORK ON electrical components, including
control panels, switches, starters, or oil heater until you are
sure ALL POWER IS OFF and no residual voltage can
leak from capacitors or solid-state components.
LOCK OPEN AND TAG electrical circuits during servic-
ing. IF WORK IS INTERRUPTED, confirm that all cir-
cuits are deenergized before resuming work.
AVOID SPILLING liquid refrigerant on skin or getting it
into the eyes. USE SAFETY GOGGLES. Wash any spills
from the skin with soap and water. If liquid refrigerant
enters the eyes, IMMEDIATELY FLUSH EYES with
water and consult a physician.
NEVER APPLY an open flame or live steam to a refriger-
ant cylinder. Dangerous overpressure can result. When it is
necessary to heat refrigerant, use only warm (110 F [43 C])
water.
DO NOT REUSE disposable (nonreturnable) cylinders or
attempt to refill them. It is DANGEROUS AND ILLE-
GAL. When cylinder is emptied, evacuate remaining gas
pressure, loosen the collar, and unscrew and discard the
valve stem. DO NOT INCINERATE.
CHECK THE REFRIGERANT TYPE before adding
refrigerant to the chiller. The introduction of the wrong
refrigerant can cause damage or malfunction to this chiller.
(Warnings continued on next page.)
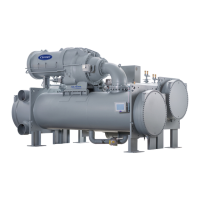
AquaEdge
®
19XR,XRV
Single-Stage or Two-Stage
Semi-Hermetic Centrifugal Liquid Chillers
with PIC II Controls and HFC-134a
50/60 Hz

Table of Contents

Other manuals for Carrier AquaEdge 19XR series

Questions and Answers:

Carrier AquaEdge 19XR series Specifications

General IconGeneral
Control SystemCarrier ComfortLink controls
Voltage Options50/60Hz
Dimensions (LxWxH)Varies with model
Evaporator TypeFlooded
Condenser TypeFlooded
Compressor TypeHermetic Centrifugal

Summary

Start-Up, Operation, and Maintenance Instructions

SAFETY CONSIDERATIONS

General safety guidelines for operating centrifugal liquid chillers.

WARNING

Warnings about potential personal injury or death if procedures are not followed.

CAUTION

STARTING EQUIPMENT

Unit-Mounted Solid-State Starter (Optional)

Details on optional solid-state starters for reduced voltage starting.

Unit-Mounted Wye-Delta Starter (Optional)

Details on optional wye-delta starters for reduced voltage starting.

Unit-Mounted VFD (Optional for 575 v Only)

Details on optional variable frequency drives for 575V units.

OPERATING INSTRUCTIONS

Prepare the Chiller for Start-Up

Procedures for preparing the chiller before initial start-up.

To Start the Chiller

Steps for initiating the chiller start-up sequence.

Check the Running System

Procedures for verifying the chiller's operation after startup.

REFRIGERATION CYCLE

MOTOR AND OIL COOLING CYCLE

LUBRICATION CYCLE

CONTROLS

PIC II System Components

Identification of the major components of the PIC II control system.

INTERNATIONAL CHILLER VISUAL CONTROLLER (ICVC)

INTEGRATED STARTER MODULE (ISM)

CHILLER CONTROL MODULE (CCM)

ICVC Operation and Menus (Table 3 and Fig. 17-23)

BASIC ICVC OPERATIONS (USING THE SOFT KEYS)

ALARMS AND ALERTS

OVERRIDE OPERATIONS (Manual Overrides)

TIME SCHEDULE OPERATION (Fig. 22)

TO VIEW AND CHANGE SET POINTS (Fig. 23)

EXAMPLE 7 — ISM_STAT DISPLAY SCREEN

EXAMPLE 8 — ICVCPSWD DISPLAY SCREEN

EXAMPLE 9 — SETPOINT DISPLAY SCREEN

EXAMPLE 10 — CAPACITY DISPLAY SCREEN

EXAMPLE 11 — OVERRIDE DISPLAY SCREEN

EXAMPLE 12 — LL_MAINT DISPLAY SCREEN

EXAMPLE 13 — SURGPREV DISPLAY SCREEN

EXAMPLE 14 — ISM_HIST DISPLAY SCREEN

EXAMPLE 17 — ISM_CONF DISPLAY SCREEN

EXAMPLE 18 — OPTIONS DISPLAY SCREEN

EXAMPLE 19 — VDO_SRD DISPLAY SCREEN

EXAMPLE 20 — SETUP1 DISPLAY SCREEN

EXAMPLE 21 — SETUP2 DISPLAY SCREEN

EXAMPLE 22 — LEADLAG DISPLAY SCREEN

EXAMPLE 23 — RAMP_DEM DISPLAY SCREEN

EXAMPLE 24 — TEMP_CTL DISPLAY SCREEN

EXAMPLE 25 — ICVC CONFIGURATION TABLE

PIC II System Functions

ALARMS AND ALERTS

How alarms and alerts are indicated and managed.

ICVC MENU ITEMS

Overview of menu structures and operations available via ICVC.

BASIC ICVC OPERATIONS (USING THE SOFT KEYS)

Basic operations using ICVC softkey functions.

CAPACITY CONTROL

VARIABLE SPEED (VFD) APPLICATIONS

How PIC II controls capacity using motor speed and guide vanes.

Fine Tuning VPF Surge Prevention

DIFFUSER CONTROL

Safety Controls

Default Screen Freeze

Capacity Override (Table 7)

Remote Reset of Alarms

Condenser Freeze Prevention

Evaporator Freeze Protection

Auto. Restart After Power Failure — ICVC Software Version 14

Demand Limit Control Option

Surge Prevention — Constant Flow and Variable Primary Flow (VPF)

Hot Gas Bypass (Optional) Algorithm

Surge Protection (Fixed Speed Chiller)

Surge Prevention Algorithm with VFD

VFD Start-Up Speed Control

Lead/Lag Control

LEAD/LAG OPERATION

How the PIC II operates chillers in lead/lag and standby modes.

ICE BUILD CONTROL

Service Operation

TO ACCESS THE SERVICE SCREENS

Steps to access the service screens and enter the password.

START-UP/SHUTDOWN/RECYCLE SEQUENCE (FIG. 31)

Local Start-Up

Procedure for initiating a local start-up.

To Prevent Accidental Start-Up

Check Chiller Operating Condition

Shutdown Sequence

Automatic Soft Stop Amps Threshold

Chilled Water Recycle Mode

BEFORE INITIAL START-UP

Leak Test Chiller

Test After Service, Repair, or Major Leak

Testing procedures after service or major repairs.

Chiller Dehydration

Standing Vacuum Test

Inspect Wiring

Oil Charge

Power Up the Controls and Check the Oil Heater

Software Configuration

VFD Field Setup and Verification

VFD CONTROL VERIFICATION (Non-Running)

Verifying VFD control while the unit is not running.

VFD CONTROL VERIFICATION (Running)

Verifying VFD control while the unit is running.

HAND CALCULATE SURGE PREVENTION CONFIGURATIONS

VFD Current Control Calibration Check

CONFIGURE DIFFUSER CONTROL IF NECESSARY

GUIDE VANE ACTUATOR CALIBRATION

COOLER AND CONDENSER PRESSURE TRANSDUCER AND WATERSIDE FLOW DEVICE CALIBRATION

Charge Refrigerant into Chiller

TRIMMING REFRIGERANT CHARGE

Operating the Optional Pumpout Unit (Fig. 47)

Transfer Refrigerant from Storage Tank Vessel to Chiller

Transfer Refrigerant from Chiller to Storage Tank Vessel

Return Chiller to Normal Operating Conditions

DISTILLING THE REFRIGERANT

GENERAL MAINTENANCE

Refrigerant Leak Testing

Methods for testing refrigerant leaks.

DANGER

Danger associated with handling HFC-134a refrigerant.

Test After Service, Repair, or Major Leak

Trim Refrigerant Charge

WEEKLY MAINTENANCE

SCHEDULED MAINTENANCE

Oil Changes

Inspect Relief Valves and Piping

Inspect the Heat Exchanger Tubes and Flow Devices

Inspect the Starting Equipment

Recalibrate Pressure Transducers

TROUBLESHOOTING GUIDE

Checking Display Messages

How to interpret ICVC display messages for fault diagnosis.

A. MANUAL STOP

B. READY TO START

C. IN RECYCLE SHUTDOWN

D. PRE-START ALERTS

STARTS LIMIT EXCEEDED

Cause and remedy for excessive compressor starts.

HIGH BEARING TEMPERATURE

Cause and remedy for high bearing temperature alerts.

LOW OIL TEMPERATURE

Cause and remedy for low oil temperature alerts.

LOW LINE VOLTAGE

Cause and remedy for low line voltage alerts.

HIGH LINE VOLTAGE

Cause and remedy for high line voltage alerts.

E. START-UP IN PROGRESS

F. NORMAL RUN

G. NORMAL RUN WITH OVERRIDES

HIGH CONDENSER PRESSURE

Cause and remedy for high condenser pressure during normal run.

HIGH MOTOR TEMPERATURE

Cause and remedy for high motor temperature during normal run.

LOW EVAP REFRIG TEMP

Cause and remedy for low evaporator refrigerant temperature.

HIGH COMPRESSOR LIFT

Cause and remedy for high compressor lift/surge.

LOW DISCHARGE SUPERHEAT

Cause and remedy for low discharge superheat.

H. OUT-OF-RANGE SENSOR ALARMS

I. CHILLER PROTECTIVE LIMIT FAULTS (cont)

OIL PRESS SENSOR FAULT

Cause and remedy for oil pressure sensor faults.

LOW OIL PRESSURE

Cause and remedy for low oil pressure faults.

LOW CHILLED WATER FLOW

Cause and remedy for low chilled water flow faults.

LOW CONDENSER WATER FLOW

Cause and remedy for low condenser water flow faults.

HIGH DISCHARGE TEMP

Cause and remedy for high discharge temperature faults.

LOW REFRIGERANT TEMP

Cause and remedy for low refrigerant temperature faults.

HIGH MOTOR TEMPERATURE

HIGH BEARING TEMPERATURE

HIGH CONDENSER PRESSURE

COMPRESS SURGE/LOW SPEED

SPARE SAFETY DEVICE

EXCESSIVE COMPR SURGE

TRANSDUCER VOLTAGE FAULT

J. CHILLER ALERTS

REFRIGERANT LEAK SENSOR

Cause and remedy for refrigerant leak sensor faults.

ISM CONFIG CONFLICT

Cause and remedy for ISM configuration conflicts.

GUIDE VANE CALIBRATION

Alarm indicating guide vane calibration is required.

LEAVING CHILLED WATER

ENTERING COND WATER TEMP

POTENTIAL FREEZE-UP

LOSS OF COMMUNICATION

Cause and remedy for loss of communication issues.

HIGH COND WATER FLOW

Cause and remedy for high condenser water flow faults.

K. ISM ALARMS

MOTOR OVERLOAD TRIP

Cause and remedy for motor overload trip.

MOTOR LOCKED ROTOR TRIP

Cause and remedy for motor locked rotor trip.

STARTER LOCK ROTOR TRIP

Cause and remedy for starter lock rotor trip.

GROUND FAULT

Cause and remedy for ground fault trips.

PHASE REVERSAL TRIP

Cause and remedy for phase reversal trips.

LINE FREQUENCY TRIP

Cause and remedy for line frequency trip faults.

STARTER MODULE FAILURE

Cause and remedy for starter module failure.

1CR START CIRCUIT FAULT

Cause and remedy for 1CR start circuit faults.
Control Algorithms Checkout Procedure

Control Modules

Replacing Defective Processor Modules

Solid-State Starters

APPENDIX B — LEAD/LAG WIRING

APPENDIX C — MAINTENANCE SUMMARY AND LOG SHEETS

APPENDIX D — BACNET COMMUNICATION OPTION

CONFIGURING THE BAS PORT FOR BACNET MS/TP

Related product manuals