3
GENERAL
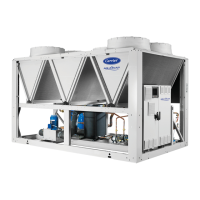
This publication contains Start-Up, Service, Controls, Oper-
ation, and Troubleshooting information for the 30MPW water-
cooled chillers and the 30MPA air-cooled chillers. For unit
sizes, see Table 1. These liquid chillers are equipped with Com-
fortLink controls and conventional thermostatic expansion
valves (TXVs, units 30MP015-045) or electronic expansion
valves (EXVs, units 30MP050-071). The 30MPA units and the
30MPW units with optional medium temperature brine are also
equipped with liquid line solenoid valves (LLSVs).
Table 1 — Unit Sizes
Conventions Used in This Manual — The follow-
ing conventions for discussing configuration points for the
local display (scrolling marquee or Navigator™ accessory)
will be used in this manual.
Point names will be written with the mode name first, then
any sub-modes, then the point name, each separated by an
arrow symbol (. Names will also be shown in bold
and italics. As an example, the Minimum Load Valve Select
Point, which is located in the Configuration mode, Option 1
sub-mode, would be written as ConfigurationOPT1
MLV.S.
This path name will show the user how to navigate through
the local display to reach the desired configuration. The user
would scroll through the modes and sub-modes using the
and keys. The arrow symbol in the path name
represents pressing to move into the next level of the
menu structure.
When a value is included as part of the path name, it will be
shown at the end of the path name after an equals sign. If the
value represents a configuration setting, an explanation will
be shown in parenthesis after the value. As an example,
ConfigurationOPT1MLV.S = YES (Minimum Load
Valve Select).
Pressing the and keys simultaneously
will scroll an expanded text description of the point name or
value across the display. The expanded description is shown in
the local display tables but will not be shown with the path
names in text.
The CCN (Carrier Comfort Network
®
) point names are also
referenced in the local display tables for users configuring the
unit with CCN software instead of the local display. The CCN
tables are located in Appendix B of the manual.
Basic Control Usage
SCROLLING MARQUEE DISPLAY — This device is the
keypad interface used for accessing unit information, reading
sensor values, and testing the unit. The scrolling marquee dis-
play is a 4-key, 4-character, 16-segment LED (light-emitting
diode) display. Eleven mode LEDs are located on the display
as well as an Alarm Status LED. See Table 2. For further details,
see Appendix A—Local Display Tables on page 72.
The scrolling marquee display module provides the user in-
terface to the ComfortLink control system. The display has up
and down arrow keys, an key, and an key.
These keys are used to navigate through the different levels of
the display structure. See Appendix A—Local Display Tables
on page 72. Press the key until the display is blank
to move through the top 11 mode levels indicated by LEDs on
the left side of the display.
Pressing the and keys simultaneously
will scroll a clear language text description across the display
indicating the full meaning of each display acronym. Clear lan-
guage descriptions will be displayed in the language of choice.
Pressing the and keys when the display is
blank (Mode LED level) will return the scrolling marquee dis-
play to its default menu of rotating display items, found under
Run Status
VIEW. In addition, the password will be disabled,
requiring that it be entered again before changes can be made
to password protected items. After a period of time with no key
activity, the scrolling marquee will display its default menu of
rotating display items found under Run Status
VIEW.
When a specific item is located, the display will flash show-
ing the operator, the item, the item value and then the item units
(if any). Press the key to stop the display at the item
value. Press the key again so that the item value
flashes. Use the arrow keys to change the value or state of an
item and press the key to accept it. Press the
key and the item, value, or units display will re-
sume. Repeat the process as required for other items.
NOTE: If a value has been forced, the lower right “.” will be
flashing.
See Table 3 and Appendix A for further details.
CAUTION
Refrigerant charge must be removed slowly to prevent loss
of compressor oil that could result in compressor failure.
CAUTION
Puron
®
refrigerant (R-410A) systems operate at higher
pressures than standard R-22 systems. Do not use R-22 ser-
vice equipment or components on Puron refrigerant equip-
ment. If service equipment is not rated for Puron
refrigerant, equipment damage or personal injury may
result.
CAUTION
This unit uses a microprocessor-based electronic control
system. Do not use jumpers or other tools to short out or
bypass components or otherwise depart from recom-
mended procedures. Any short-to-ground of the control
board or accompanying wiring may destroy the board or
electrical component.
UNIT MODEL NOMINAL TONS
30MPA,MPW015 15
30MPA,MPW020 20
30MPA,MPW030 30
30MPA,MPW040 40
30MPA,MPW045 45
30MPA,MPW050 50
30MPA,MPW055 55
30MPA,MPW060 60
30MPA,MPW065 65
30MPA,MPW071 71
 Loading...