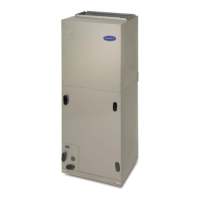
FMC4X, FMC4Z: Installation Instructions
Manufacturer reserves the right to change, at any time, specifications and designs without notice and without obligations.
4
See Fig. 3 and Fig. 4 for field low-voltage wiring. See Fig. 1 for location
of the electrical inlets. For maximum ampacity and over-current
protection, see unit rating plate or product data sheet.
A150200
Fig. 3 – Wiring Layout Heat Pump Unit
(Cooling an 1-Stage Heat)
A150202
Fig. 4 – Wiring Layout Heat Pump Unit
(Cooling and 12-Stage Heat)
1. Provide power supply for unit being installed in accordance with
unit wiring diagram and rating plate.
2. Connect line-voltage leads to the harness pigtail or the heat-kit
circuit breaker. Use copper wire only.
3. Use UL listed conduit and conduit connector for connecting
line-voltage leads to unit and obtaining proper ground. If conduit
connection uses reducing washers, a separate ground wire must be
used. Grounding can also be accomplished by using the ground lug
provided in the control box. Power wiring may be connected to
either the right or left side of the control box.
4. Connect low-voltage leads to thermostat and outdoor unit. See
Fig. 1, Fig. 3 and Fig. 4, as well as the outdoor unit wiring label.
5. Connect per Fig. 3 when electric heat is NOT used with a heat
pump.
6. Connect per Fig. 4 when electric heat is used with a heat pump.
Select Proper Blower Speed
Before operating unit, be sure that the proper blower speed has been
selected. Fan speeds are selected manually.
To change the fan speed on model FMC4X:
• Fan Motor Speed Taps are: Black–High; Red–Medium; Blue–Low
• To select the desired fan speed for cooling operation, and anytime a
"G" signal is present; connect the desired fan motor speed tap wire to
Fan Relay Terminal No. 4.
• To select the desired fan speed for heating operation, anytime the "G"
signal is not present; connect the desired fan motor speed tap wire to
Fan Relay Terminal No. 6.
• Always connect the unused fan-motor wire to the dummy terminal
block. When selecting the proper airflow, refer to Table 3 through
Table 7 to choose proper blower speeds for cooling and heating.
To change the fan speed on model FMC4Z:
• At the motor connection plug connect the green wire to the desired
motor tap number indicated on the motor plug (Fig. 5). For the electric
heat fan speed selection connect the white wire to the desired motor
tap number indicated on the motor plug. See Table 2 for factory
default settings.
A11048
Fig. 5 – FMC4Z ECM Motor Speed Taps
R
G
C
O
Y
O
R
G
C
RED
GRN
BRN
R
C
Y
THERMOSTAT
INDOOR UNIT OUTDOOR UNIT
YEL
ORG
RED
R
G
C
W2
O
Y
O
Y
R
G
C
RED
GRN
BLK/WHT
R
C
W2
W
E
L
W
Y
WHT
Y
YEL
PUR
BRN
THERMOSTAT
INDOOR UNIT OUTDOOR UNIT
RED
RED
I
I
O
O
Table 2 – FMC4Z ECM Motor Speed Taps
Tap
Delay-off
Time(s)
18 24 30 36
Tap 1 90 Default
Tap 2 90 Default
Tap 3 90 Default
Tap 4 90 Default
Tap 5 90
1 2 3 4 5
Speed Taps may be located on motor,
or on plug close to motor.
CLGN
1 2 3 4 5