A03192
Fig. 9--Decorative Backplate Assembly
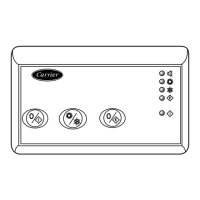
A03193
Fig. 10--4-Wire ABCD Connector
ELECTRICAL OPERATION HAZARD
Failure to follow this caution will result in equipment damage
or improper operation.
Improper wiring of the ABCD connector will cause the
Infinity Control TM to operate improperly. Check to make sure
all wiring is con'ect before proceeding with installation or
turning on power.
9. Push any excess wire into the wall. Seal hole in wall to prevent
any air leaks. Leaks can affect operation.
i0. Attach Infinity Control TM to the mounting plastic by lining up
the plastic guides on the back of the control with the opening
on the mounting plastic and push on.
11. Perlbrm installation of all other system equipment (i.e. hu-
midifier, ventilator, UV lights, etc.)
12. Turn on power to equipment.
EQUIPMENT WIRING DIAGRAMS:
See wiring diagram Figs. 12, 13 and 14.
NOTE: For other applications not listed, refer to the Network
Interface Module (NIM) Installation Instructions.
See wiring diagram figure 12 for a Typical Four-Wire Connection
Diagram, which includes an Infinity indoor comnmnicating fur-
nace or FE fan coil with a 2-speed Puron:R; communicating outdoor
unit. No additional OAT (outdoor air temperature) sensor is
required because the Infinity Control will use the temperature
sensor inside the 2-speed unit.
See wiring diagram figure 13 for a Typical Connection Diagram,
which includes an Infinity indoor communicating furnace or FE
tim coil, with a 1-speed air conditioning unit (non-communicating
outdoor). An Outdoor Air Temperature sensor may be installed
(not required) at the indoor furnace or tim coil OAT terminals.
When OAT is applied, the Infinity System will provide full system
features and benefits.
See wiring diagram Fig. 14 for a Typical Connection Diagrmn for
FE fan coil with a 1-speed heat pump (using non-communicating
outdoor unit). When OAT is applied, the Infinity System will
provide full system features and benenfits.
H umidity/OAT
Button
Left-Side._
Button
Time
Button
Hold
Button
Schedule & Vacation
Up/Down
ScrollButtons
_-- Fan Button
-- Display Screen
(LCD)
) _ Right-Side
Button
_--- Heat Button
_--- Cool Button
I 4-- System
On/Off Button
-- Basic & Advanced
Setup Buttons
Flip Down
Door
A03194
Fig. 11--Functional Overview
User interface
] Green
] Yellow
] White
] Red
Variable-Speed
Furnace/Fan Coil
[]
[]
[]
[]
2-Spd. AC or HP
Green []
Yellow []
White []
Red []
[] -_ OptionalRemote
COM
24V
OAT
ABCD
Connections
OAT
Sensor
(Optional)
Fig. 12--Universal Four-Wire Connection Diagram
A03146
HUMIDIFIER CONNECTION -- A 24vac bypass or fan
powered humidifier may be installed.
NOTE: Do Not Use a traditional humidistat to control humidifier
operation. If a humidifier is installed, let the Infinity System
control humidifier operation.
Bypass Humidifiers -- A bypass humidifier should be wired
directly to the furnace or _an coil HUM and 24vac COM temlinals.
The Infinity Control will automatically energize the HUM output
during a call for humidification.
Fan Powered Humidifiers -- Most tim powered humidifiers
produce internal 24vac in order to energize upon a switch or
contact closure. For this application, a 24vac N.O. Isolation Relay
(DPST) MUST be used to prevent mixing the internal humidifier
power with the indoor equipment transformer. Applying 24vac
isolation relay coil to furnace or fan coil HUM and COM terminals
will allow the Infinity Control to automatically energize the HUM
output during a call for humidification. The N.O. relay contacts
will be used to energize the humidifier. See fan powered hnmidi-
tier installation instructions for more details.

 Loading...