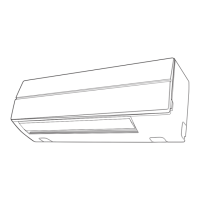
High Wall Type
Installation Manual
–20–
EN
5. Clamp the wires with the cord clamp.
6. Install the clamp base with a screw.
7. Remove the conduit cover.
8. Attach a conduit to the conduit cover with a
lock nut.
9. Take the power supply wire and the ground
wire out of the cable slot on the rear panel
so that it protrudes about 11.0” (280 mm)
from the conduit cover.
10.Insert the power supply wire fully into the
terminal block,
, , and secure it tightly
with screws.
Tightening torque: 0.9 ft•lbs (1.2 N•m)
Secure the ground wire with the ground
screw.
11.Clamp the power supply wire with the cord
clamp.
12.Attach the conduit cover.
13.Attach the terminal cover, the front panel
and the air inlet grille to the indoor unit.
CAUTION
• Refer to the wiring diagram attached inside the
front panel.
• Check local electrical cords and also any
specific wiring instructions and limitations.
• Do not catch the control and wired remote
control wires when installing the clamp base
• Beware of the metal plate edge when working
on the unit. The edge can be sharp and may cut
your hand.
• Firmly tighten the screws of the terminal block.
Keep the wire length as shown in figure below when
it is connected to the terminal block.
Address setup
Set up the addresses as per the Installation Manual
supplied with the outdoor unit.
Conduit hole
(dia. 7/8” (22.2 mm))
Conduit cover
L2
L1
Power supply wire
Ground wire
0.4” (10 mm)
0.8” (20 mm)
Conduit
cover
11.0”
(280 mm)
Connecting wire
L1 L2
L
1
ABU
1
U
2
L
2
Power supply wire
<Connecting power supply wire>
Power supply terminal block
Cord clamp
Clamp base
Ground wire
Ground screw
0.08” (2 mm) or less
Power supply wire
20-EN
+001111053901_00Ta.book Page 20 Monday, January 17, 2011 11:35 AM
 Loading...