EasyManua.ls Logo

Carrier PF4MNX - User Manual

Carrier PF4MNX
13 pages
Print Icon
To Next Page IconTo Next Page
Loading...
Installation Instructions
NOTE: Read the entire instruction manual before starting the
installation.
Safety Considerations . . . . . . . . . . . . . . . . . . . . . . . . . . . . . . . . . . . . . 1
Introduction. . . . . . . . . . . . . . . . . . . . . . . . . . . . . . . . . . . . . . . . . . . . . 2
Heater Packages . . . . . . . . . . . . . . . . . . . . . . . . . . . . . . . . . . . . . . . . . 2
Installation . . . . . . . . . . . . . . . . . . . . . . . . . . . . . . . . . . . . . . . . . . . . . 2
Check Equipment. . . . . . . . . . . . . . . . . . . . . . . . . . . . . . . . . . . . . . 2
Mount Unit. . . . . . . . . . . . . . . . . . . . . . . . . . . . . . . . . . . . . . . . . . . 2
Nuisance sweating may occur if the unit is installed in a high humidity
environment with low airflow.. . . . . . . . . . . . . . . . . . . . . . . . . . . . 2
Upflow Installation . . . . . . . . . . . . . . . . . . . . . . . . . . . . . . . . . . . . 2
Downflow Installation . . . . . . . . . . . . . . . . . . . . . . . . . . . . . . . . . . 2
Horizontal Installation . . . . . . . . . . . . . . . . . . . . . . . . . . . . . . . . . . 2
Air Ducts. . . . . . . . . . . . . . . . . . . . . . . . . . . . . . . . . . . . . . . . . . . . . . . 5
Ductwork Acoustical Treatment . . . . . . . . . . . . . . . . . . . . . . . . . . 5
Electrical Connections . . . . . . . . . . . . . . . . . . . . . . . . . . . . . . . . . . . . 5
Line Voltage Connections . . . . . . . . . . . . . . . . . . . . . . . . . . . . . . . 6
24V Control System. . . . . . . . . . . . . . . . . . . . . . . . . . . . . . . . . . . . 6
Manufactured Housing. . . . . . . . . . . . . . . . . . . . . . . . . . . . . . . . . . 7
Ground Connections . . . . . . . . . . . . . . . . . . . . . . . . . . . . . . . . . . . 7
Minimum CFM and Motor Speed Selection . . . . . . . . . . . . . . . . . 7
Refrigerant Tubing Connection and Evacuation . . . . . . . . . . . . . . . . 8
Refrigerant Flow-Control Device . . . . . . . . . . . . . . . . . . . . . . . . . . . . 8
Condensate Drains . . . . . . . . . . . . . . . . . . . . . . . . . . . . . . . . . . . . . . . 9
Accessories . . . . . . . . . . . . . . . . . . . . . . . . . . . . . . . . . . . . . . . . . . . . 10
Humidifier . . . . . . . . . . . . . . . . . . . . . . . . . . . . . . . . . . . . . . . . . . 10
Sequence of Operation . . . . . . . . . . . . . . . . . . . . . . . . . . . . . . . . . . . 10
Continuous Fan . . . . . . . . . . . . . . . . . . . . . . . . . . . . . . . . . . . . . . 10
Cooling Mode . . . . . . . . . . . . . . . . . . . . . . . . . . . . . . . . . . . . . . . 10
Heat Pump Heating with Auxiliary Electric Heat . . . . . . . . . . . . 10
Electric Heat or Emergency Heat Mode . . . . . . . . . . . . . . . . . . . 10
Start-up Procedures. . . . . . . . . . . . . . . . . . . . . . . . . . . . . . . . . . . . . . 10
Care and Maintenance . . . . . . . . . . . . . . . . . . . . . . . . . . . . . . . . . . . 11
Safety Considerations
Improper installation, adjustment, alteration, service, maintenance, or
use can cause explosion, fire, electrical shock, or other conditions which
may cause death, personal injury or property damage. Consult a
qualified installer, service agency, or your distributor or branch for
information or assistance. The qualified installer or agency must use
factory-authorized kits or accessories when modifying this product.
Refer to the individual instructions packaged with kits or accessories
when installing.
Follow all safety codes. Wear safety glasses, protective clothing and
work gloves. Have a fire extinguisher available. Read these instructions
thoroughly and follow all warnings or cautions included in literature and
attached to the unit. Consult local building codes and the current editions
of the National Electrical Code (NEC) NFPA 70.
In Canada, refer to the current editions of the Canadian Electrical Code
CSA C22.1.
Recognize safety information. This is the safety-alert symbol . When
you see this symbol on the unit and in instruction manuals, be alert to the
potential for personal injury.
Understand the signal words DANGER, WARNING, and CAUTION.
These words are used with the safety-alert symbol. DANGER identifies
the most serious hazards which will result in severe personal injury or
death. WARNING signifies hazards which could result in personal
injury or death. CAUTION is used to identify unsafe practices which
may result in minor personal injury or product and property damage.
NOTE is used to highlight suggestions which will result in enhanced
installation, reliability, or operation.
PF4MNX
FAN COIL UNITS
SIZES 018 TO 060
WARNING
!
PERSONAL INJURY / PROPERTY DAMAGE HAZARD
Failure to follow this warning could result in property damage, personal
injury, or death.
For continued performance, reliability, and safety, the only approved
accessories and replacement parts are those specified by the equipment
manufacturer. The use of non-manufacturer approved parts and
accessories could invalidate the equipment limited warranty and result
in fire risk, equipment malfunction, and failure. Please review
manufacturer’s instructions and replacement part catalogs available
from your equipment supplier.
WARNING
!
ELECTRICAL OPERATION HAZARD
Failure to maintain proper clearances could result in personal injury or
death.
Before installing or servicing unit, always turn off all power to unit.
There may be more than 1 disconnect switch. Turn off accessory heater
power if applicable.
CAUTION
!
CUT HAZARD
Failure to follow this caution may result in personal injury.
Sheet metal parts may have sharp edges or burrs. Use care and wear
appropriate protective clothing, safety glasses and gloves when
handling parts.
CAUTION
!
HOT TUBE WARNING
Failure to follow this caution could result in personal injury and/or
property damage.
Refrigerant lines can reach or exceed 130 °F (54 °C). Avoid contact
with the vapor header or vapor line, especially in Heating Mode. Do not
service A2L refrigerant fan coils while these components are hot to
avoid risk of ignition source.
Question and Answer IconNeed help?

Do you have a question about the Carrier PF4MNX and is the answer not in the manual?

Summary

Safety Considerations

Introduction

Heater Packages

Installation Procedures

Check Equipment

Inspect the unit for damage and verify specifications before installation.

Mount Unit

Guidance on positioning and securing the fan coil unit for installation.

Upflow Installation

Instructions for installing the unit in an upflow configuration.

Downflow Installation

Instructions for converting and installing the unit in a downflow configuration.

Horizontal Installation

Procedures for installing the unit in horizontal orientations.

Horizontal Right Conversion

Steps for converting units to a horizontal right orientation.

Air Ducts

Connecting supply and return air ducts to the fan coil unit.

Ductwork Acoustical Treatment

Recommendations for acoustical treatment of ductwork.

Electrical Connections

Guidelines for making electrical connections to the unit.

Line Voltage Connections

Connecting the main power supply to the unit.

24 V Control System Wiring

Wiring the low-voltage control system for thermostat and accessories.

Transformer Information

Details on the unit's transformer for voltage conversion.

Heater Staging

Requirements for multi-stage heating room thermostats.

Manufactured Housing Requirements

Specific electrical wiring requirements for manufactured housing.

Ground Connections

Ensuring proper grounding for electrical safety.

Minimum CFM and Motor Speed Selection

Selecting appropriate fan speeds for optimal airflow and performance.

Motor Speed Selection

Details on how to select motor speed taps.

Refrigerant Tubing Connection and Evacuation

Connecting refrigerant lines and evacuating the system.

Refrigerant Flow-Control Device (TXV)

Information on the TXV and its installation or servicing.

Disassembly and Assembly

Procedures for disassembling and reassembling the TXV.

Condensate Drains

Proper installation of condensate drain lines and traps.

Accessories

Information on installing optional accessories like humidifiers.

Humidifier

Connecting the humidifier and humidistat to the fan coil unit.

Sequence of Operation

Explanation of how the unit operates in different modes.

Continuous Fan

Operation sequence for the continuous fan mode.

Cooling Mode

Operation sequence for the cooling mode.

Heat Pump Heating with Auxiliary Electric Heat

Operation sequence for heat pump heating with auxiliary electric heat.

Electric Heat or Emergency Heat Mode

Operation sequence for electric heat or emergency heat modes.

Start-up Procedures

Steps to follow for initial system start-up.

Care and Maintenance

Overview

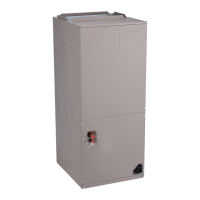
This document provides installation instructions for PF4MNX series fan coil units, covering models from 018 to 060. These units are designed for installation flexibility and are compliant with low leak requirements, featuring a cabinet leakage rate of less than 2% at 0.5 inches W.C. and 1.4% at 0.5 inches W.C. when tested according to ASHRAE 193 standard.

Function Description

The PF4MNX fan coil units are designed to work with R-410A refrigerant air conditioners and heat pumps, providing heating and cooling for residential and manufactured housing applications. They utilize a multi-tap ECM motor for efficiency, allowing for various airflow performance settings. The units are available for systems ranging from 18,000 to 60,000 BTUh nominal cooling capacity.

The fan coil units can be configured for upflow, downflow (requiring a kit), and horizontal orientations. For heating, they can be equipped with factory-installed or field-installed UL listed heater packages. The control system includes a 24V low-voltage circuit, protected by a 3A automotive-type fuse, with motor speeds and time delay functions built into the motor itself, eliminating the need for a separate circuit board.

Refrigerant flow is controlled by a mechanical TXV (Thermostatic Expansion Valve) designed for R-410A refrigerant. Condensate drainage is managed through primary and secondary 3/4" FPT drain connections, which require proper trapping to ensure optimal performance and prevent water overflow.

Usage Features

Installation Flexibility: The units can be installed in upflow, downflow, or horizontal configurations. For downflow applications, an accessory downflow kit and base kit are required, along with specific procedures for converting the condensate drains. Horizontal installations are factory-built for horizontal left, but can be converted to horizontal right with specific modifications to the coil assembly and drain pan. When suspending units from the ceiling, dimples in the casing indicate suitable locations for mounting metal support straps.

Air Duct Connections: Supply-air ducts connect to 3/4" (19 mm) flanges on the supply-air opening. Flexible connectors are recommended between ductwork and the unit to prevent vibration. For units with electric heaters, heat-resistant material must be used for flexible connectors at the discharge connection. Ductwork in unconditioned spaces must be insulated and covered with a vapor barrier. Specific clearances to combustible materials are required for electric heaters, depending on their kW rating.

Electrical Connections: Low-voltage wiring uses #18 AWG color-coded, insulated wire (35°C minimum) for connections between the thermostat, unit, and outdoor equipment. For distances over 100 feet (30 m), #16 AWG wire is required. All wiring must comply with NEC Class 1 and be separated from incoming power leads. The transformer is factory-wired for 230V operation but can be reconfigured for 208V applications.

Motor Speed Selection: Fan speed selection is done at the motor connector, with various speed taps (Tap 1 to Tap 5) offering different CFM and off-delay settings. Taps 1, 2, and 3 have a 90-second blower off time delay, while Tap 4 (electric heat only) and Tap 5 (high static applications) have a 0-second delay. The unit wiring label specifies the minimum fan speed required.

Refrigerant Tubing: Units have sweat suction and liquid tube connections. Brazing connections require silver-bearing or non-silver-bearing materials, avoiding solder that melts below 800°F (427°C). The coil and tubing system must be evacuated to 500 microns before opening outdoor unit service valves. A brazing shield must be used to prevent damage to the unit surface and condensate pan fitting caps.

Condensate Drains: Primary and secondary drain lines must be installed with properly-sized P-traps (minimum 2 inches / 51 mm deep) to ensure optimum drainage and prevent property damage. Shallow running traps are inadequate. The drain lines should be pitched downward at a minimum slope of 1" (25 mm) for every 10' (3 m) of length. PVC fittings are recommended for plastic condensate pans.

Humidifier Connection: The units support connection of a humidifier and humidistat, with specific wiring layouts provided for units with or without electric heat. A cooling lockout relay is optional.

Sequence of Operation:

  • Continuous Fan: The thermostat closes the R to G connection, energizing the fan relay on the PCB, which powers the indoor blower motor. A 90-second delay occurs before the relay opens when G is de-energized.
  • Cooling Mode: The thermostat energizes R to G, R to Y, and R to O (for heat pump only). G energizes the fan relay, powering the indoor blower motor. A 90-second delay occurs before the fan relay opens when G is de-energized.
  • Heat Pump Heating with Auxiliary Electric Heat: The thermostat energizes R to G, R to Y, and R to W connections. G energizes the fan relay, and W energizes the electric heat relay(s), powering the heater elements. A 90-second delay occurs before the fan relay opens when G is de-energized, and the electric heat relay(s) open when W is de-energized.
  • Electric Heat or Emergency Heat Mode: The thermostat closes the R to W connection, energizing the electric heat relay(s), which powers the heater elements. The blower motor is energized through normally-closed contacts on the fan relay. The electric heat relay(s) open when W is de-energized.

Maintenance Features

Periodic Maintenance: To ensure high performance and minimize equipment failure, periodic maintenance is essential. This typically involves filter replacement or cleaning on a monthly basis. For more complex maintenance, consulting a qualified dealer is recommended.

Filter Access: The unit should never be operated without a filter. Factory-authorized filter kits can be used for internal filter placement. If internal access is impractical, a field-supplied filter must be installed in the return air duct system.

Blower Assembly Service: Servicing the blower assembly requires the removal of two screws connecting the blower housing to the fan deck. These screws do not need to be reinstalled after service.

Condensate Drain Maintenance: Condensate drain lines should be regularly checked for blockages. Traps should be primed, and the system tested for leaks. Insulation around traps located above living areas is important to prevent condensation.

Safety Precautions: The manual emphasizes the importance of following all safety codes, wearing protective clothing, and having a fire extinguisher available. It highlights warnings regarding personal injury, property damage, electrical shock, and cut hazards. Before servicing, all power to the unit must be turned off, and refrigerant charge must be removed from the system when servicing the TXV. The cabinet must have an uninterrupted ground to minimize personal injury in case of an electrical fault.

Carrier PF4MNX Specifications

General IconGeneral
ModelPF4MNX
RefrigerantR-410A
Seasonal Energy Efficiency Ratio (SEER)Up to 16
Cabinet MaterialGalvanized Steel
TypeAir Handler
AirflowUp to 2000 CFM
DimensionsVaries by model size
Voltage208/230V
Motor TypeECM
Filter TypeStandard
HeightVaries by model
WidthVaries by model
DepthVaries by model

Related product manuals