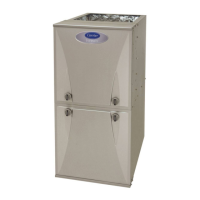
PG92MSA: Installation, Start-up, Operating and Service and Maintenance Instructions
Manufacturer reserves the right to change, at any time, specifications and designs without notice and without obligations.
64
7. Remove the screw that secures the condensate trap to the collector
box, remove the trap and set aside.
8. Remove the trap gasket from the collector box if it did not come off
when the trap was removed.
9. Discard the old trap gasket.
10. Rinse condensate trap in warm water until trap is clean.
11. Flush condensate drain lines with warm water. Remember to check
and clean the relief port on the collector box.
12. Shake trap dry.
13. Clean port on collector box with a small wire.
To re-install Condensate Drain and Trap:
1. Remove adhesive backing from condensate trap gasket
2. Install gasket on collector box
3. Align the condensate trap with the drain opening on the collector
box and secure the trap with the screw
4. Attach the relief hose to the relief port on the condensate trap and
collector box.
5. Secure tubing to prevent any sags or traps in the tubing.
6. Connect condensate drain elbow or drain extension elbow to the
condensate trap
7. Connect the leads of the condensate heat pad (if used)
8. Connect external drain piping to the condensate drain elbow or
drain extension pipe.
9. Turn gas on at electric switch on gas valve and at external shut-off
or meter
10. Turn power on at external disconnect, fuse or circuit breaker.
11. Run the furnace through two complete heating cycles to check for
proper operation
12. Install control door when complete.
Checking Heat Pad Operation (If Applicable)
In applications where the ambient temperature around the furnace is
32_F or lower, freeze protection measures are required. If this
application is where heat tape has been applied, check to ensure it will
operate when low temperatures are present.
NOTE: The Heat Pad, when used, should be wrapped around the
condensate drain trap. There is no need to use heat tape within the
furnace casing. Most heat tapes are temperature activated, and it is not
practical to verify the actual heating of the tape. Check the following:
1. Check for signs of physical damage to heat tape such as nicks, cuts,
abrasions, gnawing by animals, etc.
2. Check for discolored heat tape insulation. If any damage or
discolored insulation is evident, replace heat tape.
3. Check that heat tape power supply circuit is on.
Cleaning Heat Exchangers
The following items must be performed by a qualified service
technician.
Primary Heat Exchangers
If the heat exchangers get an accumulation of light dirt or dust on the
inside, they may be cleaned by the following procedure:
NOTE: If the heat exchangers get a heavy accumulation of soot and
carbon, both the primary and secondary heat exchangers should be
replaced rather than trying to clean them thoroughly due to their intricate
design. A build-up of soot and carbon indicates that a problem exists
which needs to be corrected, such as improper adjustment of manifold
pressure, insufficient or poor quality combustion air, improper vent
termination, incorrect size or damaged manifold orifice(s), improper gas,
or a restricted heat exchanger (primary or secondary). Action must be
taken to correct the problem.
1. Turn off gas and electrical supplies to furnace.
2. Remove control door.
3. Disconnect wires or connectors to flame rollout switch, gas valve,
igniter, and flame sensor.
4. Using backup wrench, disconnect gas supply pipe from furnace gas
control valve.
5. Remove two screws attaching top filler plate and rotate upwards to
gain access to screws attaching burner assembly to cell panel.
6. Remove screws attaching burner assembly to cell panel. See
Fig. 68.
NOTE: Burner cover, manifold, gas valve, and burner assembly should
be removed as one assembly.
7. Clean heat exchanger openings with a vacuum and a soft brush. See
Fig. 71.
A11273
Fig. 71 – Cleaning Heat Exchanger Cell
WARNING
!
ELECTRICAL SHOCK, FIRE OR EXPLOSION HAZARD
Failure to follow this warning could result in personal injury or death,
or property damage.
Before installing, modifying, or servicing system, main electrical
disconnect switch must be in the OFF position and install a lockout tag.
There may be more than one disconnect switch. Lock out and tag
switch with a suitable warning label. Verify proper operation after
servicing. Always reinstall access doors after completing service and
maintenance.
WARNING
!
FIRE OR EXPLOSION HAZARD
Failure to follow this warning could result in personal injury, death,
and/or property damage.
Never purge a gas line into a combustion chamber. Never test for gas
leaks with an open flame. Use a commercially available soap solution
made specifically for the detection of leaks to check all connections. A
fire or explosion may result causing property damage, personal injury
or loss of life.
WARNING
!
ELECTRICAL SHOCK AND FIRE HAZARD
Failure to follow this warning could result in personal injury, death,
and/or property damage.
Turn off the gas and electrical supplies to the furnace and install lockout
tag before performing any maintenance or service. Follow the operating
instructions on the label attached to the furnace.