Do you have a question about the Carrier RG10 Series and is the answer not in the manual?
Locate the remote controller within the signal range of the indoor unit's receiver.
Instructions for replacing the remote control's batteries, including notes on battery types and disposal.
Instructions for entering and operating the remote controller's service mode, including applicable codes.
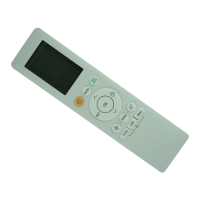
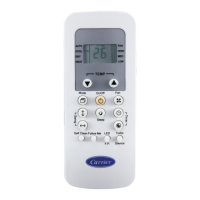
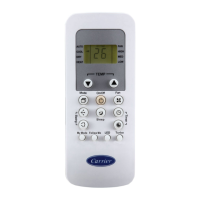
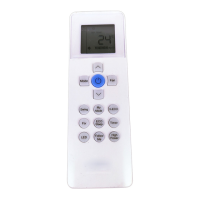
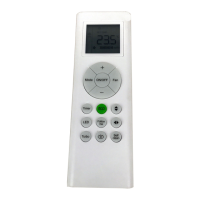
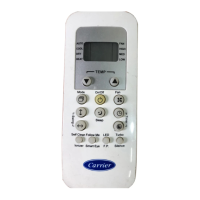
The RG10 Series Wireless Remote Controller is a device designed to provide convenient control over an air conditioning system. It serves as the primary interface for users to interact with and manage various functions of their indoor unit, ensuring a comfortable and optimized environment.
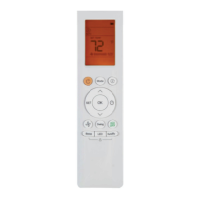
The remote controller allows users to turn the air conditioning unit on or off with a dedicated ON/OFF button. It features temperature adjustment capabilities, enabling users to increase or decrease the set temperature in 1°F (0.5°C) increments. The maximum temperature setting is 86°F (30°C), and the minimum is 60°F (16°C). A unique feature allows users to alternate the temperature display between Celsius and Fahrenheit by simultaneously pressing the temperature up and down buttons for 3 seconds.
The MODE button cycles through various operation modes: AUTO, COOL, DRY, HEAT, and FAN, providing flexibility to suit different environmental needs. An "Eco Intelligent eye" feature is included to detect inhabitant activities in the room, aiming to save energy by adjusting settings accordingly. The OK button is used to confirm selected functions.
A TIMER function allows users to set specific times for the unit to turn on or off, promoting energy efficiency and convenience. The ECO/GEAR button enables entry into an energy-efficient mode, cycling through different power levels (ECO, GEAR 75%, GEAR 50%) before returning to the previous setting.
For humidity control, the remote offers a HUMIDITY adjustment feature during Dry operation, allowing users to increase humidity in 5% increments within a range of 35% to 85%. The set humidity settings are displayed on the screen.
The LED button controls the indoor unit's LED display and air conditioner buzzer, creating a comfortable and quiet environment. Pressing and holding the LED button for 5 seconds displays the return air temperature at the unit versus the set point temperature.
The BOOST function enables the unit to reach the preset temperature in the shortest possible time, providing quick comfort when needed.
FAN SPEED can be selected in a sequence of AU (Auto), 20%, 40%, 60%, 80%, and 100%. Additionally, the fan speed can be increased or decreased in 1% increments using the temperature up or down buttons.
The SWING button starts and stops the horizontal louver movement. Holding it down for 2 seconds initiates the vertical louver auto swing feature, ensuring even air distribution.
The SET button scrolls through various operation functions, including "Breeze away," "Active clean," "Fresh," "Sleep," "Follow Me," and "AP mode." Once a symbol flashes on the display, pressing OK confirms the selection.
The remote controller is designed for ease of use with clearly labeled buttons and an intuitive display. Its compact and ergonomic design ensures comfortable handling. The device operates wirelessly, communicating with the indoor unit via infrared signals. For optimal performance, the remote should be kept within a range of 26 feet (8m) of the indoor unit's receiver. Obstructions like curtains or doors can block signals, affecting functionality. Users are advised to prevent liquids from coming into contact with the remote and to avoid direct sunlight or heat exposure, which could impair its operation. If the indoor unit's infrared receiver is exposed to direct sunlight, curtains should be used to prevent interference.
Battery replacement is a straightforward process. The remote controller uses two AAA alkaline dry batteries. To replace them, users slide off the battery compartment cover, insert new batteries according to the correct (+) and (-) polarities, and then slide the cover back into position. Important maintenance notes include not mixing old and new batteries or different types, removing batteries if the remote will not be used for 2 or 3 months, and disposing of old batteries in appropriate recycling bins.
The remote also features a "Service Inquiry Mode" which provides access to advanced diagnostic and configuration functions. This mode is primarily for service personnel but offers insights into the device's capabilities. To enter this mode, users simultaneously press the ON/OFF and FAN SPEED buttons for 8 seconds. In this mode, the remote's display cancels all icons except AUTO, COOL, DRY, HEAT, and Battery Strength, defaulting to 0. Digital codes (0 to 30) can be accessed using the UP or DOWN arrows, and pressing OK sends the inquiry information to the indoor unit. This mode allows for reviewing error memory, changing power-off memory selections, controlling indoor fan operation, adjusting available cooling and heating modes, and setting temperature limits, among other functions.
For service adjustments, the indoor unit must first be turned off with the remote, followed by powering down the outdoor unit for 2 minutes. Batteries must be removed from the remote, and within 30 seconds of replacement, UP or DOWN buttons are used to scroll through inquiry modes. To enter "SERVICE mode" for a specific inquiry, the ON/OFF button is pressed for 2 seconds. After adjustments, pressing ON/OFF for 2 seconds exits "SERVICE mode" and returns to "INQUIRY mode." To exit "INQUIRY mode" completely, ON/OFF and FAN SPEED are pressed for 2 seconds, disabling all remote buttons for 60 seconds. Finally, to lock in changes, the outdoor unit should be powered down for three minutes. This detailed service mode allows for fine-tuning the air conditioning system's performance and addressing specific operational parameters.
| Model | RG10 Series |
|---|---|
| Display | LCD |
| Type | Remote Control |
| Functions | Temperature Adjustment, Mode Selection, Fan Speed, Timer |
| Compatibility | Compatible with various Carrier air conditioner models. Check your air conditioner's manual for specific compatibility. |