ZS zone sensors
ZS Sensors Carrier Proprietary and Confidential CARRIER CORPORATION ©2017
Installation Guide All rights reserved
12
To address a ZS zone sensor
Each ZS Sensor on an Rnet must have a unique address, but addresses do not have to be sequential.
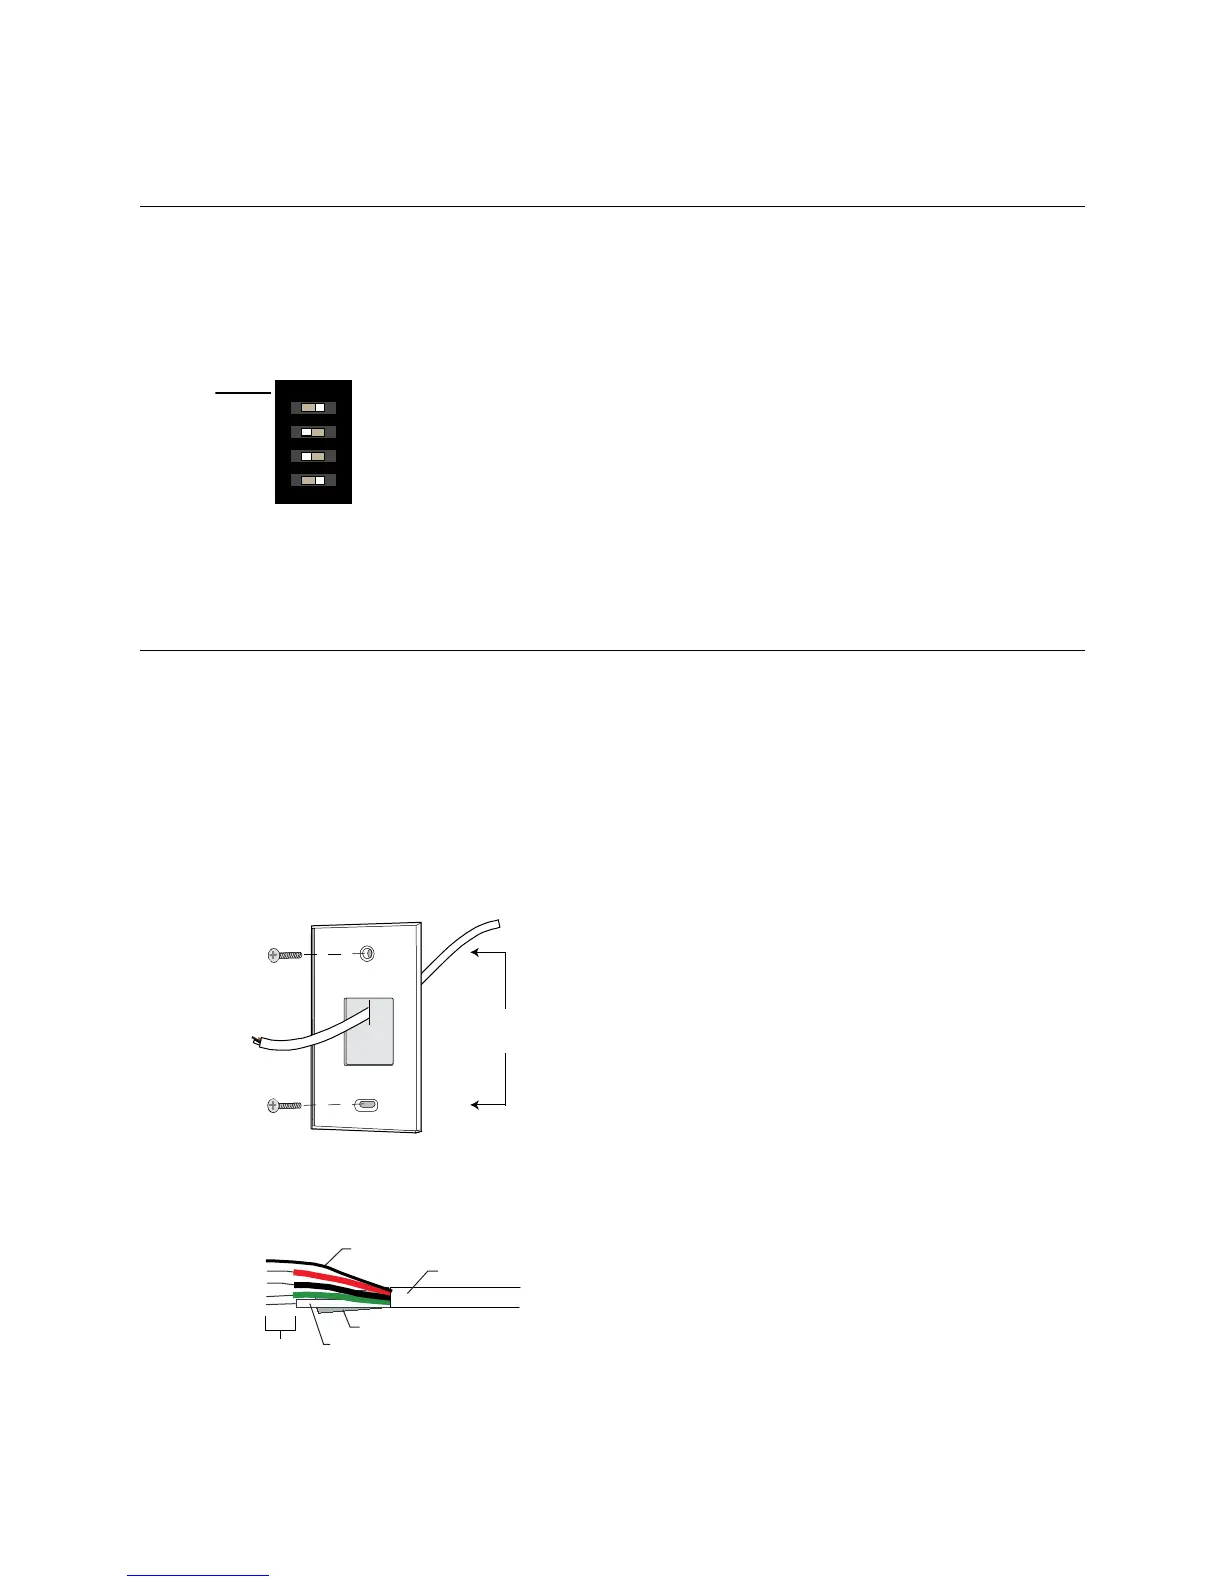
Use the DIP switches on the back of the ZS zone sensor to set an address from 0 to 14. (1 is factory default.) Each
DIP switch has the value shown in the figure below. Turn on as many DIP switches as you need so that their total
value equals the address.
DIP
S
witch
value
1
ON
2
4
8
1 2 3 4
DIP switches 1 and 4 above
are on. Their values (1 + 8) total 9, so
the sensor's address is 9.
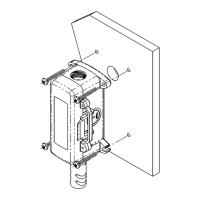
To wire and mount a ZS zone sensor
The Rnet communicates at a rate of 115 kbps and should be wired in a daisy-chain, star, or hybrid configuration.
The Rnet cable is wired to the controller. The shield wire and the ground wire should be inserted
into the controller's GND terminal.
1 Turn off the controller's power.
2 Pull the backplate off the ZS Sensor. You may need to turn the setscrews in the bottom of the sensor
clockwise until you can remove the backplate.
3 Pull the Rnet communication cable through the slit in the insulated backing material.
4 Use 2 screws to mount the backplate to the wall or outlet box.
Partially cut, then bend and pull off the outer jacket of the Rnet cable(s). Do not nick the inner insulation.
Inner insulation
Outer jacket
Foil shield
.25 in.
(.6 cm)
Shield wire
 Loading...