E-10
Using Built-in Tones
You can split the keyboard so the left side (lower
range) plays one tone and the right side (upper range)
plays a different tone.
Example: To split the keyboard between the GM SLAP
BASS 1 tone on the left (lower range) and the
GRAND PIANO tone on the right (upper range).
1.
Press the
(SPLIT) button.
This causes the SPLIT lamp to light, indicating that the
keyboard is split between two tones.
2.
Select the tone you want to assign to the left
side (lower range) of the keyboard.
Example: To select GM SLAP BASS 1 in the VARIOUS/
GM TONES group, press the
(VARIOUS/
GM TONES) button and then use the
(w,
q) buttons to select “073 GM SlapBass1”.
3.
To unsplit the keyboard and return it to a
single tone, press the
(SPLIT) button.
The SPLIT lamp will go out, indicating that the
keyboard is no longer split.
• If the keyboard is set up with layered tones (page
E-9) when you perform the above split operation,
the layered tones will play on the right (upper
range) side of the keyboard.
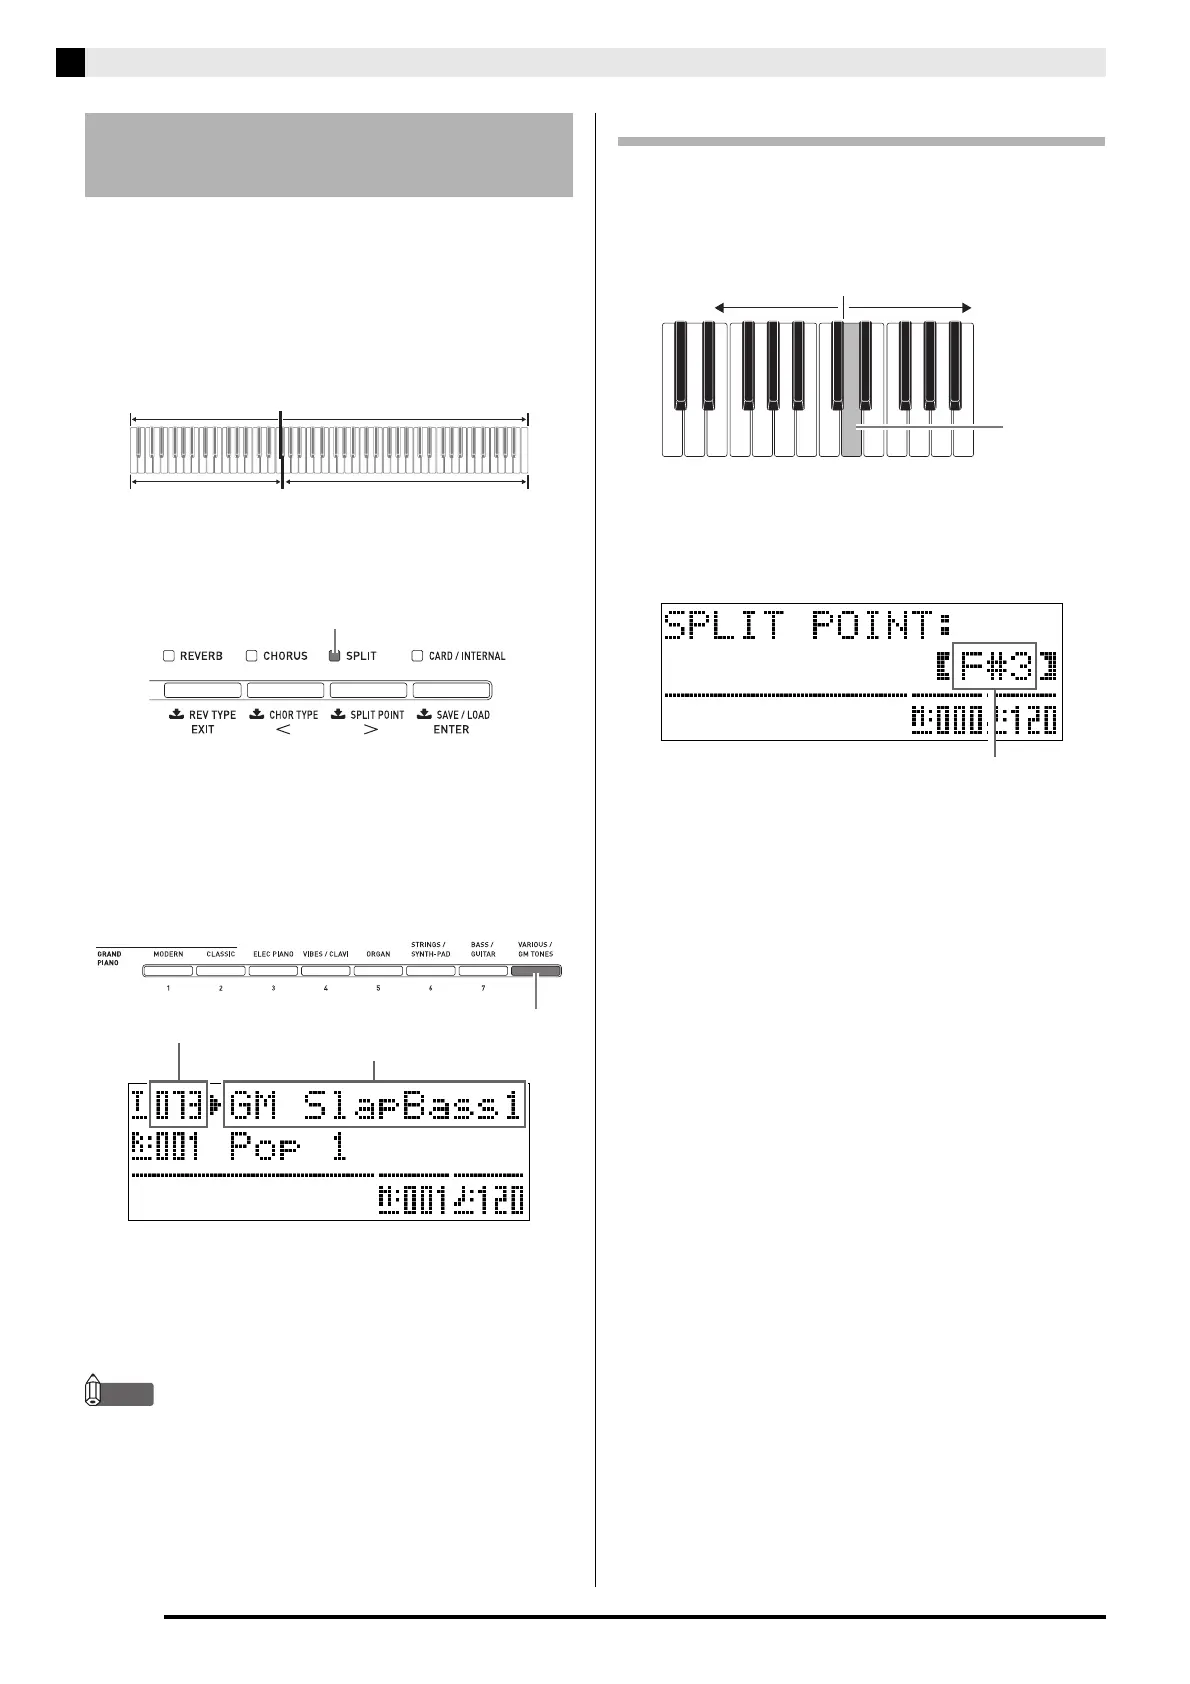
Moving the Keyboard Split Point
You can use the procedure below to specify the
location on the keyboard where it splits between the
left side and the right side. That location is called the
“split point”.
1.
Hold down the
(SPLIT) button until the
split point setting screen appears on the
display as shown below.
2.
Press the keyboard key where you want to
specify as the leftmost key of the right (upper
range) tone.
This specifies the split point.
3.
Press the
(SPLIT) button.
This exits the split point screen.
Splitting the Keyboard
between Two Tones
Left (Lower Range)
Tone: GM SLAP BASS 1
Right (Upper Range)
Tone: GRAND PIANO
Lit
Left tone number
Left tone name
Left (Lower Range) side Right (Upper Range) side
Split point
Current split point key name

 Loading...