Using the Pattern Sequencer
E-116
The settings in this section control how instruments parts you
are currently editing or creating are sounding when played
back as Auto Accompaniment after being saved as a user
rhythm. These settings are configured using the “PartPara”
(Part Parameter) item on the edit menu.
• You can configure part parameters for an instrument
part whose status (page E-103) is “Recorded Data” or
“Empty”. You cannot configure part parameters for an
instrument part whose status is “Fix Data”.
1.
On the pattern sequencer screen, select the
“Recorded Data” or “Empty” status instrument
part whose part parameters you want to
configure.
2.
While holding down the R-13 (FUNCTION)
button, press the C-4 (EDIT) button to display
the edit menu.
3.
Use the R-17 (t, y) buttons to move the 0 to
“PartPara” and then press the R-16 (ENTER)
button.
• This displays the “Part Para” screen.
4.
Use the R-17 (t, y) buttons to select one of
the items described in the table below and then
use the dial or R-14 (–, +) buttons to change the
setting.
• For details about each setting item, see “Pattern
Sequencer Part Parameters” (page E-117).
• You can configure only bend range settings for drum
and percussion parts.
5.
After configuring the settings you want, press
the R-15 (EXIT) button twice.
• This returns to the pattern sequencer screen.
Configuring Instrument Part
Playback Settings
(Part Parameters)
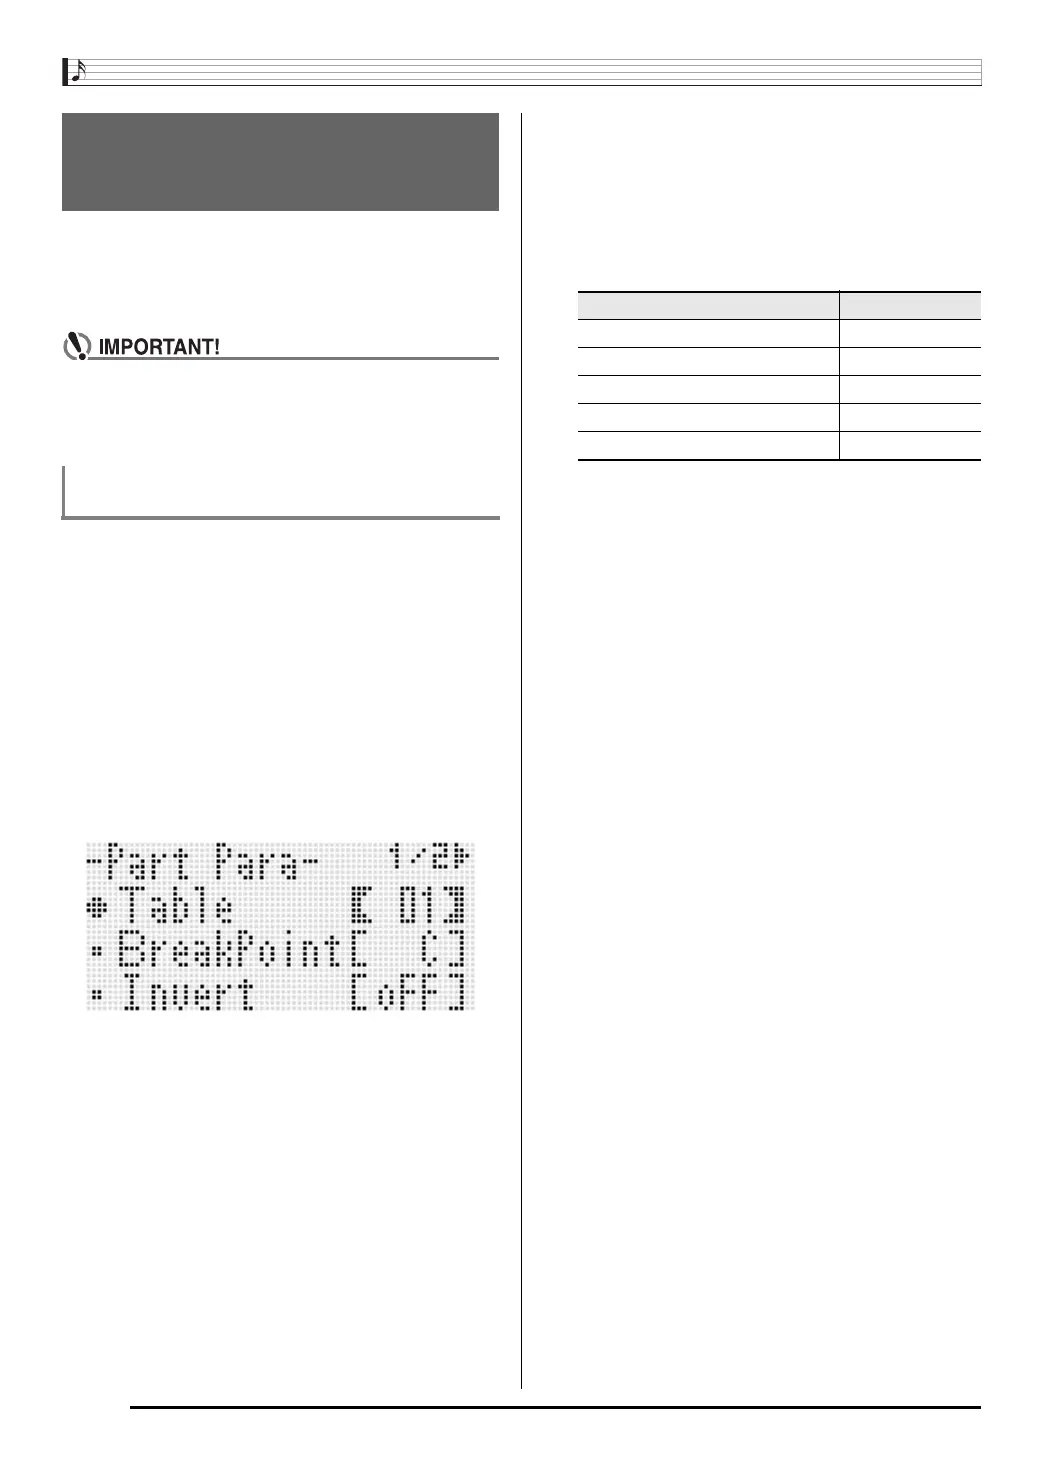
To configure pattern sequencer part
parameters
Display: Item name Setting Range
Table: Chord conversion table 01 to 19
BreakPoint: Break Point C to B
Invert: Inversion oFF, on, 7th
Retrigger: Retrigger oFF, on
BendRange: Bend Range 00 to 12
CTK7000_e.book 116 ページ 2010年7月21日 水曜日 午後5時15分