No Operation Display Inspection contents
1
2
3
4
— 48 —
5
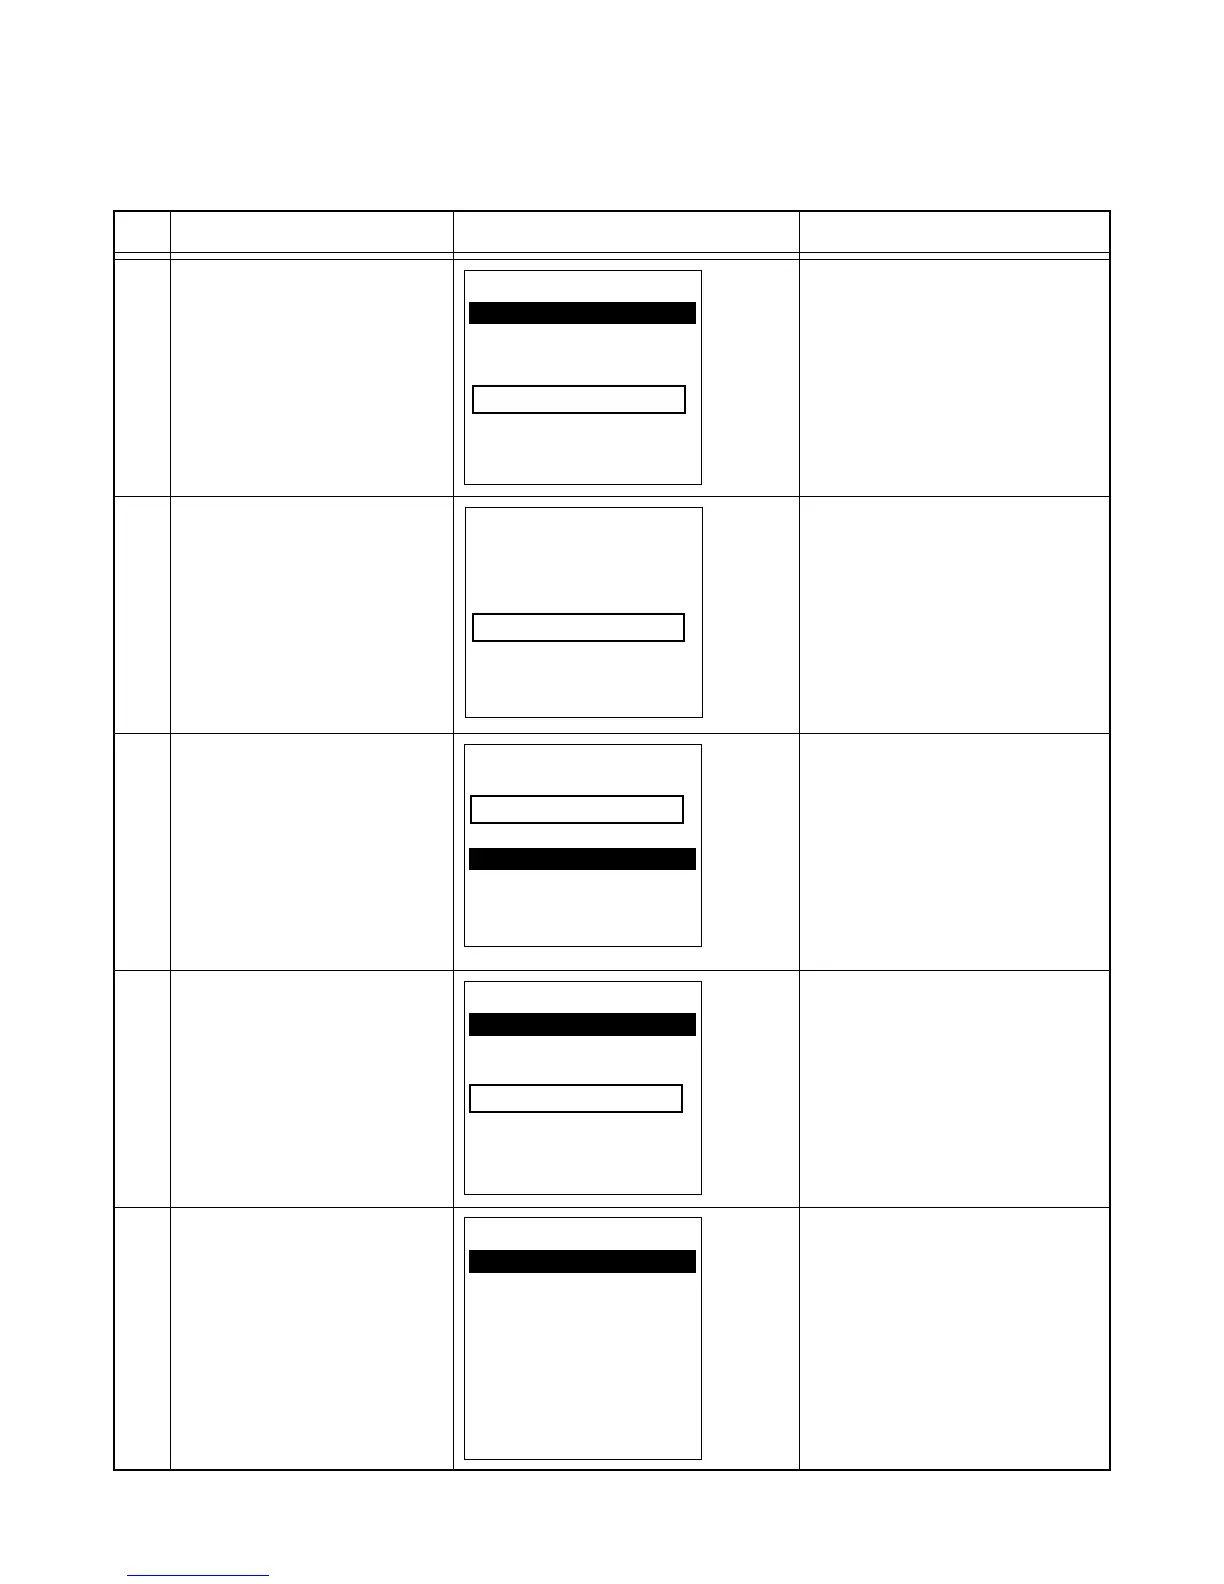
4-6. ID Number Registration
Perform the ID Number Registration after replacing the following;
• Main PCB assy
Display "Test Menu #3".
Select "3.Serial ID SET".
Confirm the display on the left.
Serial ID Setting Ve
1.Serial ID SET
Setting ID
9.EXIT
Serial ID Setting Ve
524612345AAAA1
1.SET
2.Retry
9.Cancel
Confirm the display on the left.
Confirm whether the inputted
number is correct.
Confirm the display on the left.
Back to Main Menu.
Confirm the display on the left.
Input the serial number of the
product.
Push "ENT" key.
Select "1.Serial ID SET".
Select "1.SET".
Select "9.EXIT".
Test Menu VO.22F #3
1.Burn-In Test
2.WLAN Country Code
3.Serial ID Set
4.RTC
5.OBR Set
6.Memory Test
7.Previous Page
8.Exit
Serial ID Setting Ve
1.Serial ID SET
Setting ID
524612345AAAA1
9.EXIT
Serial ID Setting Ve
Push TRG-Key
or TEN-Key
 Loading...