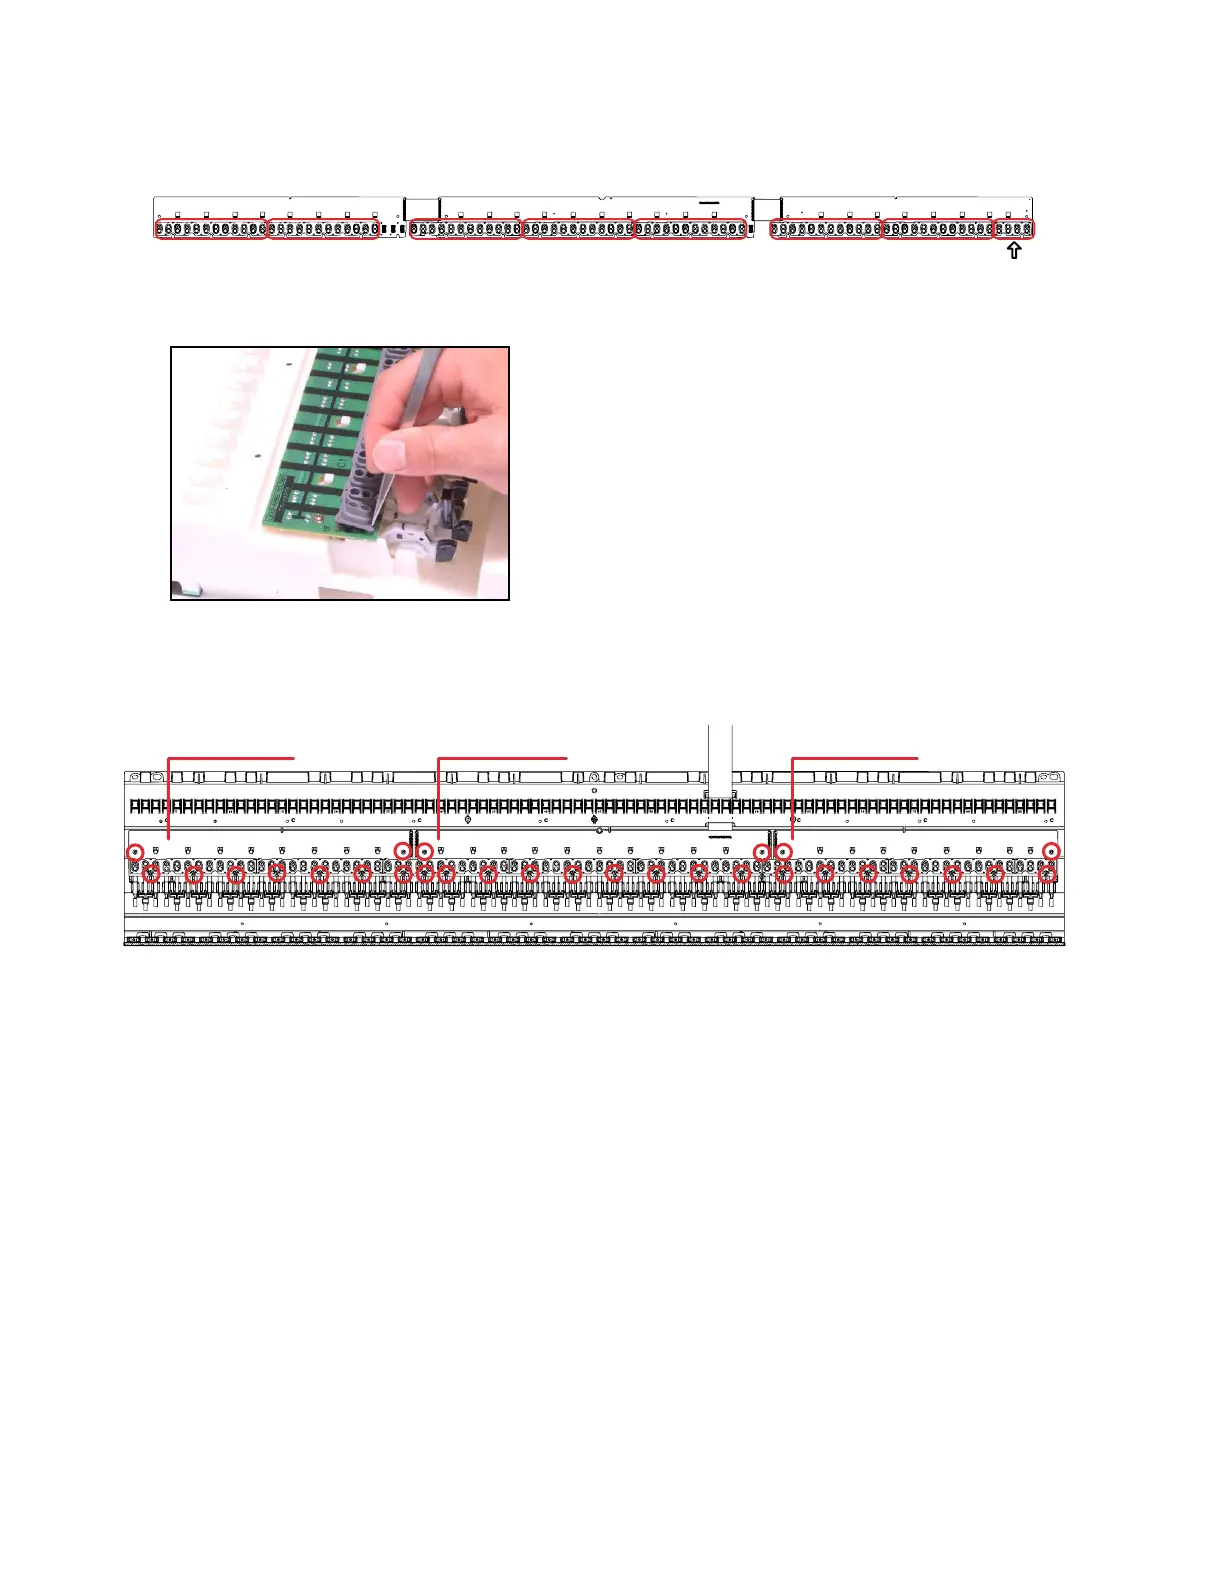
EasyManuals Logo

Casio PX-700 User Manual

Casio PX-700
29 pages
To Next Page IconTo Next Page
To Previous Page IconTo Previous Page
Page #15 background imageLoading...
Page #15 background image
— 13 —
MCPZ-KYA1
*SCREW 9
MCPZ-KYB2
*SCREW 11
MCPZ-KYA3
*SCREW 9
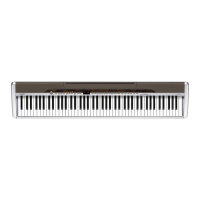
28. Remove 8 rubber keys.
* One of the keys has the different length from others.
* Caution while assembling the rubber keys.
Push the rubber keys with the tool like the tweezers, so the projections of the rubber keys matches with
the holes of the lower case.
29. Remove 9 screws then the PCB (MCPZ-KYA1).
30. Remove 11 screws then the PCB (MCPZ-KYB2).
31. Remove 9 screws then the PCB (MCPZ-KYA3).

Other manuals for Casio PX-700

Questions and Answers:

Question and Answer IconNeed help?

Do you have a question about the Casio PX-700 and is the answer not in the manual?

Casio PX-700 Specifications

General IconGeneral
Built-in Songs60
Speakers12cm x 2
Amplifier Output8W + 8W
Power Consumption18W
Polyphony (Maximum)128
Digital EffectsReverb (4 types), Chorus (4 types)
Transpose±1 octave (–12 to +12 semitones)
TuningYes (A4 = 415.5Hz to 465.9Hz)
Pedalssoft, sostenuto
TerminalsHeadphone (Stereo standard jack) x 2
Power SupplyAC Adaptor (AD-A12150LW)
Included Accessoriesmusic stand
MetronomeBeats: 0, 1, 2, 3, 4, 5 (Tempo range: quarter note = 30 to 255)

Related product manuals