— 18 —
3-2. Flash adjustment
1. General
Do not fail to perform this adjustment when you replace the flash unit.
2. Necessary equipment
(1) Dark room
(2) AC adaptor
(3) Gray paper (Superior's oxford gray No. 22)
The following sizes are available from us (also available from camra shop).
Parts code Parts name Specifications
1904 5411 Superior photographing background paper No. 22 (1.75 x 2.7m)
1904 5412 Sperior photographing background paper No. 22 (2.72 x 11m)
3. Condition
(1) Perform in a dark room.
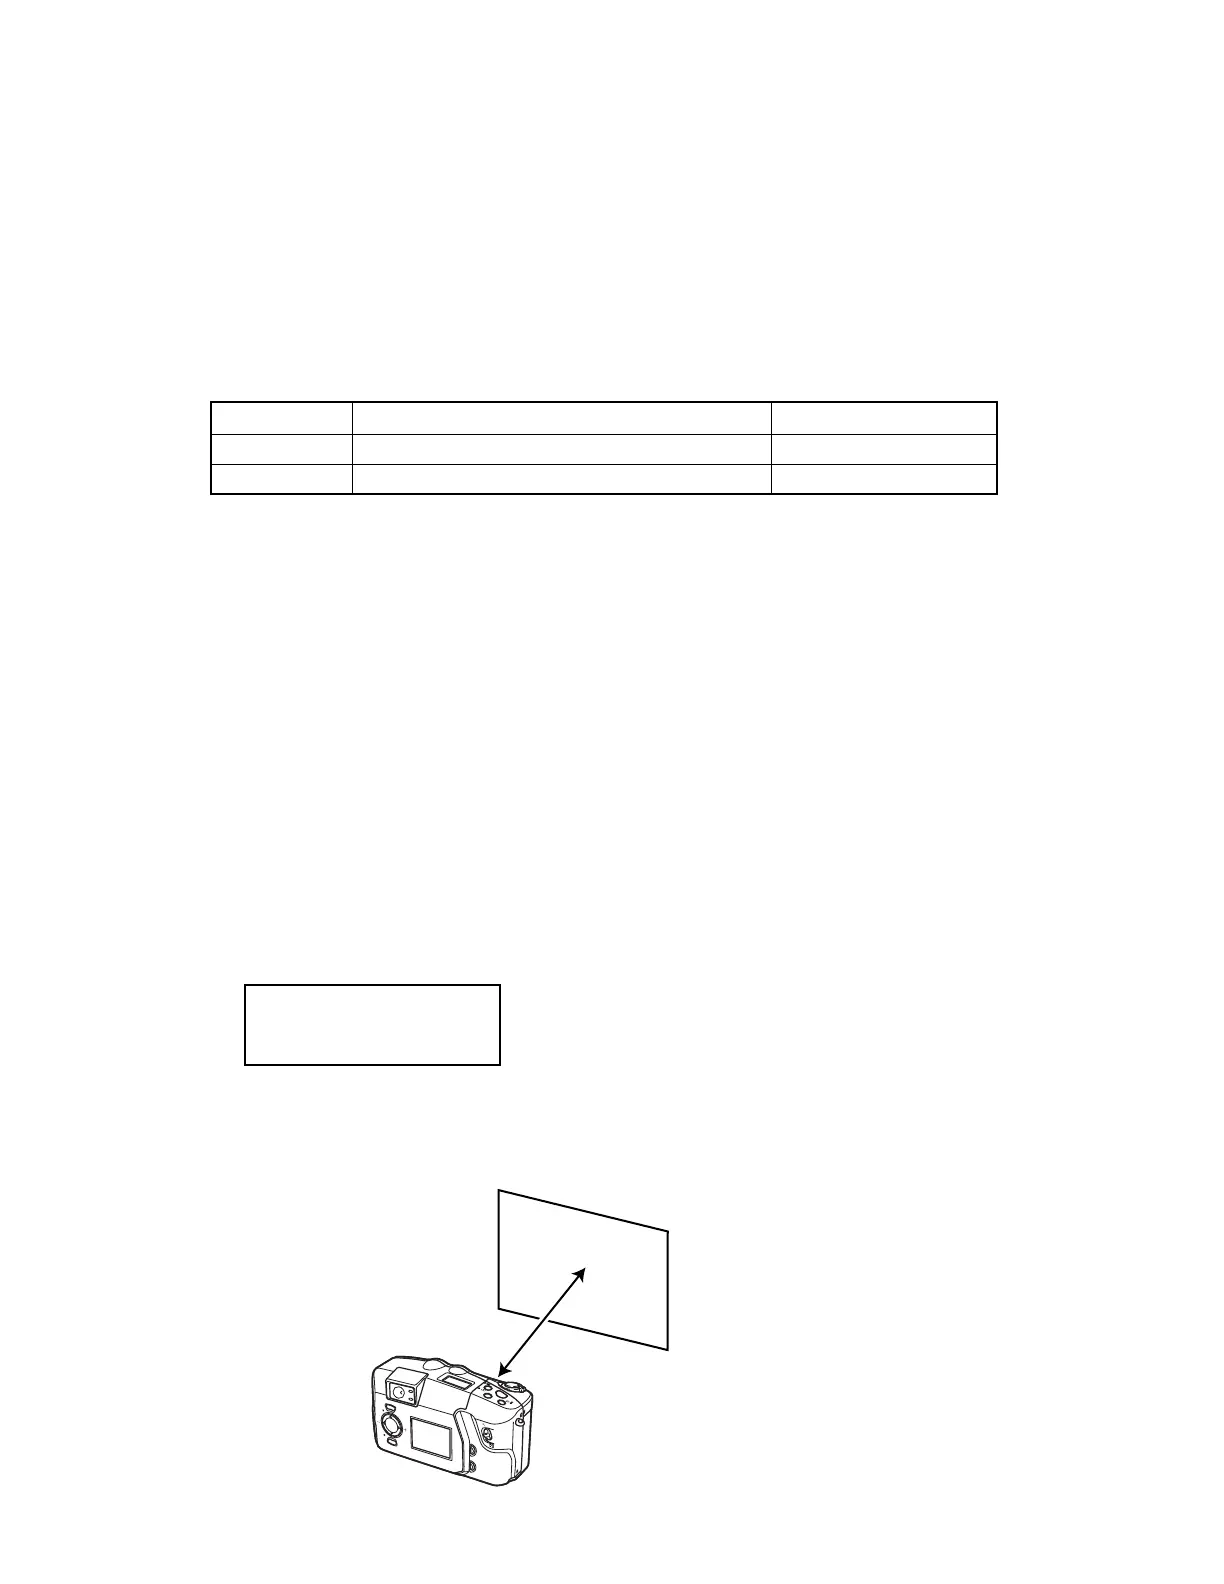
(1) Distance between flash lens and gray paper should be 1 meter.
(1) Use lighter color of the gray paper.
Paper should be larger enough to fit in a picture taken from 1 meter distance.
(Reference; more than 1.5m x 2.0m)
4. Adjustment
(1) Connect an AC adaptor to the camera.
(2) Set the camera in REC mode.
(3) Boot the MENU2 in the test mode.
Turn the camera on while pressing SHIFT and MENU keys sumultaneously.
Press FLASH ➜ FLASH ➜ MENU in order quickly.
(4) Using + and – keys, choose STROB ADJUST and press the shutter button.
(5) When STROBE indicator appears on the right upper corner, turn the light off then press the shutter with
the above conditions.
(6) The camera flashes more than 4 times.
(7) Confirm the following indication and turn the camera off.
EEP WR OK
PWM XX
(8) Boot the test mode.
Turn the camera on while pressing DISP and MENU keys.
(9) Make sure that STROB ADJ column is YES.
(10) Turn the camera off.
5. Block diagram
REC
OFF
PLAY
MENU
T
W
SET/ DISP
SHIFT
BEST SHOT
RESIZE
MF
PREVIEW
/
/
1m
Back ground paper.
 Loading...