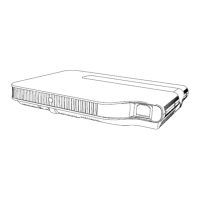
C. LENS COVER C-1.
Remove the lens cover. C-2.
Remove the plug and unscrew one screw (S15).
<ASSEMBLY NOTE: LENS COVER>
Screws (S13)
• Pass the loop through the groove in the lens housing.
• When assembling the top cover, make sure that the hinge is not caught between the covers.
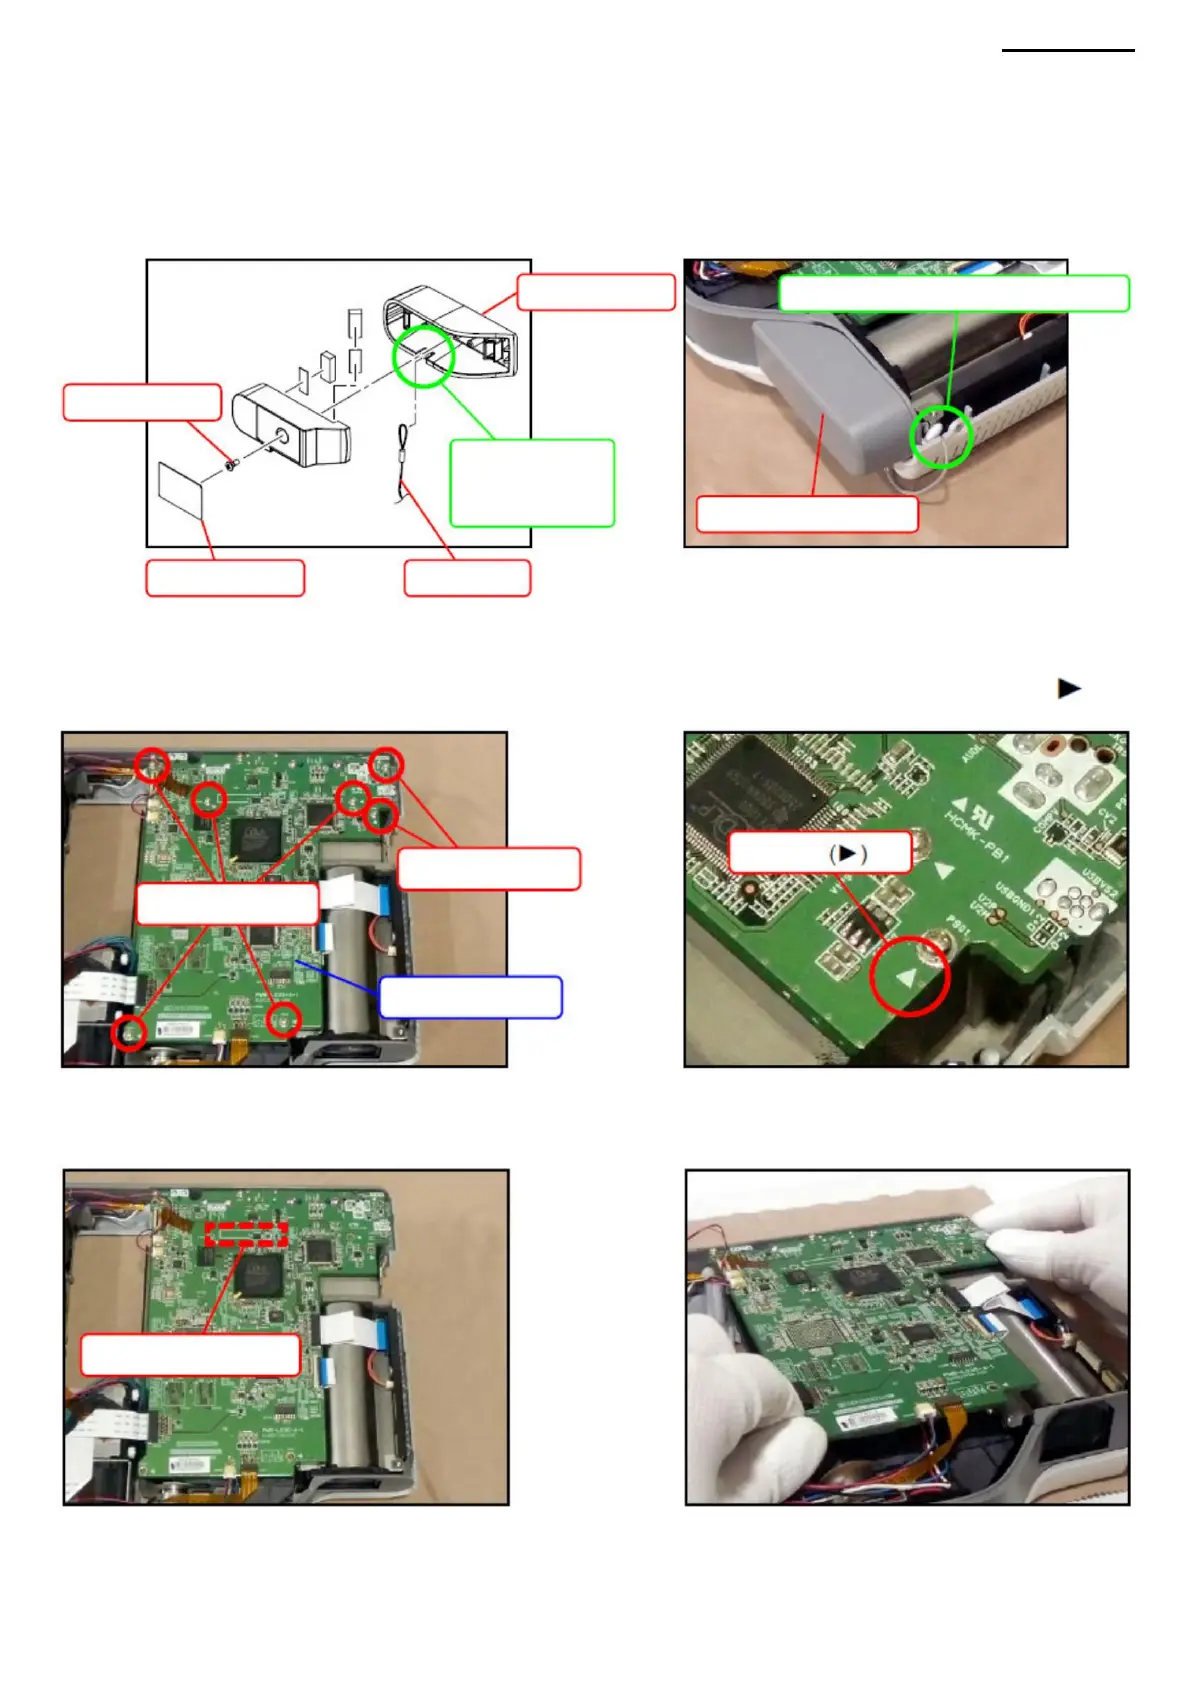
D-1. Remove seven screws (S13).
NOTE: The screws to be removed are indicated on the PWB-1 board by triangles (
SALARY PWB-1
).
D-2. Slightly lift the PWB-1 board and disconnect the connector located on the back of the device. NOTE: The PWB-1 board
is connected with a board-to-board (BtoB) connector.
XJ-A240/A245
Bullet
Screws (S13)
BtoB connector
Lens cover
Pass the loop through the groove
Pass the loop through
the groove
Stub
Screw (S15)
LENS COVER
A loop
D. PWB-1 BOARD (Main board)
-17-
Machine Translated by Google