infrared
sensor
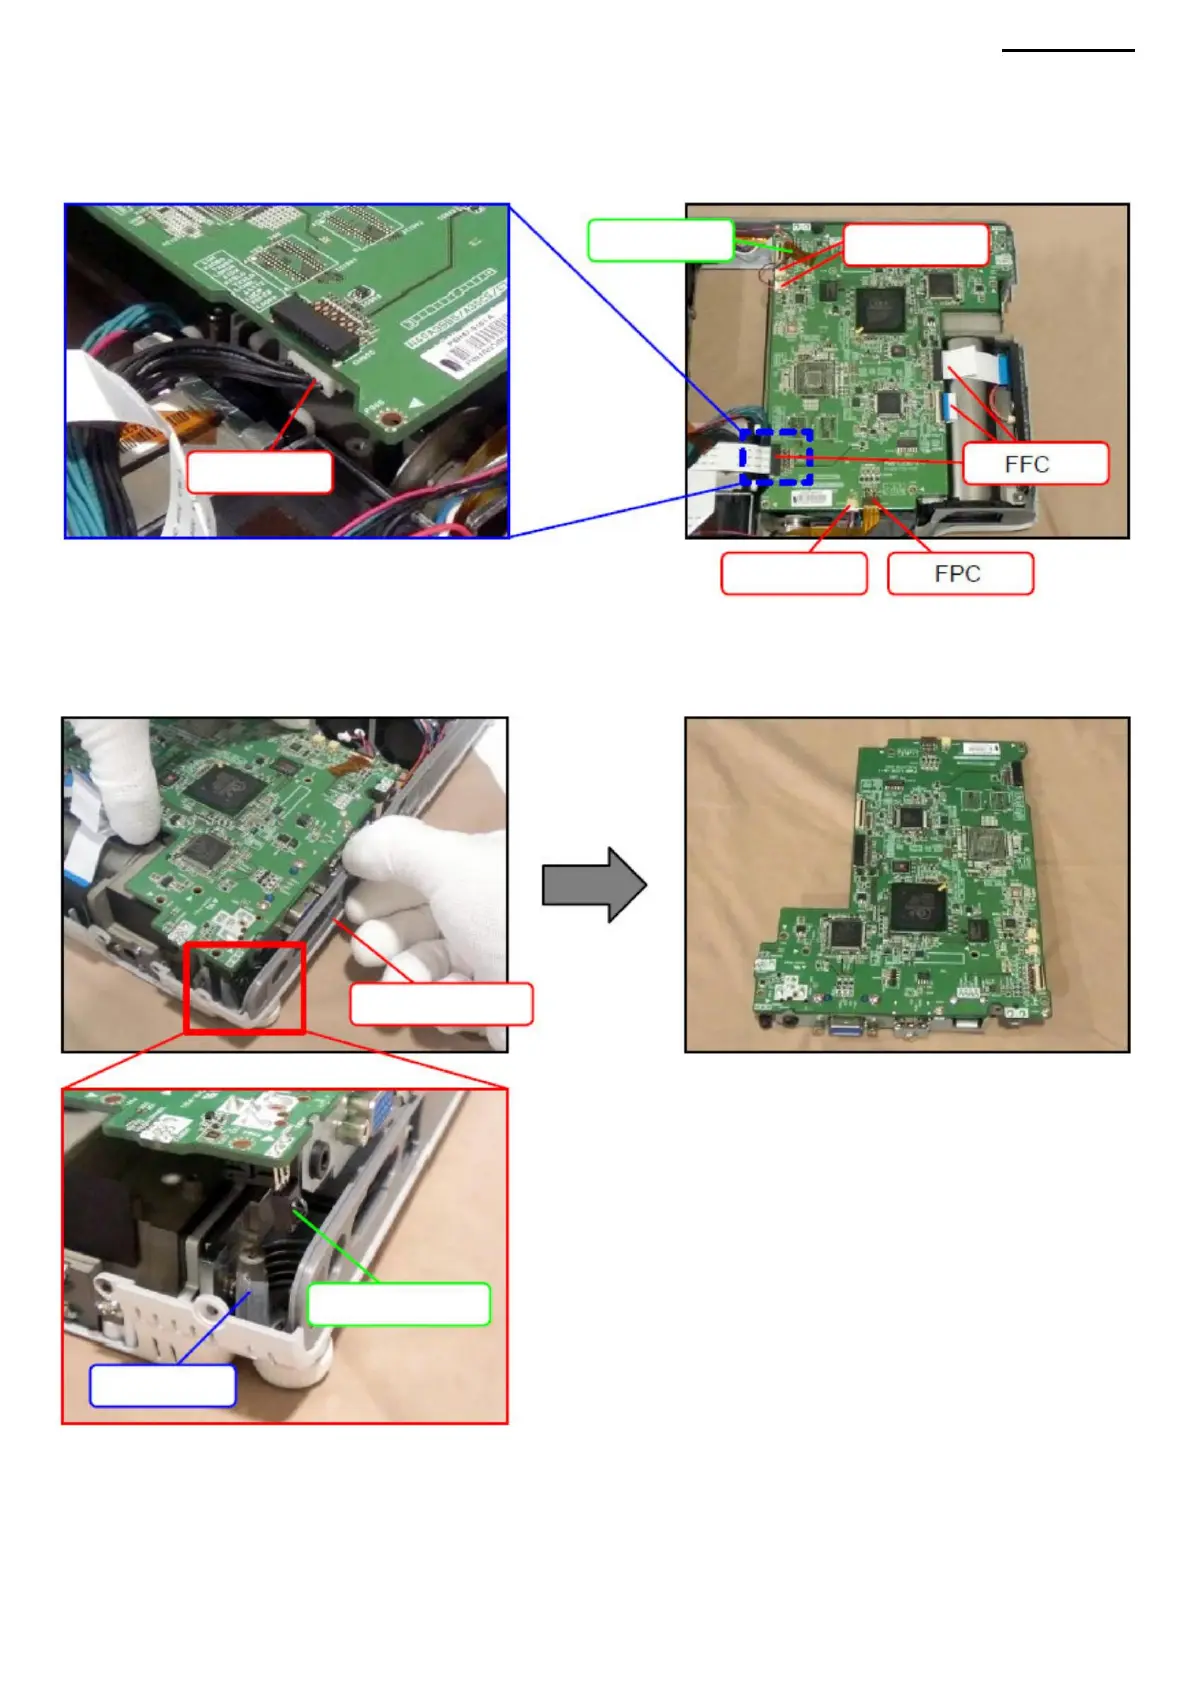
D-3. Remove the tape.
Connector
D-4. Disconnect four connectors, three FFCs and one FPC. NOTE:
The connector lock is very fragile. Be careful when removing the FFC cable. NOTE: The connector is connected to
the back of the PWB-1 board.
D-5. With the rear panel slightly open, disconnect the PWB-1 board. NOTE:
When removing the module, make sure the IR sensor does not touch the stop or back panel.
Tape
Connector
Back panel
XJ-A240/A245
Connector
Emphasis
-18-
Machine Translated by Google