-19-
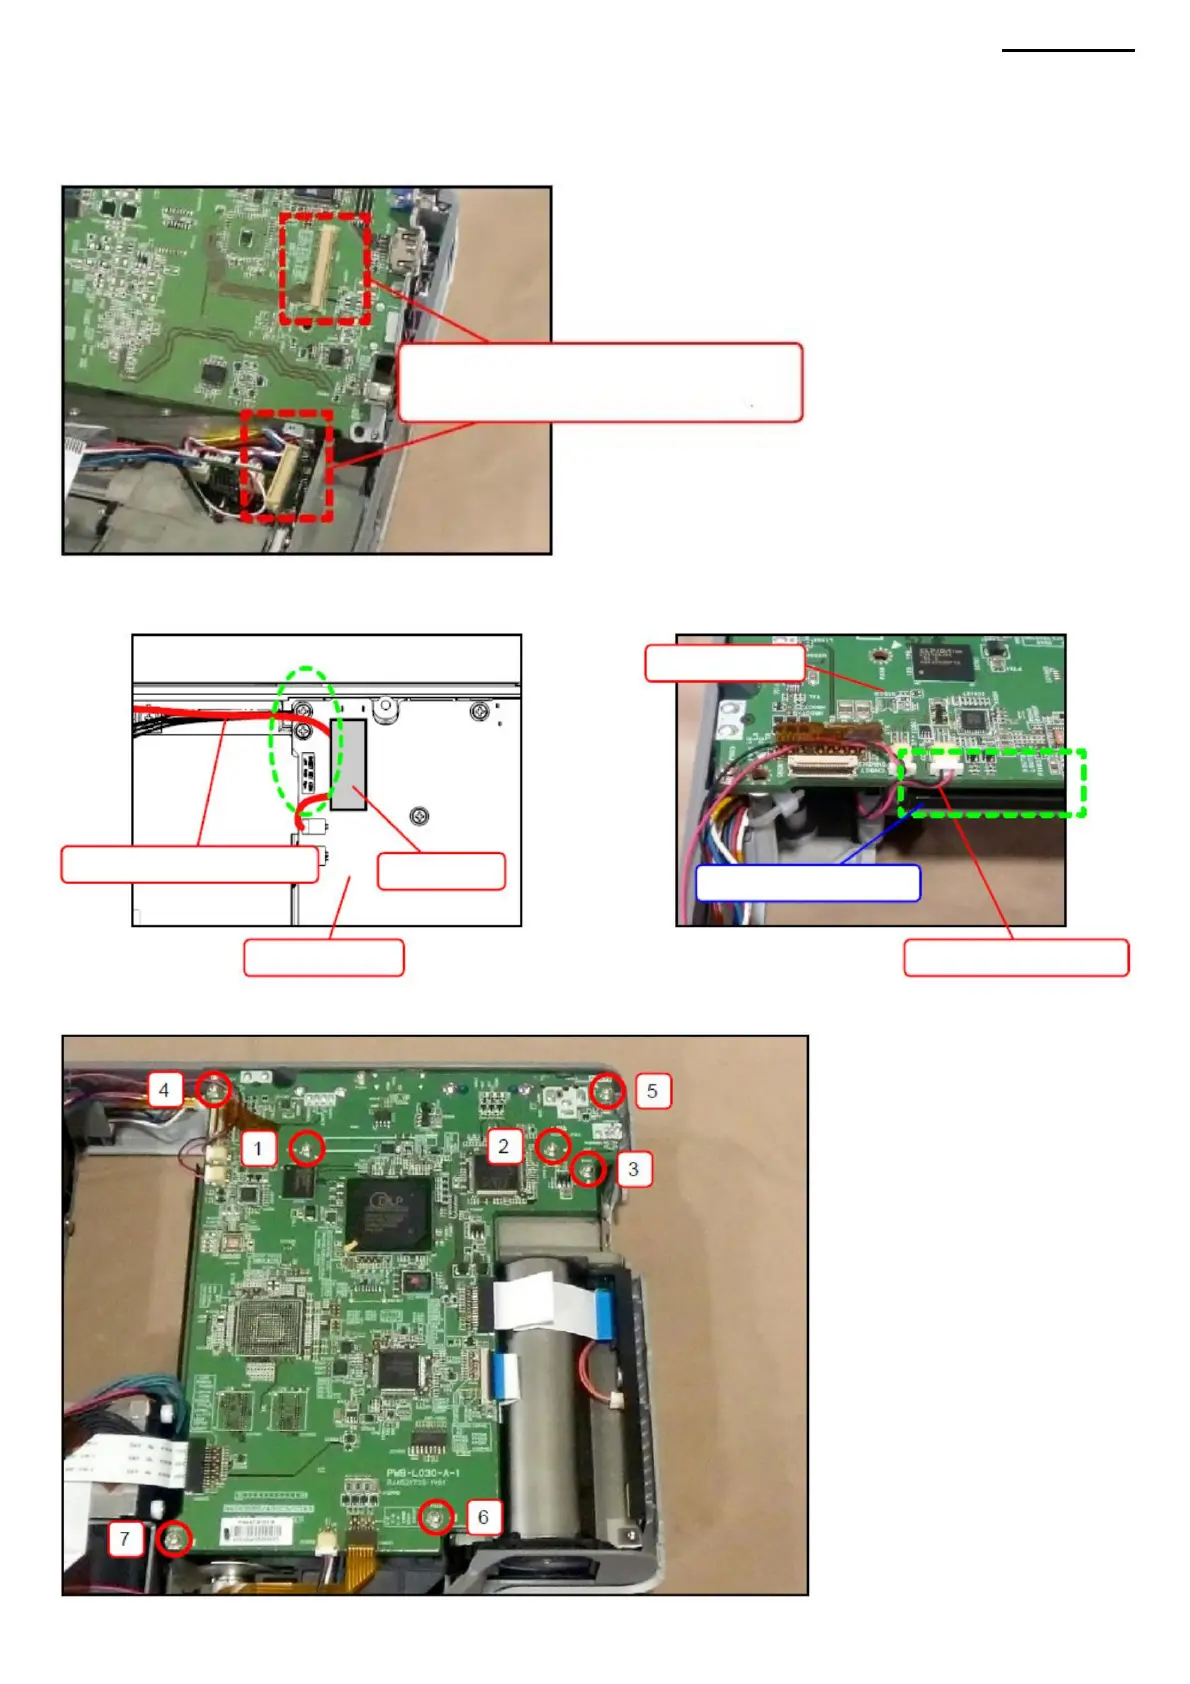
<ASSEMBLY NOTES: PWB-1 BOARD> • With the
rear panel slightly open, assemble the PWB-1 board. • When assembling
the unit, make sure that the infrared sensor does not touch the stop or the back panel. • Securely connect the board-to-board
(BtoB) connector on the back of the PWB-1 board.
Cables (CASE B)
BtoB connectors
Connect connectors
• When securing the PWB-1 board with the seven screws (S13), tighten them in the sequence shown
Tape
• When arranging the cables (CASE B), make sure that the screws and connectors are away from
cables, secure the cables with tape. Route
the cables (LSA module) inside the LSA-M board.
SALARY LSA-M
XJ-A240/A245
SALARY PWB-1
SALARY PWB-1
numbers below.
Cables (LSA MODULE)
Machine Translated by Google
 Loading...