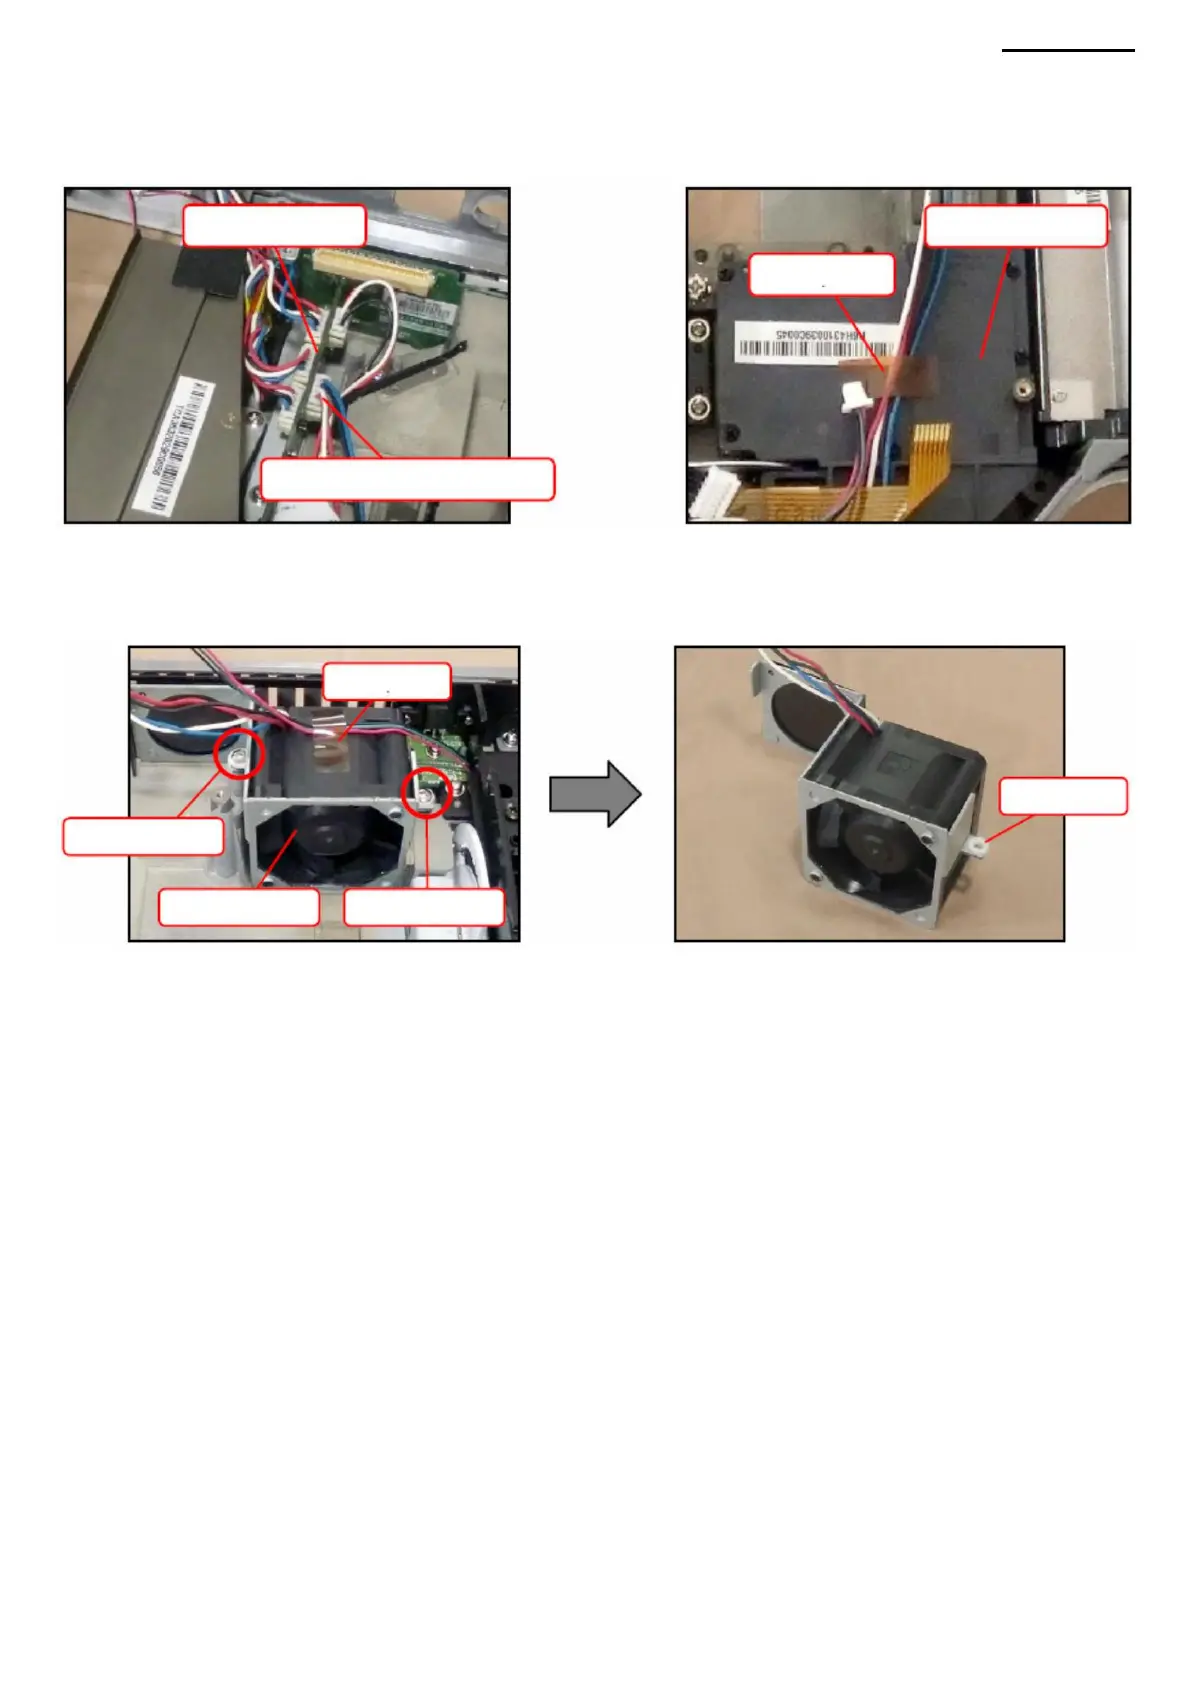
K. FAN MODULE IN K-1. Disconnect the
connector (FAN MODULE B) connected to the PWB-3 board. K-2. Remove the tape securing the fan module B cables.
K-3. Remove the tape.
K-4. Remove two screws (S12), then remove fan module B. NOTE: A bushing is installed in
each hole. Do not interchange bushings.
Salary PWB-3
Screw (S12)
Tape
ORM MODULE
Tape
Bushing
XJ-A240/A245
Screw (S12)
Connector (FAN
MODULE B)
FAN
MODULE B
-31-
Machine Translated by Google
 Loading...