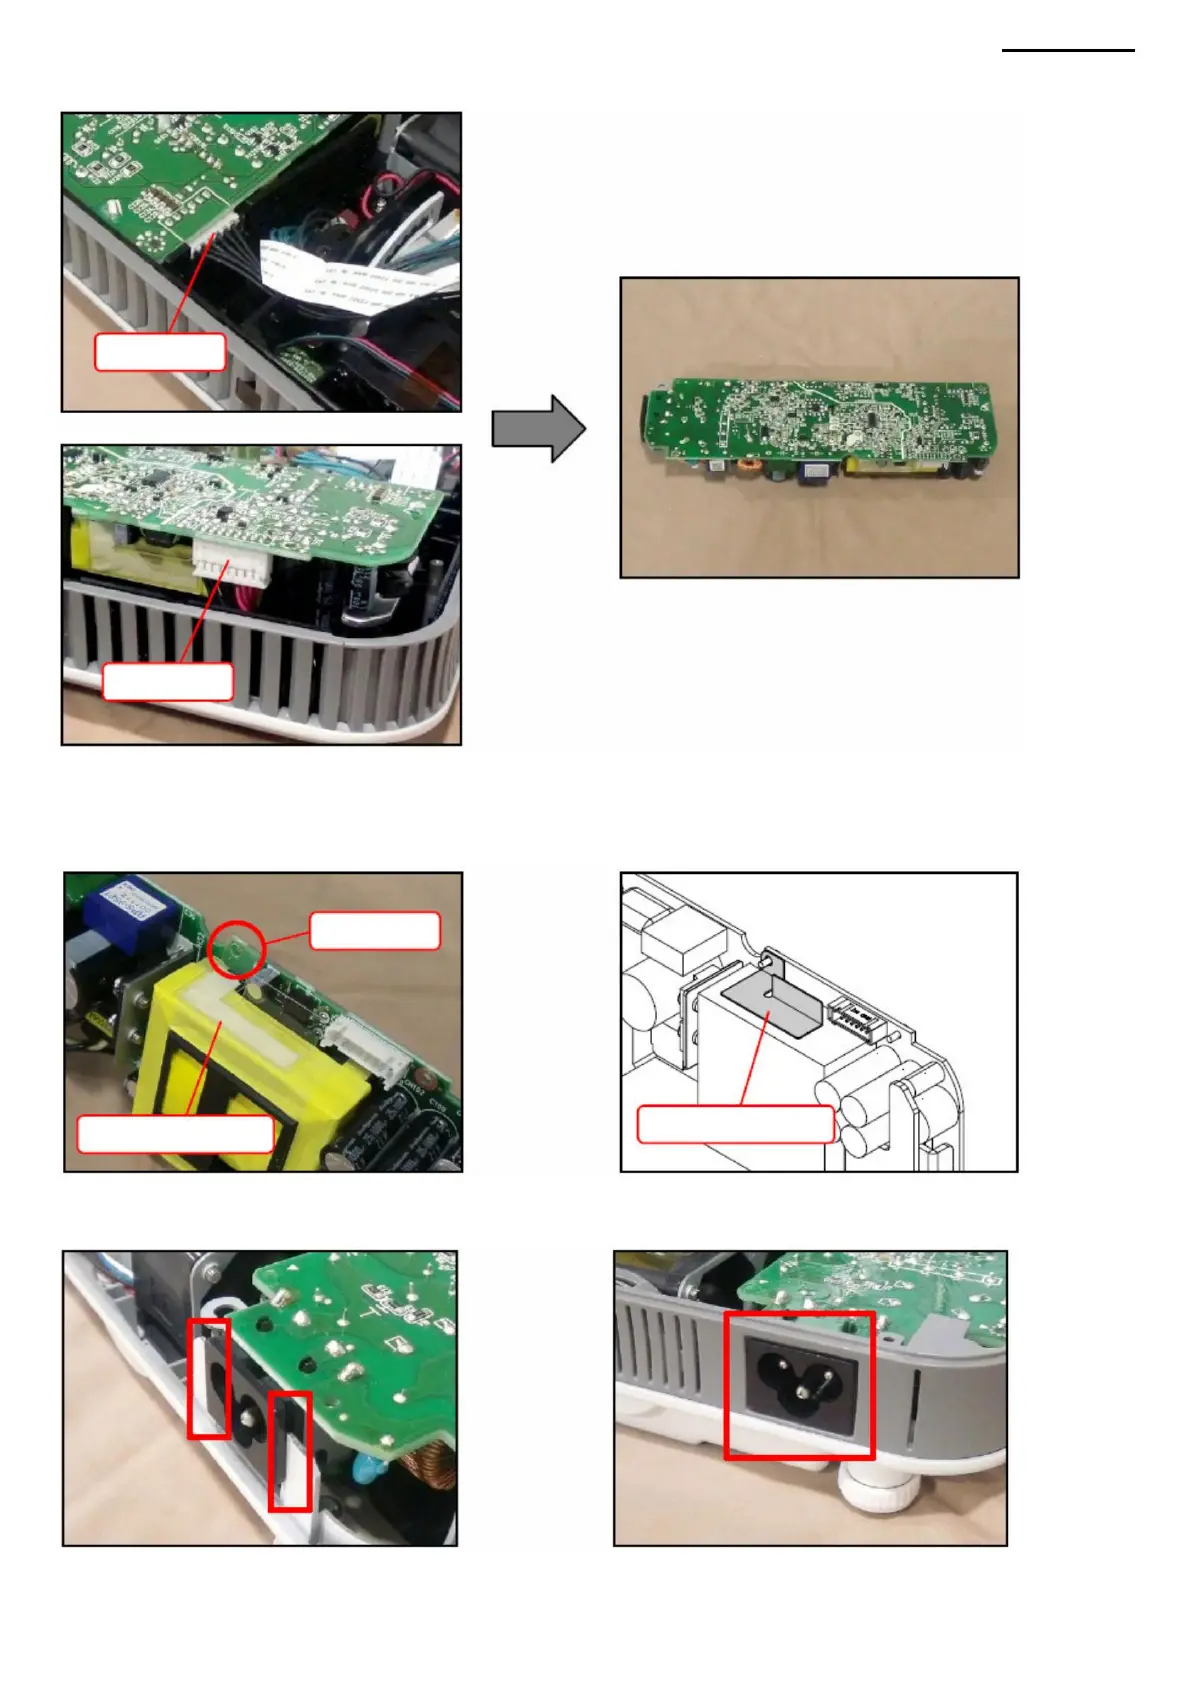
N-4. Disconnect the two connectors and remove the ACDC module.
NOTE: Align the screw hole of the PWB board with the hole in the insulation plate.
<ASSEMBLY NOTES: ACDC MODULE>
• Securely connect the power cable entry to the chassis and panel.
<CAUTIONS WHEN REPLACING WITH A NEW PART: ACDC MODULE> • When replacing
the components of the ACDC module with a new one, make sure that the insulating plate
XJ-A240/A245
• Tighten the screws securing the rear panel if they were loosened during disassembly of the ACDC module.
installed.
Connector
insulating plate
for screw
-36-
Connector
insulating plate
Hole
Machine Translated by Google
 Loading...