XJ-A240/A245
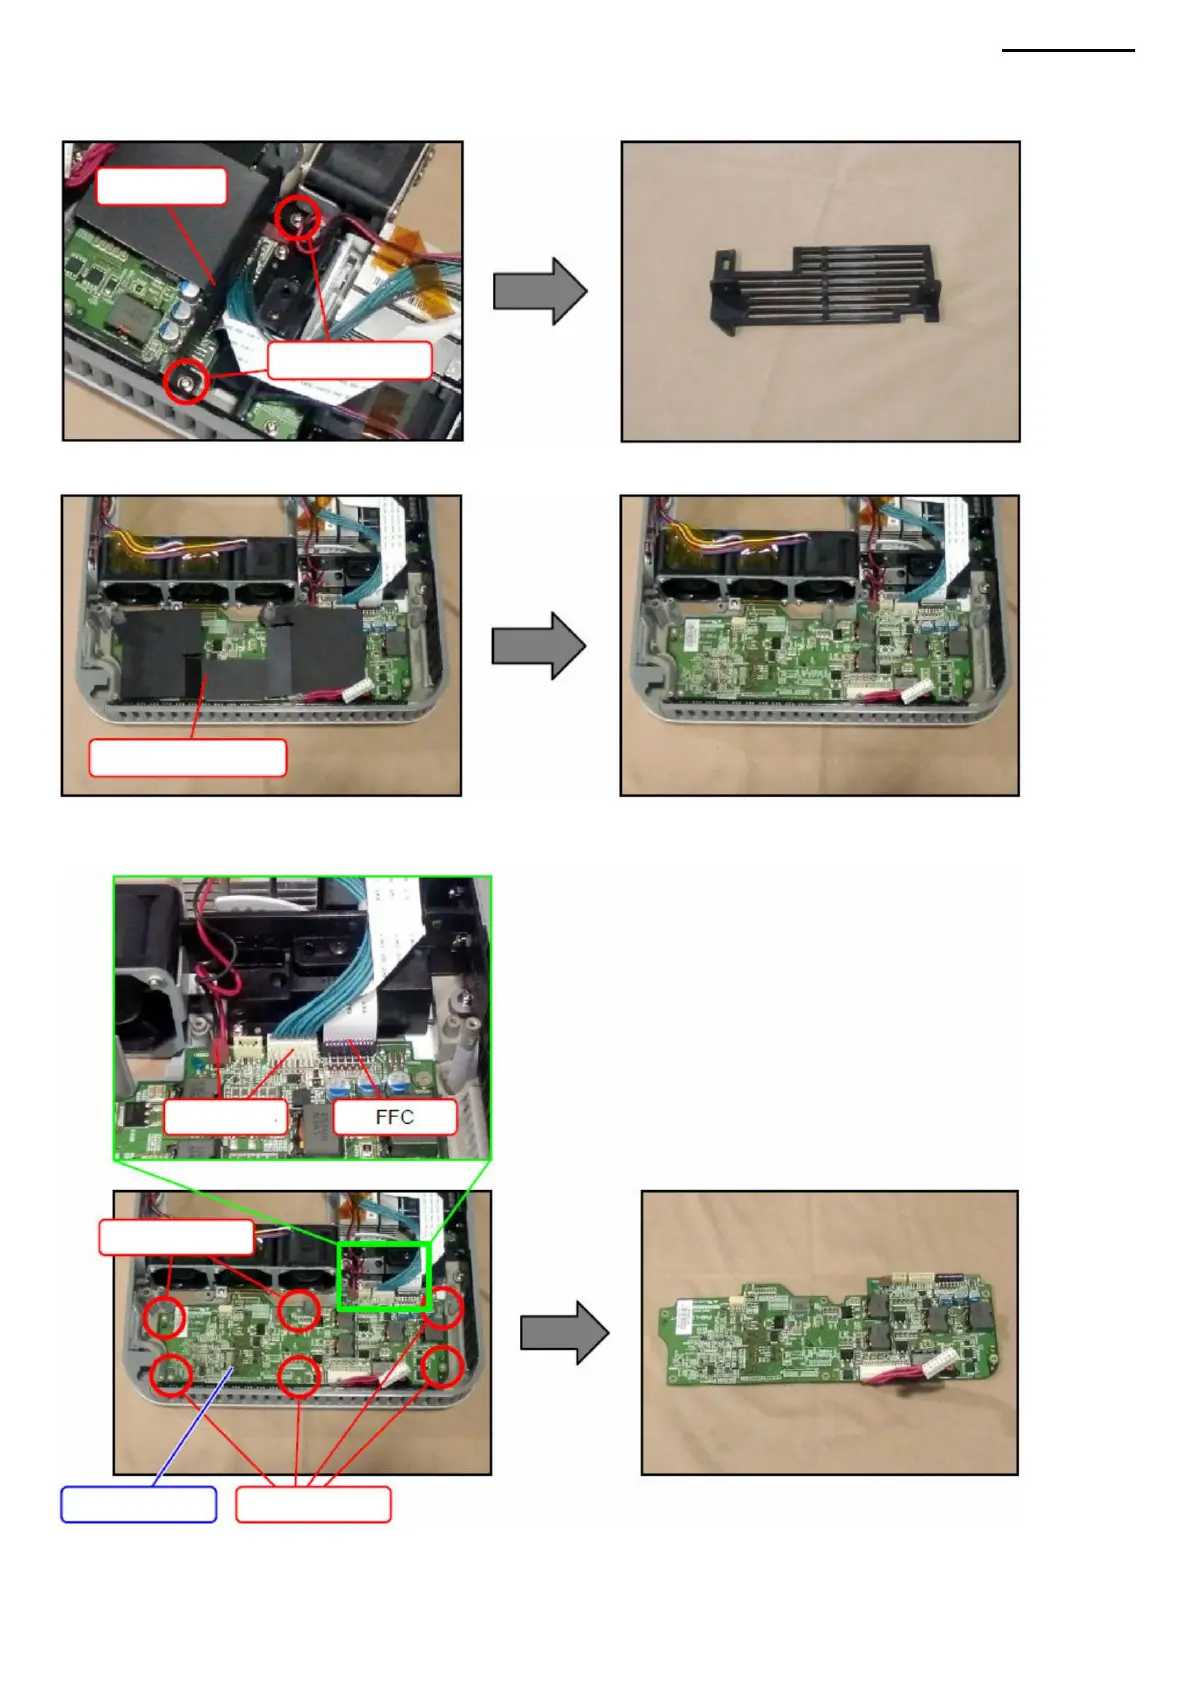
O-3. Disconnect the two connectors and the FFC
cable. O-4. Remove six screws (S8) and remove the PWB-7 board.
O-2. Remove the insulating plate.
O. PWB-7 BOARD (LASER INITIATION BOARD) O-1. Loosen
the two screws and remove cover A.
Cover A
-37-
Connector
Screws (S9)
Screws (S9)
Salary PWB-7
insulating plate
Screws (S9)
Machine Translated by Google
 Loading...