22
fig. 15
fig. 16
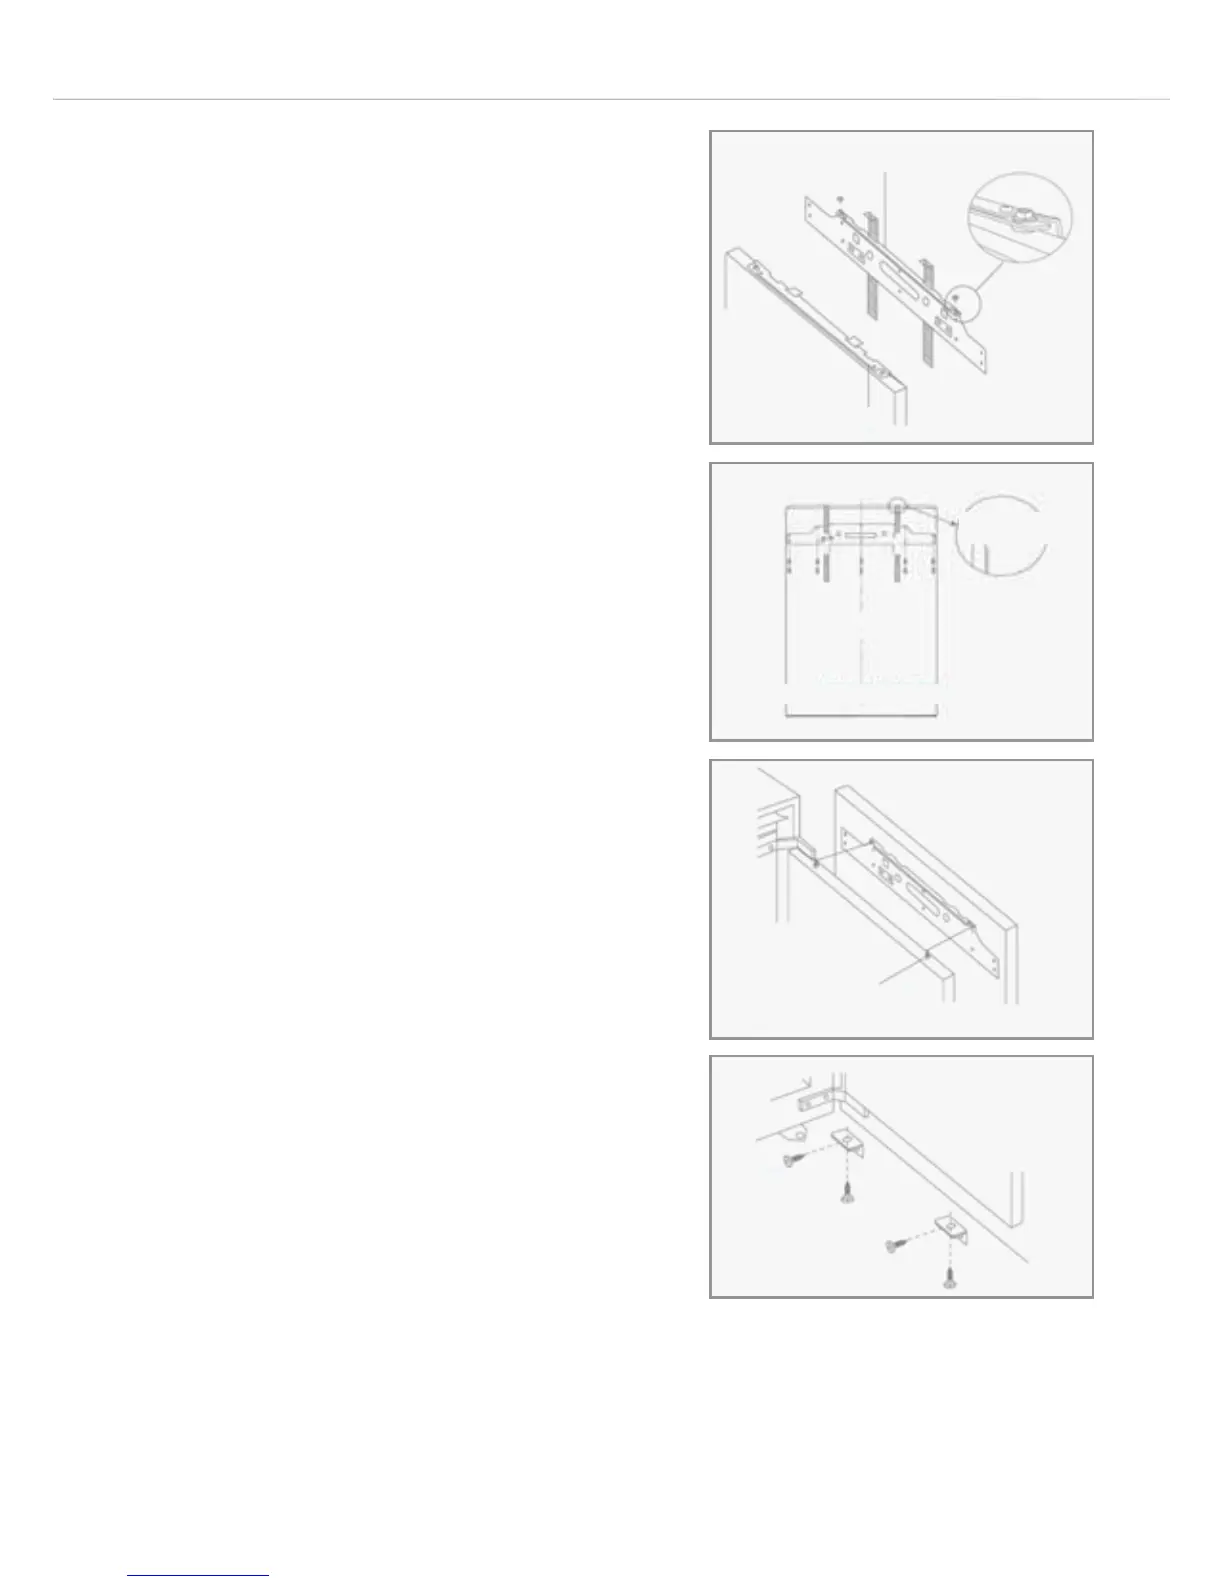
Fitting the cabinet
fascia doors
First, fit the upper fascia by following
the steps below. After fitting the upper
fascia in the correct position, use the
lower edge of the upper fascia as a
guide for positioning the lower fascia (A
distance between the two fascias when
installed is normally between 2 and
4mm) and fit the lower fascia.
1. With the door open and using the
fitting guides, position the door
in the required position with respect
to the cabinet (figure 14).
2. Without moving the fitting guides,
remove the upper fixing plate
on the door by removing the fixing
plate securing nuts (figure 15).
3. Place the fascia door upside down
on a protective cloth or similar and
position the fixing plate centrally in its
required position, using the guides
to help you (figure 16) and secure the
plate in position using wood screws
fig. 17
Height adjustment screw
Refrigerator door
Center line
Cupboard door
Upper fixing plate
Upper fixing plate (Dismantling)
Refrigerator door
Fitting guide
fig. 18
Fascia fixing bracket