Table Saw - Operating Instructions 10.4
On both edges of the case lid there are
dimensions to give a guide to the cut width.
When fitting the post it is important to ensure
that both ends of the post are the same distance
from the blade (parallel to the blade); use the
dimension to check this.
Lifting the head of the post will again release the
fence and allow it to be removed and the
position to be changed.
10. The depth and angle of the blade can be
adjusted by simply lifting the lid and using the
adjustment knobs, the same as described in the
“Circular Saw Operating Instructions (6.3)”
section of this user manual. The angle plate can
be used as an angle fence, by placing it in one
of the grooves on the case work surface.
NOTE: When the table saw is configured in the
way you require it is time to add a
POWERhandle into the charger dock, this will
supply power to the case and you can start
cutting your work.
NOTE: Table saw is started and stopped by the
main case operation button above the charger
dock. The table saw will not work unless the
table saw guard is correctly installed and the
case lid is shut. If the case is connected to the
main then the POWER8handle will be charged
when the table saw in not in operation.
Different Type of Cutting
The POWER8 table saw can be used for
straight-line cutting operations such as cross
cutting, rip cutting, miter cutting, bevel cutting,
and compound angle cutting.
1. Cross cuts are straight 90° cuts made across
the grain of the workpiece. The wood is feed into
the cut at a 90° angle to the blade, and the blade
is vertical.
2. Rip cuts are made with the grain of the wood.
To avoid kickback while making a parallel cuts,
make sure one side of the wood rides firmly
against the fence.
3. Miter cuts are made with the wood at any
angle to the blade other than 90’. The blade is
vertical.
4. Bevel cuts are made with an angled blade.
Bevel cross cuts are across the wood grain, and
bevel rip cuts are with the grain. The rip fence
must always be on the left side of the blade for
bevel rip cuts.
5. Compound, or bevel miter cuts, are made with
an angled blade on wood that is feed into the
blade at an angle to the table.
8
9
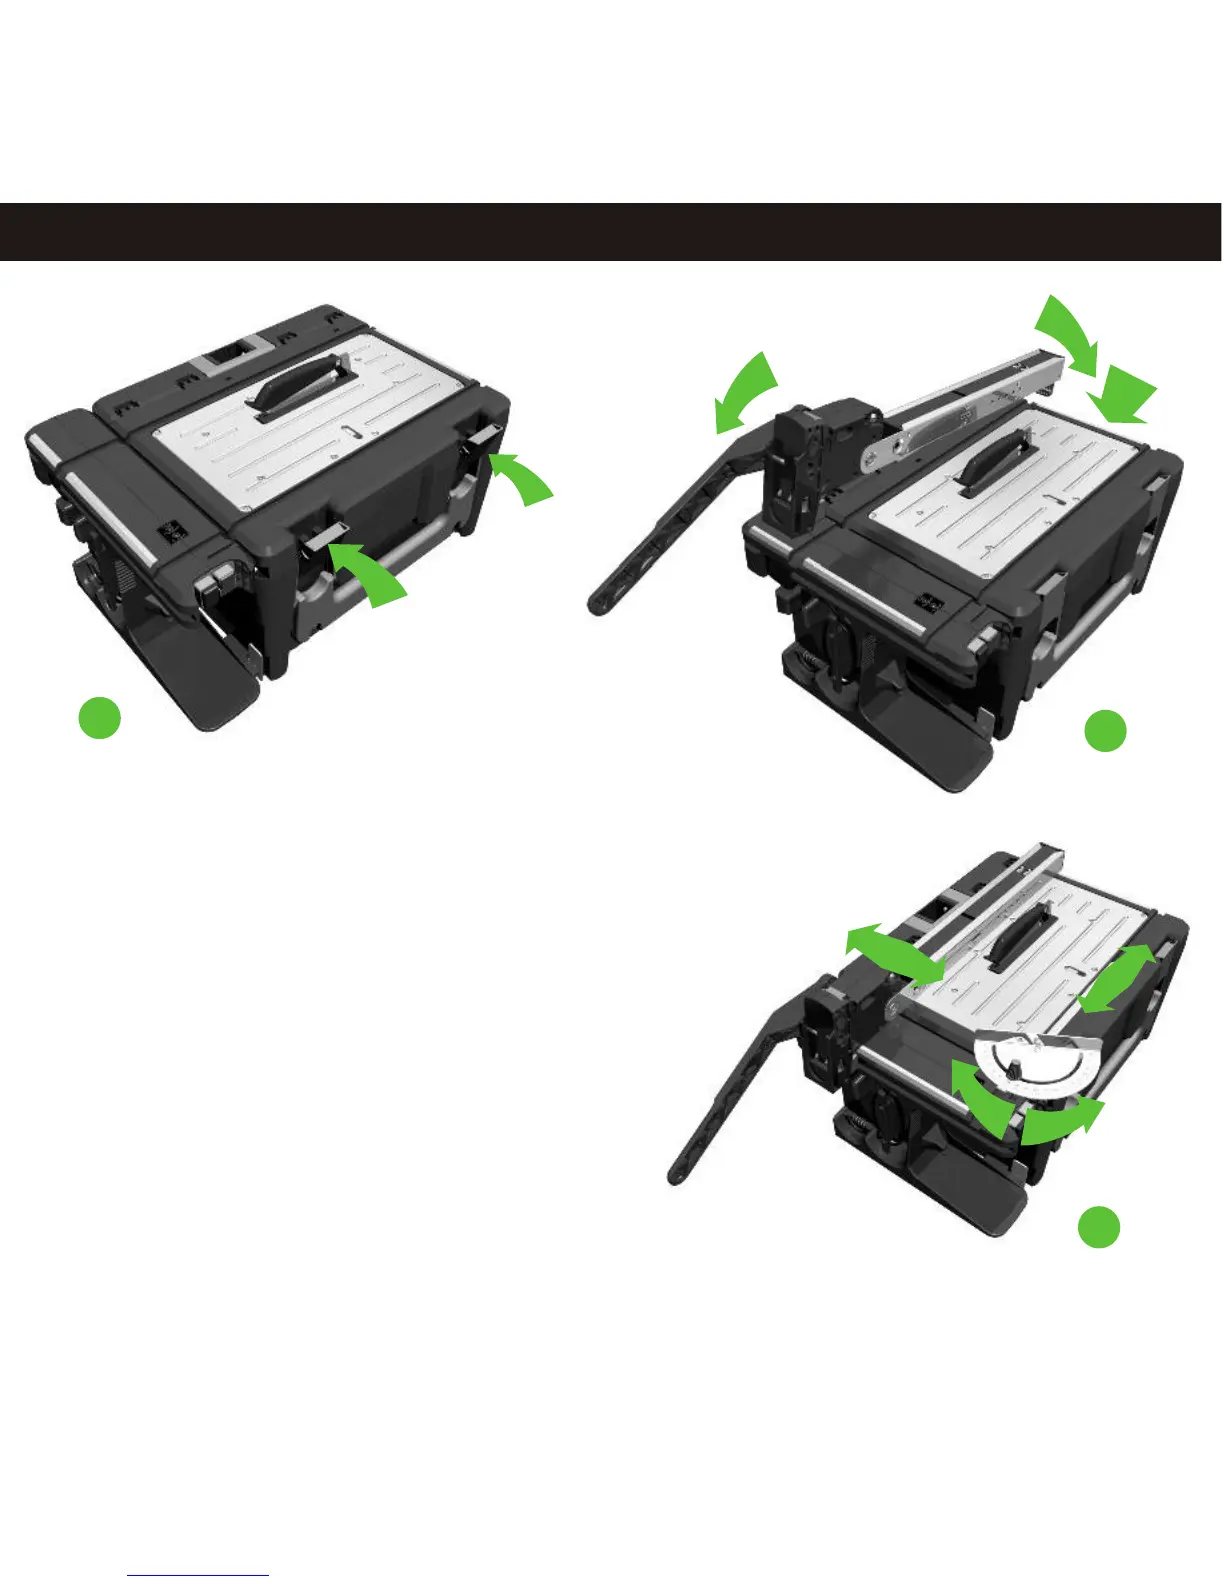
Table Saw - Assembly
10.3
8. Close the lid of the case and ensure that both latches
are closed.
WARNING the Table Saw will not work unless the lid
is closed.
TO INSTALL THE FENCE:
If required the POST can be used as a parallel fence.
The post can be assembled onto the case on both sides
of the saw blade.
9. To install the fence, use the green hook, on the
bottom of the post, to latch under the case lid, pull the
fence tight towards the centre of the case. Then lower
the locking end until the fence lies parallel with the table
surface. Swing the head of the fence down and press it
down until it hooks into the groove on the charger dock.
10