Scroll Saw
1. Please also refer to 2.1 - General Safety
Instructions and 7.2 - Additional Safety Rules -
Jigsaw before using this Scroll Saw.
2. This scroll saw (model number WS1-TS01) is
only for light duty trimming and cutting. It is not
intended for heavy or industrial use.
Always wear safety glasses with side shields,
and gloves.
Do not fix the drill into the post for the drill press
function while it us still setup for Scroll Saw
function.
Use the work clamp provided to assist you to
gently hold the workpiece on the table while
cutting.
Scroll Saw - Specification
12.1
Scroll Saw - Additional Safety Rules
Specifications
Voltage: 18V
2400 RPM
Max Cutting Capacity:
Metal (10 mm)
Wood (40 mm)
No load speed:
Select the right jigsaw blade for the material be
to cut, refer to ‘7.3 - Jigsaw - Operating
Instructions’ when necessary. The maximum
blade capacity of this scroll saw is 90mm, and
maximum cutting for wood is 40mm.
Never leave the scroll saw running unattended.
Turn power OFF by pressing the RED Button
and remove the POWERhandle. Don't leave tool
until it comes to a complete stop.
Provide adequate support to the rear and sides
of the saw table for wide or long workpieces.
Keep hands away from cutting area and blade.
Do not reach around or over the blade while
blade is reciprocating.
Do not attempt to remove off cuts of material
when blade is moving. Never attempt to free a
stalled saw blade without first turning the saw
OFF.
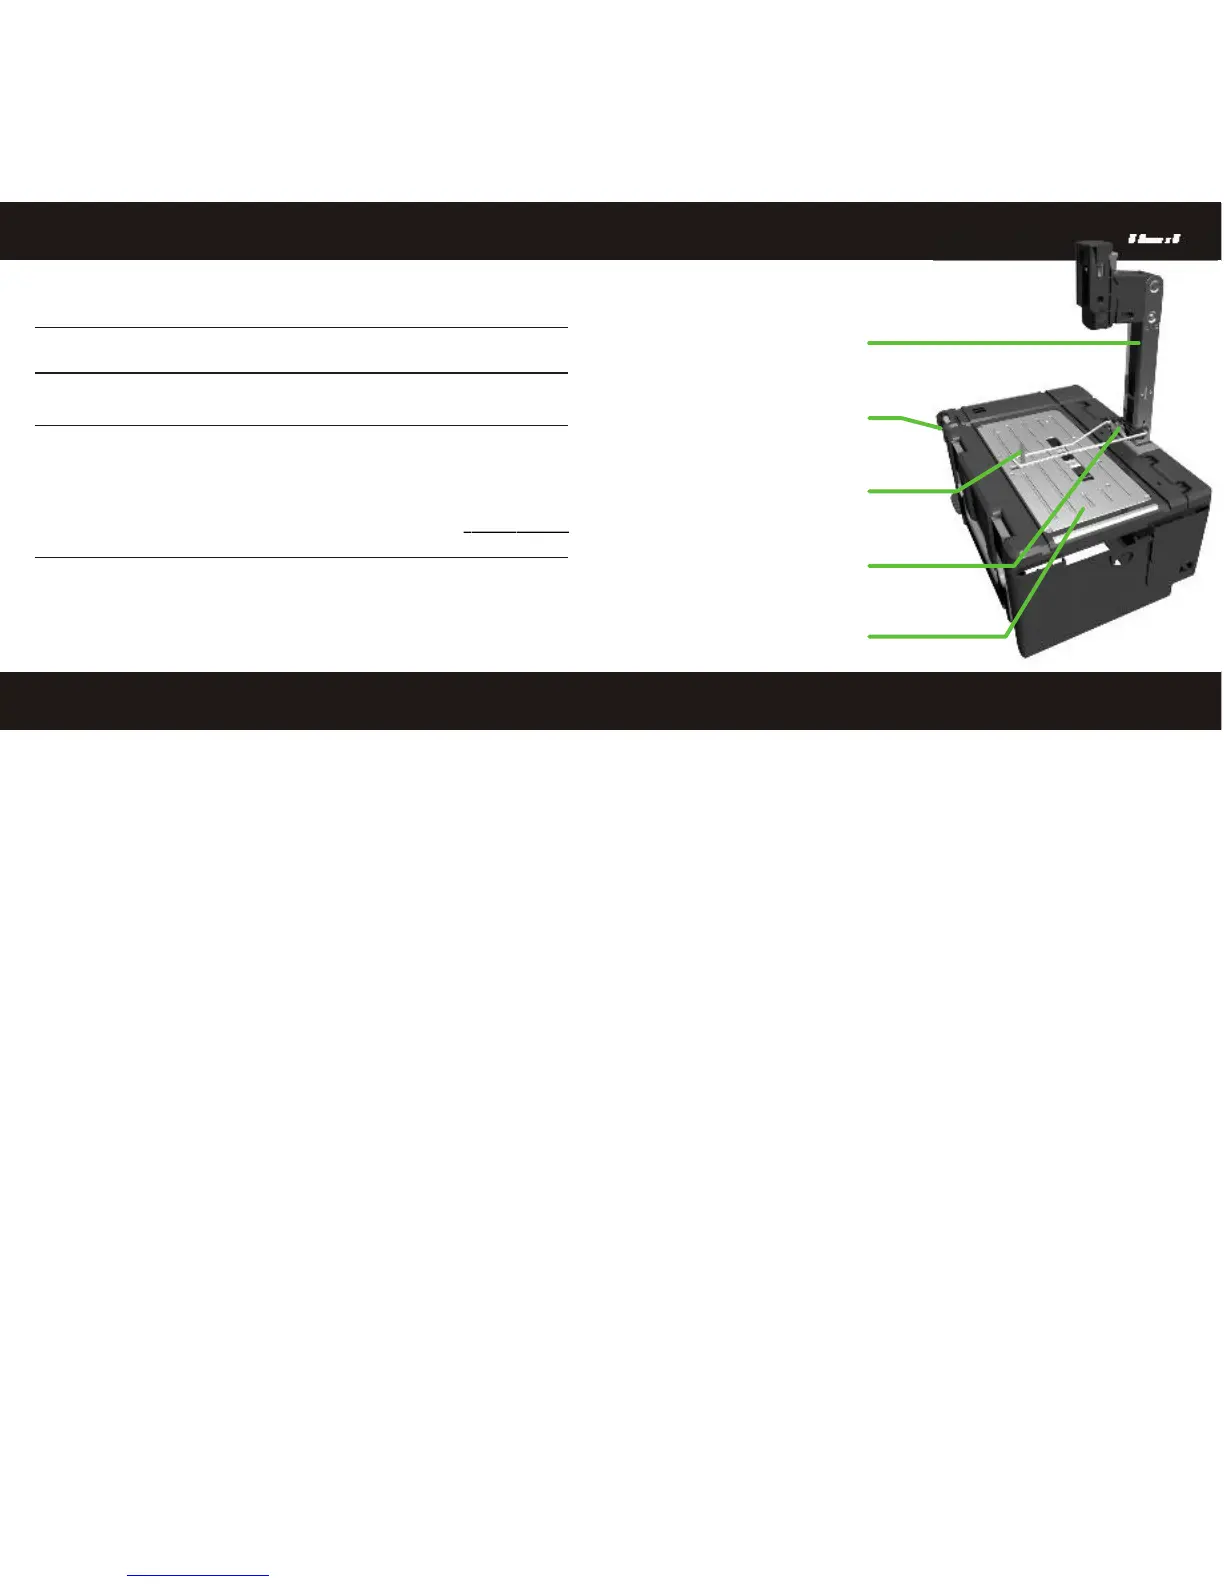
12.2
1. Open case lid and remove
the all the tools and the carry
tray. Take the jigsaw in your left
hand and push the rear of the
sole plate into the pocket on the
bottom of the case lid.
2. Slide the product lock ,
and rotate the front of the
jigsaw into position. When the
sole of the jigsaw is fully in
contact with the metal work
surface release the product
lock. Ensure that the product
lock is fully returned to the left.
3. Remove the internal plug
from its storage area, ensuring
that the cable is free from its
hooks.
4. Slide the internal plug onto
the jigsaw. Ensure that it is fully
pressed into position.
back
Scroll Saw - Assembly
12.3
1
3
2
1 2
43
Post
Operation Buttons
Saw Blade
Table Clamp
Work Surface