REV. 01
11 / 28
4.2 POSITIONING AND PARTS ASSEMBLY
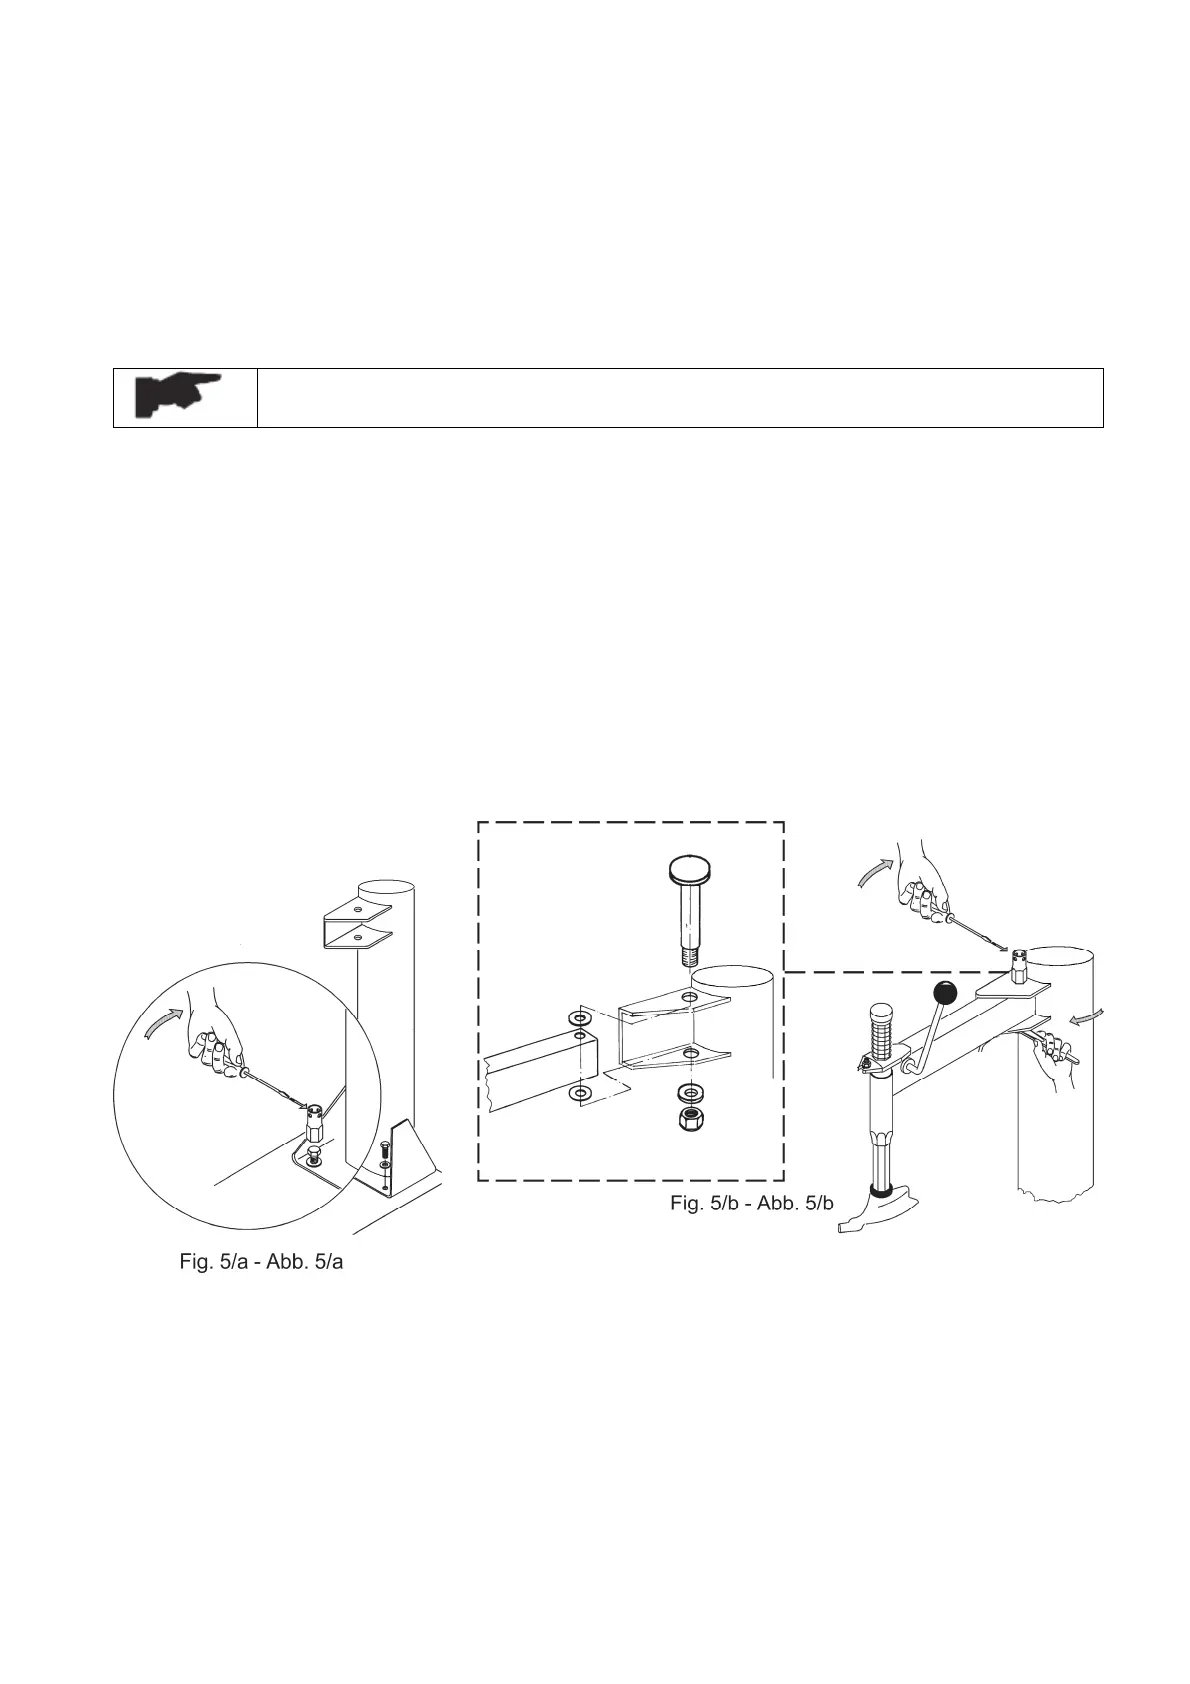
• Unscrew the pallet fixing screws and set the tire changer on the floor.
• Unscrew the 4 screws from the body, set the vertical arm into the proper seat and fix the screw
again (Fig. 5/a).
• Make sure the horizontal arm is on the vertical arm’s support and the pin is locked with nuts
and washers as shown in Fig. 5/b.
Before connecting all the power sources ALWAYS check your installations.
They must exactly correspond to those requested by the machine.
• Connect the machine to the compressed air network (Fig. 5/d)
• Mount the bead breaker arm as shown in Fig. 5/e:
- Set the arm “a” into the proper seat, set the screw into the hole and screw the nut
WITHOUT TIGHTENING.
- Set the pivot pin “b” into the hole on the arm and let the cylinder’s shaft pass through
the pin’s hole. Screw two nuts WITHOUT TIGHTENING.
- Set the spring by hooking it at the indicated points.
• Screw the bead breaker arm’s screw as indicated in Fig 5/f
• Screw the nut as indicated in Fig 5/g
 Loading...