Page 10 @+-*)/93='91<*A,/()'+=(B*4</1(/*91<<*CDEEEDE!!DF#"#6 Item 69724
GH@;IJ KL;MHINKO PHNOI;OHOQ;G;IRL
K4/-1)'=8*N=()-,9)'+=(
*M/1>*)3/*;OINM;*NPLKMIHOI*GH@;IJ*NO@KMPHINKO*(/9)'+=*1)*)3/*0/8'=='=8*
+7*)3'(*:1=,1<*'=9<,>'=8*1<<*)/^)*,=>/-*(,03/1>'=8(*)3/-/'=*0/7+-/*(/)*,4*+-*
,(/*+7*)3'(*4-+>,9)6**N=(4/9)*)++<*0/7+-/*,(/B*<++['=8*7+-*>1:18/>B*<++(/B*1=>*
:'(('=8*41-)(6**N7*1=]*4-+0</:(*1-/*7+,=>B*>+*=+)*,(/*)++<*,=)'<*-/41'-/>6
I++<*G/)*R4
IK*LM;&;OI*G;MNKRG*NOZRMJ*@MKP*HQQNW;OIHV*KL;MHINKO2*
Q<+(/*1<<*&1<_/(B*>/)193*)3/*1'-*(,44<]B*(17/<]*>'(931-8/*1=]*-/('>,1<*1'-*4-/((,-/*'=*)3/*
)++<B*1=>*9<+(/*1<<*&1<_/(*181'=*0/7+-/*4/-7+-:'=8*1=]*4-+9/>,-/*'=*)3'(*(/9)'+=6
IK*LM;&;OI*G;MNKRG*NOZRMJ2*
W+*=+)*1>\,()*+-*)1:4/-*.')3*1=]*9+=)-+<*+-*9+:4+=/=)*'=*1*.1]*=+)*(4/9'7'91<<]*/^4<1'=/>*.')3'=*
)3'(*:1=,1<6**N:4-+4/-*1>\,():/=)*91=*-/(,<)*'=*)++<*71'<,-/*+-*+)3/-*(/-'+,(*31a1->(6
H0-1('_/*G/</9)'+=
The type of abrasive selected effects the time
required to blast clean a given surface area.
Particularly for large sueadrfaces, test one or more of the
following abrasives to determine which is most effective:
a. Silicon Carbide
b. Aluminum Oxide
c. Glass Beads
d. Walnut Shells
SHMONOTc**IK*LM;&;OI*G;MNKRG*
NOZRMJ2**W+*=+)*,(/*(1=>*+-*+)3/-*0<1()'=8*
:1)/-'1<(*)31)*9+=)1'=*9-]()1<<'=/*('<'916
O+)/2**Q3/9[*)+*/=(,-/*)3/*10-1('_/(*1-/*>-]*
1=>*9</1=*(+*)31)*)3/]*>+*=+)*9<+8*)3/*,=')6
O+)/2 The Nozzle size depends on grit of abrasive used.
The larger sizes are best suited to glass
beads and walnut shells, while smaller sizes
are best suited for fine aluminum oxide.
Change the nozzle as needed to suit the abrasive.
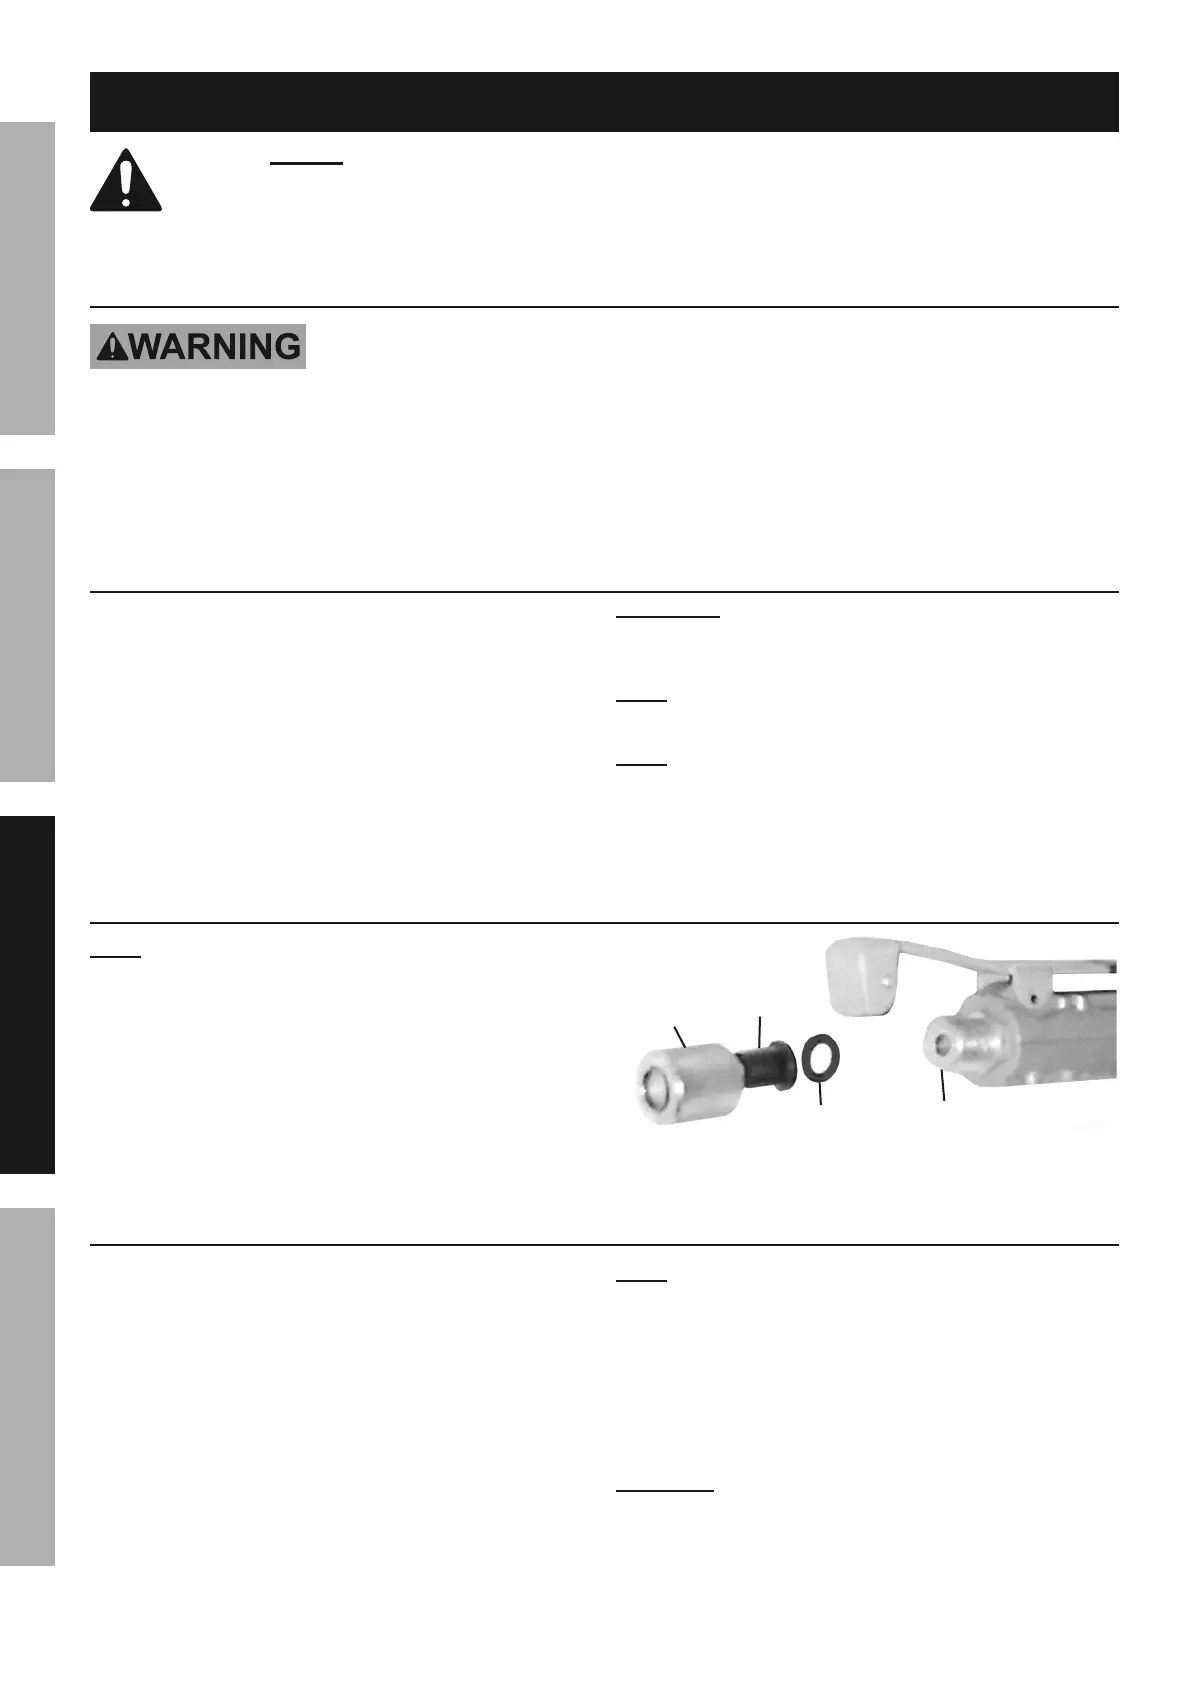
O+aa</*G/</9)'+=
O+)/2 Depending on the size of the abrasive,
install the proper size Nozzle onto the Blast Gun.
1. Unscrew and remove the Nozzle Cap Nut.
2. Position the Nozzle Gasket against the Adapter.
3. Position the proper Nozzle against
the Nozzle Gasket.
4. Screw the Nozzle Cap Nut back onto the Adapter
to secure the Nozzle Gasket and Nozzle in place.
O+aa</*
Q14*O,)
O+aa</*
T1([/)
H>14)/-
O+aa</
@'8,-/*W
V+1>'=8*H0-1('_/
1. S/1-*4-+)/9)'_/*8/1-*'=9<,>'=8*1*
ONKGYD144-+_/>*-/(4'-1)+-6
2. Close the Air Valve, Abrasive Valve,
then the Throttle Valve.
3. Open the Safety Valve to make sure tank
is not pressurized. Check the Pressure
Gauge to make sure it reads ″0″ PSI.
4. Remove Filler Cap.
5. Insert Funnel into Tank and pour in
abrasive (up to 3/4 full). W+*=+)*7'<<*
:+-/*)31=*e5%*+7*)3/*I1=[6
O+)/2 If humidity in your region is
90% or more, only fill the tank halfway and
check the Water Trap more frequently.
6. Re-attach Filler Cap securely.
7. Turn on the compressor and set the
regulator to the pressure recommended
for this Blaster (60-125 PSI).
QHRINKOc**W+*=+)*/^9//>*C$F*LGN6