Do you have a question about the Central Pneumatic 94734 and is the answer not in the manual?
Read this material before using the product to prevent serious injury. Save this manual.
Keep work area clean, well-lit, and free from explosive atmospheres. Keep bystanders away.
Ensure proper grounding, avoid wet conditions, protect power cord, and do not use extension cords.
Stay alert, dress properly, avoid accidental starting, maintain balance, and use safety equipment.
Use the correct compressor for the application. Do not force pressure. Ensure proper operation.
Service or maintenance must be performed only by qualified repair personnel using identical parts.
Fill with 30-weight non-detergent oil to the correct level and unscrew the oil fill cap.
Use eye/ear protection, ensure tool compatibility, disconnect for service, avoid direct air jets.
Inspect safety valve daily, do not alter it, do not readjust pressure switch, drain tank daily.
Prevent tank explosion by avoiding modifications. Keep hands away from moving parts.
Use approved air hoses and never plug into an electrical outlet while on a wet surface.
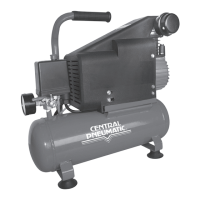
Check all parts upon unpacking. The oil fill plug is removed as a reminder to add oil.
Fill the compressor with 7.8 ounces of 30-weight non-detergent oil, checking level with the dipstick.
Install air filter assembly if used. Connect air hose to compressor output using quick couplers.
Verify settings, plug in, turn power switch ON, allow pressure to build to 80 PSI before use.
Automatic pressure switch controls operation. Avoid adjusting pressure levels to prevent motor stress.
Open the Air Flow Valve to the middle position for desired air output pressure.
Check oil level before each use, clean air filter every 50 hours, drain tanks after each use.
Check pressure switch, circuit breaker, power, voltage, or pressure settings to resolve issues.
Check for extension cord use, defective motor capacitor, or defective motor.
Avoid extension cords, check fuse size, ensure dedicated circuit, and verify voltage.
Check for loose bolts, ensure unit is level, or address motor seizure due to low oil.
Reduce air usage, check for tank leakage, or replace broken valves.
Drain water from the tank to resolve excessive moisture at the air outlet.
One year for tank, 90 days for other parts. Excludes misuse, abuse, accidents, and lack of maintenance.
Return product with proof of purchase and complaint explanation for repair, replacement, or refund.
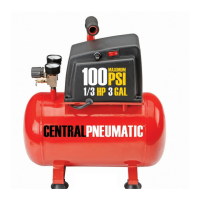
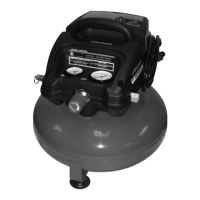
| Horsepower | 2 HP |
|---|---|
| Tank Size | 8 Gallons |
| Maximum Pressure | 125 PSI |
| Voltage | 120V |
| Type | Portable |
| SCFM at 90 PSI | 3.0 SCFM |
| Amperage | 15 Amps |
| Air Delivery @ 40 PSI | 4.0 CFM |
| Air Delivery @ 90 PSI | 3.0 CFM |