7
Concrete Requirements
All posts require concrete to be poured around the post base.
All hinge and latch posts require reinforcement using aluminum
post inserts high enough to attach gate hardware (or concrete
and rebar).
• Avoid “soupy" concrete mix as it will make concrete weak
Concrete Usage for Posts
Post Size
Fence
Height
End Line
or Corner
Posts
End Posts
Filled with
Concrete Gate Posts
4x4 3' 100 lbs 145 lbs 160 lbs
4x4 4' 100 lbs 155 lbs 175 lbs
5x5 5' 140 lbs 235 lbs 270 lbs
5x5 6' 140 lbs 240 lbs 285 lbs
5x5 2 rail 140 lbs 210 lbs 240 lbs
5x5 3 rail 140 lbs 230 lbs 260 lbs
5x5 4 rail 140 lbs 250 lbs 280 lbs
Note: Determine total pounds of concrete required based on
number of posts required. Divide by 60 or 80 lb. bag.
Figures based on 4x4 hole=10", 5x5 hole=12", both 30" deep.
• Check local codes for frost line depth and regulations
Solidify Posts - Extruded
Gate hinge and latch posts as well as end posts can be
solidified by using an aluminum gate post stiffener inside each
post or by filling post with concrete and rebar.*
Rebar Separator Clips (for use with
rebar and concrete method)
Use 2 clips for each post. Position clips on the rebar
approximately 6" down from top and 6" up from bottom.
Clips are located in gate hardware box.
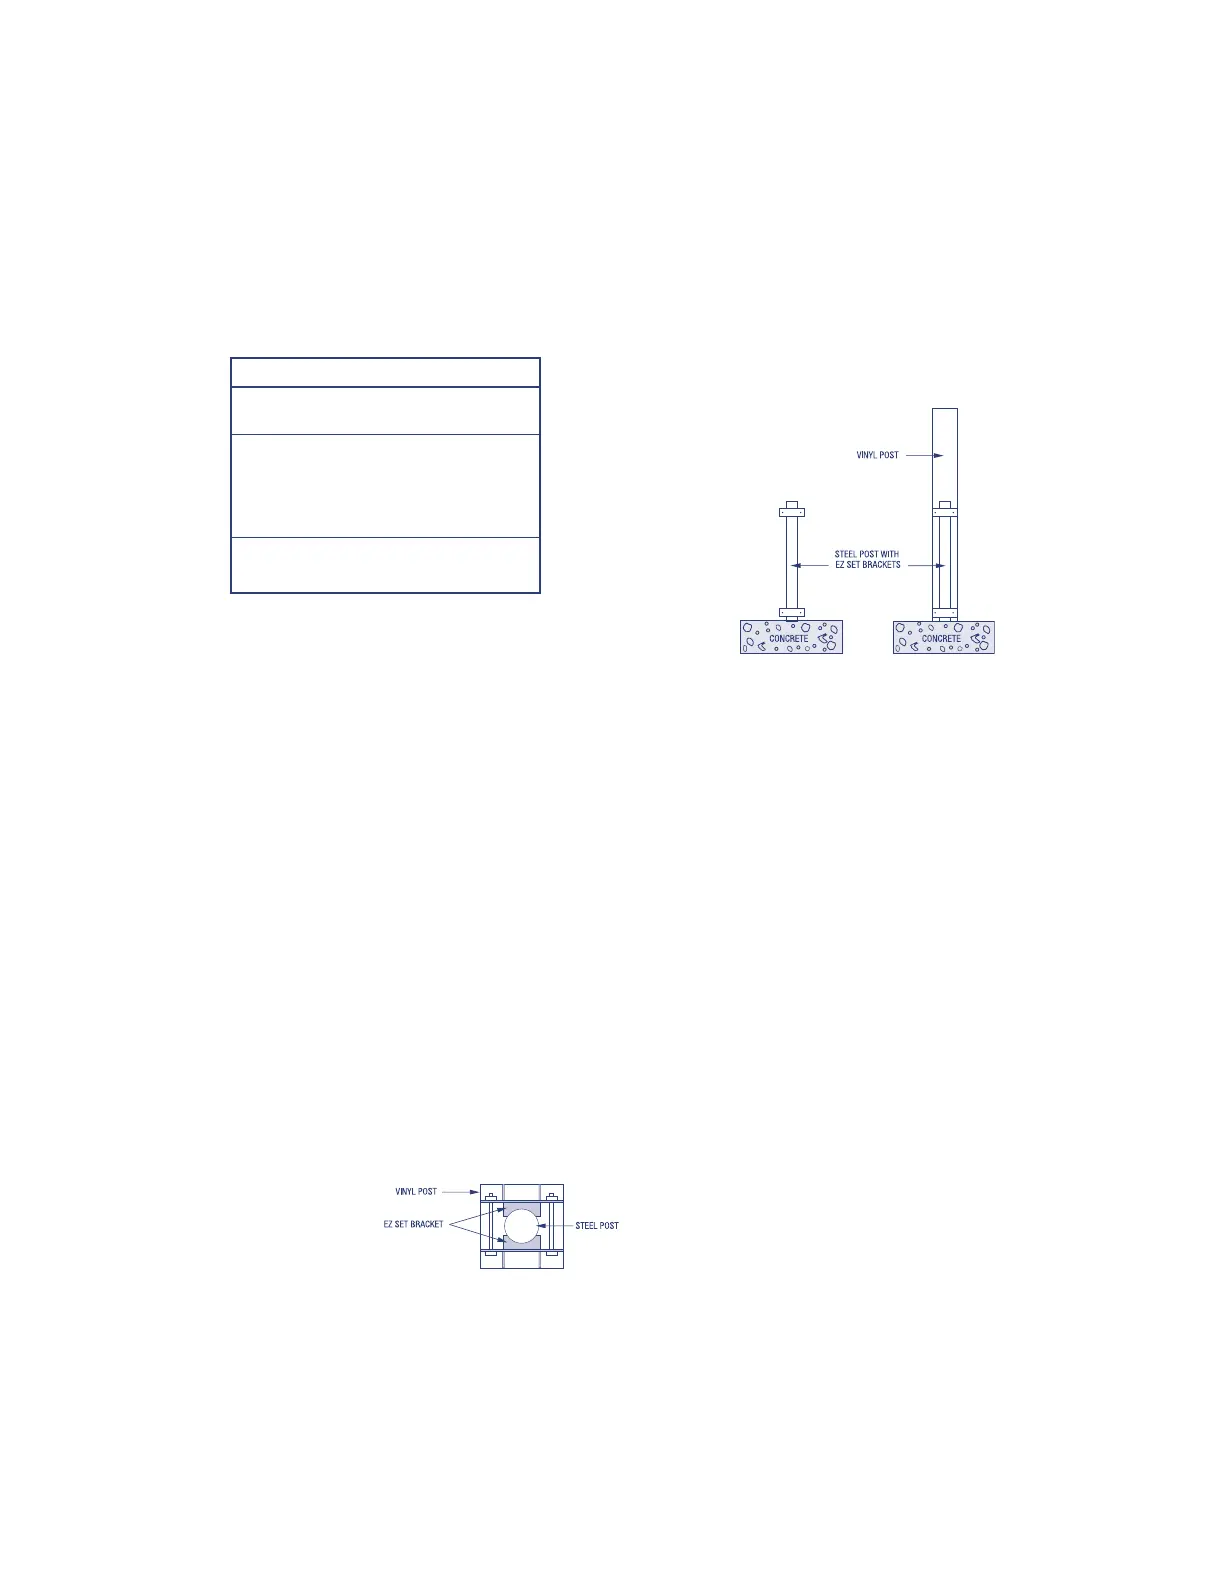
Alternative Fence Installations
For fence systems on concrete, use steel posts. On concrete
applications fence may be installed with 1-5/8" (4 x 4 post) or
1-7/8" (5 x 5 post) galvanized steel post set in hydraulic
cement. EZ Set bracket bolts to post as a spacer.
For wall mounting, use wall mount brackets.
EZ Set Bracket Installation Instructions
on Concrete
• Core drill hole into concrete
• Minimum 4" deep
• Post centers will remain the
same as normal installation
• Rails will have to be cut
down to fit between steel post
• Fill hole with hydraulic cement. Insert steel post
For 4" vinyl post, set 1 5/8" OD steel post
For 5" vinyl post, set 1-7/8" OD steel post
• Steel post should go at least halfway up the vinyl post
• Put EZ Set brackets together and slide over steel post
• Place one bracket on steel post below where the
routed hole will be on your vinyl post
• Place other bracket just below the top of your steel post
• Slide vinyl post over steel post with EZ Set brackets
Care of the Product
• Place fence components on a non-abrasive surface, such as
a drop cloth, to avoid scratching
• Protect components during transportation to your
installation site to avoid damage
• Avoid excessive force when assembling components
• Avoid overtightening fasteners
• Clean fence with mild detergent and a plastic scouring pad.
For more stubborn stains, use a cleanser such as
Soft Scrub
®
or cleaning solution listed on warranty
• Concrete is easily washed off when wet, but can also be
removed when dry
Gates - Extruded
• Specific gate hardware instructions included with
individual components
• Gate(s) must be assembled prior to fence to accurately
establish space between hinge and latch posts and
height of fence
• Gate requires 2" clearance under bottom rail on
level ground
• When building gates in the field, ensure that 1/4" drain holes
are drilled in bottom rail
• Determine gate swing direction to assist in ground
clearance and positioning
• Steel channel not required in bottom rail of gate
General Information
Be sure to call underground (811) prior to digging.
Installation techniques may vary in different regions; be sure to check local requirements prior to installation.
* Caution – In climates that experience freeze-thaw cycles, this installation method could result in post cracking over time. This would not be covered by the warranty.