Do you have a question about the Challenge Champion 305 XG and is the answer not in the manual?
Essential safety guidelines and warnings for operating the machine safely.
Steps to safely disconnect and secure electrical power before maintenance.
Explains the meaning of various warning symbols found on the machine.
Check shipment for damage and missing items against the packing list.
Instructions for removing the machine from its shipping container and skid.
Procedures for safely lifting and moving the machine using appropriate equipment.
Guidance on moving the machine using a forklift or pallet jack.
How to clean the machine surfaces using appropriate solvents and waxes.
Steps for attaching extension tables and securing safety shields.
Procedure for removing the hydraulic power unit for narrow doorways.
How to check and maintain the hydraulic fluid level in the reservoir.
Instructions for connecting the machine to the electrical power supply.
Detailed steps for connecting a three-phase power source to the cutter.
Detailed steps for connecting a single-phase power source to the cutter.
How to turn the machine on and off using the main power switch.
How to operate the table light using its switch and the main power.
Procedure to preset the backgauge position every time power is turned on.
Understanding the backlash indicator and approaching positions from behind.
How to use the thumb screw to lock the backgauge position.
Using the soft key to switch display between inches and millimeters.
Step-by-step guide on how to perform a cut using the machine.
How to manually shut off the hydraulic motor.
How to use the jogging aid for loading and aligning stock safely.
Using the low-pressure clamping feature before the cut cycle.
How to turn the air table on and off using a soft key.
How to adjust the clamping pressure for different stock types.
Steps to re-calibrate the backgauge if its position is inaccurate.
Using the knife down mode for service technicians to change the knife.
How electric eyes prevent reaching into the cutting area during operation.
Storing and using the false clamp plate for pressure-sensitive jobs.
How to turn the machine on and off using the main power switch.
How to operate the table light using its switch.
Initial display information and startup prompts after powering on.
Step-by-step guide on how to perform a cut using the machine.
How to use the jogging aid for loading and aligning stock safely.
How to adjust the clamp pressure using soft keys.
Using the low-pressure clamping feature before the cut cycle.
Understanding and resetting machine alarms for knife changes and lubrication.
How electric eyes prevent reaching into the cutting area during operation.
Storing and using the false clamp plate for pressure-sensitive jobs.
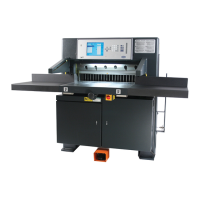
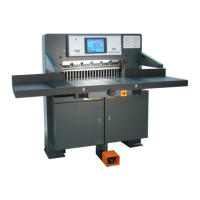
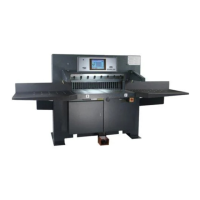
Overview of the display panel and its components.
Explanation of the function of various keys on the machine's console.
Manually positioning the backgauge using the glide control.
Toggling the display between inches, fractions, and millimeters.
Turning the air table on and off.
Sending the backgauge to a valid position or advancing to the next cut.
Using the push-out key to remove paper without reaching under the clamp.
Clearing error messages and the current entry line.
Selecting items in maintenance mode and processing data.
Entering fractions combined with whole numbers.
Understanding the function of the eight soft keys labeled A through H.
Using arrow keys for navigation and selection on the display screens.
Adjusting display screen contrast using control buttons.
Adjusting display contrast using specific procedures.
Manually controlling the backgauge using glide control or a knob.
Manually positioning the backgauge using the glide control.
Controlling the backgauge using the knob at the front of the table.
Ensuring accurate cuts by bringing the backgauge to position from the rear.
Positioning the backgauge using pinpoint control or entering values.
Performing simple math calculations within the send mode.
Entering fractions using the priority add key.
Making a series of cuts with the backgauge moving a specified distance.
Accessing settings for language, parameters, diagnostics, and knife adjustment.
Selecting the display language for machine messages.
Adjusting machine parameters like false clamp, time-out, push-out, and accuracy.
Configuring the false clamp plate setting for older serial numbers.
Configuring the false clamp plate setting for newer serial numbers.
Setting the idle time before screen saver and motor turn off.
Enabling or disabling the automatic push-out feature.
Adjusting the backgauge accuracy based on measured paper length.
Resetting knife and lube alarms and setting knife alarm values.
Accessing error codes, sensor data, and memory clearing for troubleshooting.
Recalling the last five error messages for diagnostics.
Checking the status of machine inputs and outputs for troubleshooting.
Resetting machine memory, which erases all cut positions.
Procedure for service technicians to change the knife position.
Programming and managing up to 99 jobs, each a sequence of programmed cut positions.
Preventing or allowing editing of programmed jobs.
Duplicating an existing job to create a new one.
Deleting programmed jobs from the machine's memory.
Steps to create a new job, including naming and entering send values.
Methods for entering desired cut positions or send values for a job.
Setting a position that prevents cutting and aids in loading.
Entering rotation indicators for specific cuts.
Setting specific clamp pressure for each cut within a job.
Recording current backgauge positions as send values for a job.
Automatically creating send values based on sheet sizes.
Using a feature to automatically create jobs for label cutting.
Exiting the current job or returning to the job mode screen.
Modifying programmed jobs, including names and send values.
Changing the name of an existing programmed job.
Modifying the programmed cut positions within an existing job.
Executing a pre-programmed job for automated cutting.
Quitting an open job and returning to the job mode or send mode.
A practical example of programming a job for two specific cuts.
Step-by-step instructions for safely removing the cutting knife.
Step-by-step instructions for safely installing a new or re-sharpened knife.
Specific procedures for using the shielded knife lifter.
Instructions for installing and removing the false clamp plate.
Essential safety precautions and advice for knife maintenance.
Identifying signs that indicate the blade needs sharpening for optimal cut quality.
Factors influencing the choice of bevel angle for the cutting knife.
Tips for shops with limited knife sets and choosing bevel angles.
Procedures for maintaining knives, including removing oil and storing them properly.
Overview of the hydraulic system powering cutting and clamping operations.
List of recommended hydraulic oils and their distributors.
Procedure for safely changing the hydraulic oil in the machine.
Adjusting the line lights to create a visible cutting line beam.
Adjusting the clamp pressure using the manual pressure reducer.
Routine cleaning procedures for machine components.
Cleaning the hydraulic fan and tank.
Maintaining the cutter table for smooth paper movement and preventing oxidation.
Cleaning the machine's control console.
Cleaning the machine base and being mindful of warning labels.
| Brand | Challenge |
|---|---|
| Model | Champion 305 XG |
| Category | Paper Cutters |
| Language | English |