EasyManua.ls Logo

Chamberlain 1240R - 1/4HP User Manual

Chamberlain 1240R - 1/4HP
40 pages
To Next Page IconTo Next Page
Page #1 background imageLoading...
Page #1 background image
The Chamberlain Group, Inc.
845 Larch Avenue
Elmhurst, Illinois 60126-1196
www.liftmaster.com
GARAGE DOOR OPENER
Model Series 1200
For Residential Use Only
®
Owner’s Manual
Please read this manual and the enclosed safety materials carefully!
Fasten the manual near the garage door after installation.
The door WILL NOT CLOSE unless the Protector System
®
is connected and
properly aligned.
Periodic checks of the opener are required to ensure safe operation.
The model number label is located on the front panel of your opener.
®
Model 1256R - 1/2HP
Model 1246R - 1/3HP
Model 1255R - 1/2HP
Model 1245R - 1/3HP
Model 1240R - 1/4HP
Question and Answer IconNeed help?

Do you have a question about the Chamberlain 1240R - 1/4HP and is the answer not in the manual?

Chamberlain 1240R - 1/4HP Specifications

General IconGeneral
Horsepower1/4 HP
Drive TypeChain Drive
Max Door Weight350 lbs
Safety SensorsYes
Max Door Height7 ft
Remote ControlYes
Safety FeaturesAuto-reverse mechanism

Summary

Preparing Your Garage Door

Tools Needed for Installation

Lists essential tools required for the assembly and installation process.

Planning Your Installation

Sectional Door Installation Planning

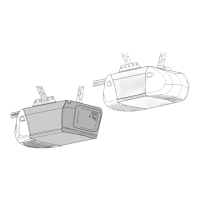
Details planning considerations for sectional garage doors.

One-Piece Door Installation Planning

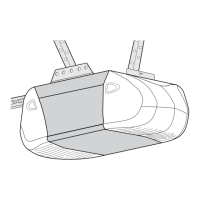
Outlines planning steps specific to one-piece garage doors.

Opener Carton Inventory

Opener Hardware Inventory

ASSEMBLY STEP 1: Fasten Rail to Motor Unit

ASSEMBLY STEP 2: Attach Chain Spreader and Re-install Chain

ASSEMBLY STEP 5: Tighten the Chain

INSTALLATION: IMPORTANT INSTRUCTIONS

INSTALLATION STEP 1: Determine Header Bracket Location

Sectional Door Bracket Location

How to determine header bracket placement for sectional garage doors.

One-Piece Door Bracket Location

Steps for determining header bracket placement for one-piece doors.

INSTALLATION STEP 2: Install the Header Bracket

Wall Header Bracket Installation

Instructions for mounting the header bracket to a wall.

Ceiling Header Bracket Installation

Guidelines for securing the header bracket to the ceiling.

INSTALLATION STEP 3: Attach Rail to Header Bracket

INSTALLATION STEP 4: Position the Opener

Positioning for Sectional/One-Piece Doors with Track

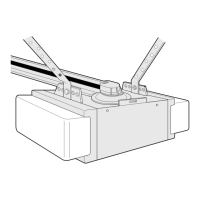
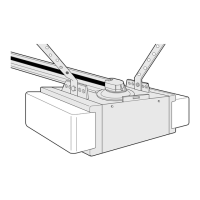
How to position the opener for doors with a track.

Positioning for One-Piece Doors Without Track

Guidance for positioning the opener on doors without a track.

INSTALLATION STEP 5: Hang the Opener

INSTALLATION STEP 6: Install the Door Control

INSTALLATION STEP 7: Install Light and Lens

INSTALLATION STEP 8: Attach Emergency Release Rope and Handle

INSTALLATION STEP 9: Electrical Requirements

INSTALLATION STEP 10: Install The Protector System®

Safety Reversing Sensor Information

Details on the safety reversing sensor's function, installation, and alignment.

INSTALLING THE BRACKETS

Garage Door Track Bracket Installation

Mounting sensor brackets to the garage door track.

Wall Mounted Bracket Installation

Installing sensor brackets directly onto the garage wall.

Floor Mounted Bracket Installation

Securing sensor brackets to the garage floor.

MOUNTING AND WIRING SAFETY SENSORS

Aligning the Safety Sensors

Procedures for aligning the safety reversing sensor eyes for proper operation.

INSTALLATION STEP 11: Fasten the Door Bracket

Sectional Door Bracket Fastening

Methods for attaching the door bracket to sectional doors.

One-Piece Door Bracket Fastening

Securing the door bracket for one-piece garage doors.

INSTALLATION STEP 12: Connect Door Arm to Trolley

Connecting Arm for Sectional Doors

Steps to connect the door arm to the trolley for sectional doors.

Connecting Arm for One-Piece Doors

How to attach the door arm to the trolley for one-piece doors.

ADJUSTMENT STEP 1: Adjust Travel Limits

How and When to Adjust Travel Limits

Guide on adjusting UP and DOWN travel limits for accurate door stop points.

ADJUSTMENT STEP 2: Adjust Force Settings

How and When to Adjust Force Settings

Procedures for adjusting the force required to open and close the door.

ADJUSTMENT STEP 3: Test Safety Reversal System

ADJUSTMENT STEP 4: Test Protector System®

OPERATION

Important Safety Instructions for Operation

Critical safety warnings and guidelines for operating the garage door opener.

Using Your Garage Door Opener

How to use the opener with remote controls and wall controls.

Using Wall-Mounted Door Control

Instructions for operating the opener via the wall control panel.

Opening the Door Manually

Procedure for manually opening or closing the garage door.

Care of Your Opener

Opener Limit and Force Adjustment Considerations

Factors affecting limit and force settings, and their adjustments.

Opener Maintenance Schedule

Recommended maintenance tasks for monthly, bi-annual, and annual checks.

Remote Control Battery Replacement

Guidance on replacing the battery in the remote control transmitter.

Troubleshooting Opener Problems

Common issues and solutions for opener operation, including problems with door movement and lights.

PROGRAMMING FEATURES

Add or Reprogram Remote Control

Steps to program or re-program remote controls to operate the opener.

Erase All Remote Codes

How to clear all previously programmed remote and keyless entry codes.

Programming 3-Button Remotes

Specific instructions for programming 3-button remotes.

Keyless Entry PIN Management

Guide for setting up or modifying the PIN for the keyless entry system.

Opener Parts Identification

Rail and Installation Parts

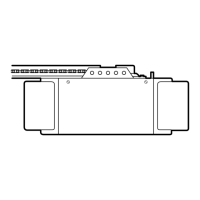
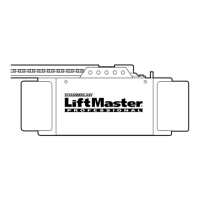
Lists and illustrates parts for the opener rail and installation.

Motor Unit Assembly Parts

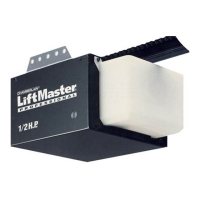
Diagrams and part numbers for the motor unit components.

Available Accessories

Lists optional accessories to enhance opener functionality.

Service and Warranty Information

LiftMaster Service Contact Information

Details on how to contact LiftMaster for installation and service support.

How to Order Repair Parts

Information required and steps to order replacement parts for the opener.

Limited Warranty Overview

Summary of the product's one-year limited warranty terms and conditions.

Limited Motor Warranty Details

Specific warranty periods for the opener's motor based on model.

Related product manuals