EasyManua.ls Logo

Chamberlain Security+ 1215E FS2 User Manual

Chamberlain Security+ 1215E FS2
80 pages
To Next Page IconTo Next Page
Page #1 background imageLoading...
Page #1 background image
The Chamberlain Group, Inc.
845 Larch Avenue
Elmhurst, Illinois 60126-1196
Owner’s Manual
Please read this manual and the enclosed safety materials carefully!
Fasten the manual near the garage door after installation.
Periodic checks of the opener are required to ensure safe operation.
The model number label is located on the front panel of your opener.
®
GARAGE DOOR OPENER
For Residential Use Only
Model 1215E FS2
Model 1225E FS2

Table of Contents

Question and Answer IconNeed help?

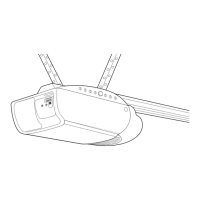
Do you have a question about the Chamberlain Security+ 1215E FS2 and is the answer not in the manual?

Chamberlain Security+ 1215E FS2 Specifications

General IconGeneral
BrandChamberlain
ModelSecurity+ 1215E FS2
CategoryGarage Door Opener
LanguageEnglish

Summary

Introduction to Safety Symbols

Safety Symbol and Signal Word Review

Explains the meaning of safety symbols and signal words used in the manual.

Preparing Your Garage Door for Installation

Safety Warnings and Cautions

Safety warnings and cautions for preparing the garage door before installation.

Required Tools for Installation

Lists the tools required for assembly, installation, and adjustment.

Installation Planning

Sectional Door Installation Considerations

Specific planning considerations for sectional garage doors.

One-Piece Door Installation Considerations

Planning considerations specific to one-piece garage doors.

Safety Warning: Garage Door Gap

Safety warning regarding the garage door gap and safety reversal system.

Gate Installation Planning

Gate Installation Safety Warnings

Safety warnings for gate installations and operation.

Package Contents and Hardware

Carton Inventory

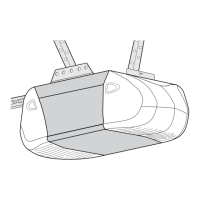
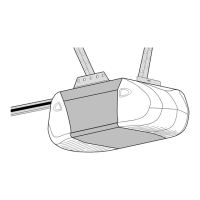
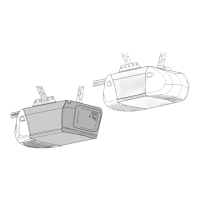
Lists the parts included in the garage door opener cartons.

Hardware Inventory

Details assembly and installation hardware with quantities.

Assembly Steps: Rail and Trolley

Step 1: Assemble Rail (Sectional/One-Piece)

Instructions for assembling the rail and attaching the chain pulley bracket for specific door types.

Step 1: Assemble Rail (Sliding/Swinging Gates)

Instructions for assembling the rail and attaching the chain pulley bracket for gate types.

Step 2: Install Trolley (Sectional/One-Piece)

Steps to install the trolley for sectional and one-piece doors.

Step 2: Install Trolley (Sliding/Swinging Gates)

Steps to install the trolley for sliding and swinging gates.

Assembly Steps: Rail to Motor Unit

Step 3: Fasten Rail to Motor Unit

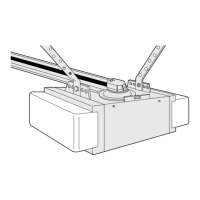
Steps to connect the rail to the motor unit.

Caution on Fastener Usage

Caution regarding using specific bolts for fastening the rail to the motor unit.

Assembly Steps: Chain and Sprocket Cover

Step 4: Installing the Chain

Detailed steps for installing the chain onto the opener mechanism.

Step 4: Attaching Sprocket Cover (Model 1215E)

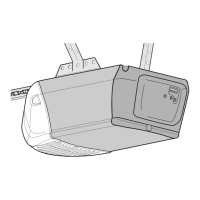
Instructions for attaching the sprocket cover for Model 1215E.

Step 4: Safety Warning for Sprocket Cover

Safety warning about keeping fingers clear of the sprocket cover.

Assembly Steps: Chain and Sprocket Cover (Continued)

Step 4: Installing the Chain for Gates

Steps for installing the chain for sliding and swinging gates.

Step 4: Safety Warning for Sprocket Cover (Gates)

Safety warning about keeping fingers clear of the sprocket cover.

Assembly Step 5: Tighten the Chain

Instructions for Tightening the Chain

Instructions for tightening the chain and notes on sprocket noise.

Critical Installation Safety Warnings

Reduce Risk of Severe Injury or Death

Critical warnings to reduce the risk of severe injury or death during installation.

Installation Step 1: Header Bracket Location

Safety Warning: Header Bracket Mounting

Safety warnings about rigidly fastening the header bracket to structural support.

Installation Step 1: Header Bracket Location (One-Piece Door)

Example: Bracket Height Calculation

Example calculation for determining header bracket height for one-piece doors.

Installation Step 2: Install the Header Bracket

Wall Mount Installation Procedures

Instructions for installing the header bracket on a wall.

Ceiling Mount Installation Procedures

Instructions for installing the header bracket on a ceiling.

Installation Step 3: Attach Rail to Header Bracket

Connecting Rail to Header Bracket

Steps to connect the rail to the header bracket.

Installation Step 4: Position the Opener

Positioning Opener (Sectional/One-Piece with Track)

Instructions for positioning the opener for sectional/one-piece doors with track.

Caution: Opener Rail Placement

Caution for positioning the opener rail using a 38 mm board.

Positioning Opener (One-Piece Without Track)

Instructions for positioning the opener for one-piece doors without track.

Installation Step 5: Hang the Opener

Safety Warning: Secure Opener Mounting

Warning about securely fastening the opener to structural supports.

Installation Step 6: Install the Door Control

Safety Warnings for Door Control Installation

Safety warnings regarding electrocution and injury from closing garage doors.

Installation Steps: Lights and Emergency Release

Step 7: Install the Lights

Instructions for installing the opener lights.

Caution: Light Bulb Usage

Caution against overheating the endpanel or light socket with specific bulbs.

Step 8: Attach Emergency Release Rope

Instructions for attaching the emergency release rope and handle.

Safety: Release Rope Handling

Warnings about serious injury or death from a falling garage door.

Installation Step 9: Electrical Requirements

Safety Warnings for Wiring Installation

Warnings to prevent injury or death from electrocution or fire during wiring.

Installation Step 10: Fasten the Door Bracket

Caution: Door Reinforcement

Caution to reinforce the door inside with angle iron.

Sectional Door Bracket Installation

Steps for fastening the door bracket for sectional doors.

One-Piece Doors: Fasten Door Bracket

One-Piece Door Bracket Installation

Instructions for fastening the door bracket for one-piece doors.

Installation Step 11: Connect Door Arm to Trolley

Connecting Door Arm (Sectional Doors)

Steps to connect the door arm to the trolley for sectional doors.

One-Piece Doors: Connect Door Arm to Trolley

Connecting Door Arm (One-Piece Doors)

Steps to assemble the door arm and connect it to the trolley for one-piece doors.

Adjustment Step 1: Travel Limits

Adjusting UP and DOWN Travel Limits

Instructions for adjusting the up and down travel limits of the opener.

Safety: Travel Limits and Reversal System

Warnings about safety reversal system and travel limits adjustment.

Caution: Door Clearance During Adjustment

Caution to ensure fully open door provides adequate clearance.

Adjustment Step 2: Adjust the Force

Adjusting UP and DOWN Force Settings

Instructions for adjusting the force required to open and close the door.

Safety: Force Adjustment Guidelines

Warnings about safety reversal system and force adjustment.

Adjustment Step 3: Safety Reversal System Test

Garage Door Safety Reversal Test

Steps to test the safety reversal system for garage doors.

Gate Safety Reversal Test

Steps to test the safety reversal system for gates.

Safety Warning: Reversal System Testing

Warnings about safety reversal system testing and adjustments.

Opener Operation and Safety Instructions

General Operation Safety

Crucial safety instructions for operating the garage door opener.

Using Wall-Mounted Door Controls

Control Button Operations

Details operation of lighted and multi-function door control buttons.

Light and Lock Feature Usage

Explains how to use the opener's light and lock features.

Manual Door Opening Safety

Safety warnings and procedures for manually opening the garage door.

Opener Care, Maintenance, and Troubleshooting

Adjustments, Schedule, and Battery

Covers limit/force adjustments, maintenance schedule, and remote battery.

Troubleshooting: Opener Not Operating

Steps to diagnose why the opener does not respond to controls.

Troubleshooting Common Opener Issues

Door Operation Problems

Addresses issues like door opening/closing by itself or straining.

Power Failure and Chain Sag Guidance

Guidance for power failures and normal chain sagging.

Programming Remote Controls

Add or Reprogram a Remote Control

Instructions for programming remote controls to the opener.

Erase All Remote Control Codes

Steps to erase all stored remote control codes from the opener.

Programming Keyless Entry PIN

Change Existing Keyless Entry PIN

Instructions for changing an existing Keyless Entry PIN.

Set a Temporary Keyless Entry PIN

Instructions for setting a temporary PIN for visitors or service people.

Motor Unit Assembly Parts List

Motor Unit Components and Part Numbers

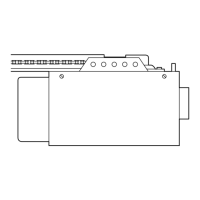
Diagrams and part numbers for the motor unit assembly components.

Optional Accessories

Overview of Available Accessories

Lists and describes available optional accessories for the opener.

Service and Support Information

LiftMaster Service Contact Information

Contact information for LiftMaster installation and service.

How to Order Repair Parts

Instructions and information required for ordering repair parts.

One-Year Limited Warranty Details

Details the one-year limited warranty for the garage door opener.

Related product manuals