EasyManua.ls Logo

Chamberlain LiftMaster Professional 1255-2R User Manual

Chamberlain LiftMaster Professional 1255-2R
36 pages
To Next Page IconTo Next Page
Page #1 background imageLoading...
Page #1 background image
The Chamberlain Group, Inc.
845 Larch Avenue
Elmhurst, Illinois 60126-1196
www.liftmaster.com
GARAGE DOOR OPENER
Models 1255-2R 1/2HP
For Residential Use Only
®
Owner’s Manual
Please read this manual and the enclosed safety materials carefully!
Fasten the manual near the garage door after installation.
The door WILL NOT CLOSE unless the Protector System
®
is connected and
properly aligned.
Periodic checks of the opener are required to ensure safe operation.
The model number label is located on the front panel of your opener.
®
Question and Answer IconNeed help?

Do you have a question about the Chamberlain LiftMaster Professional 1255-2R and is the answer not in the manual?

Chamberlain LiftMaster Professional 1255-2R Specifications

General IconGeneral
BrandChamberlain
ModelLiftMaster Professional 1255-2R
CategoryGarage Door Opener
LanguageEnglish

Summary

Introduction

Safety Symbol and Signal Word Review

Explains safety symbols and signal words used in the manual for hazard communication.

Carton Inventory

Installation Hardware

Lists all the hardware required for the installation of the garage door opener.

Assembly Steps

Attach Rail to Motor Unit

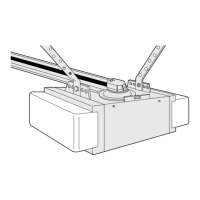
Guides on how to connect the garage door opener rail to the motor unit securely.

Attach Chain and Sprocket Cover

Details the process of attaching the chain to the sprocket and installing the protective cover.

Installation

Important Installation Instructions

Crucial safety warnings and instructions to follow before and during the installation process.

Determine Header Bracket Location

Install Header Bracket

Attach T-Rail to Header Bracket

Position the Opener

Hang the Opener

Install Door Control

Install Light and Release Handle

Install the Light

Steps for installing the light bulb and lens into the opener unit.

Attach Emergency Release Rope

How to attach the emergency release rope and handle to the trolley for manual operation.

Electrical Requirements

Install Protector System®

Install Sensor Brackets

Describes different methods for installing sensor brackets on tracks, walls, or floors.

Mount, Wire, and Align Safety Sensors

Instructions for mounting, wiring, and aligning the safety sensors for proper operation.

Fasten Door Bracket

One-Piece Door Bracket Installation

Specific instructions for fastening the door bracket on one-piece garage doors.

Connect Door Arm to Trolley

One-Piece Door Arm Assembly

Specific instructions for assembling the door arm for one-piece doors and adjustment procedures.

Adjust Travel Limits

Adjust Force Settings

Safety System Testing

Operation

Important Safety Instructions

Essential safety guidelines to follow during operation of the garage door opener.

Wall Controls and Manual Operation

Care and Maintenance

Routine Maintenance and Adjustments

Guidance on regular maintenance, limit/force adjustments, and battery replacement.

Troubleshooting

Diagnostic Chart

A chart that helps diagnose issues based on flashing LED codes on the motor unit.

Programming

Remote Control Setup

Step-by-step guide to add or change remote control programming using the learn button.

Keyless Entry PIN Management

Repair Parts

Rail and Installation Parts

Lists and identifies parts for rail assembly and installation components.

Motor Unit Assembly Parts

Accessories

Service and Warranty

Support, Parts, and Warranty

Contact details for service, ordering parts, and warranty terms.

Related product manuals