ALL ONE-PIECE DOORS
Assemble the Door Arm:
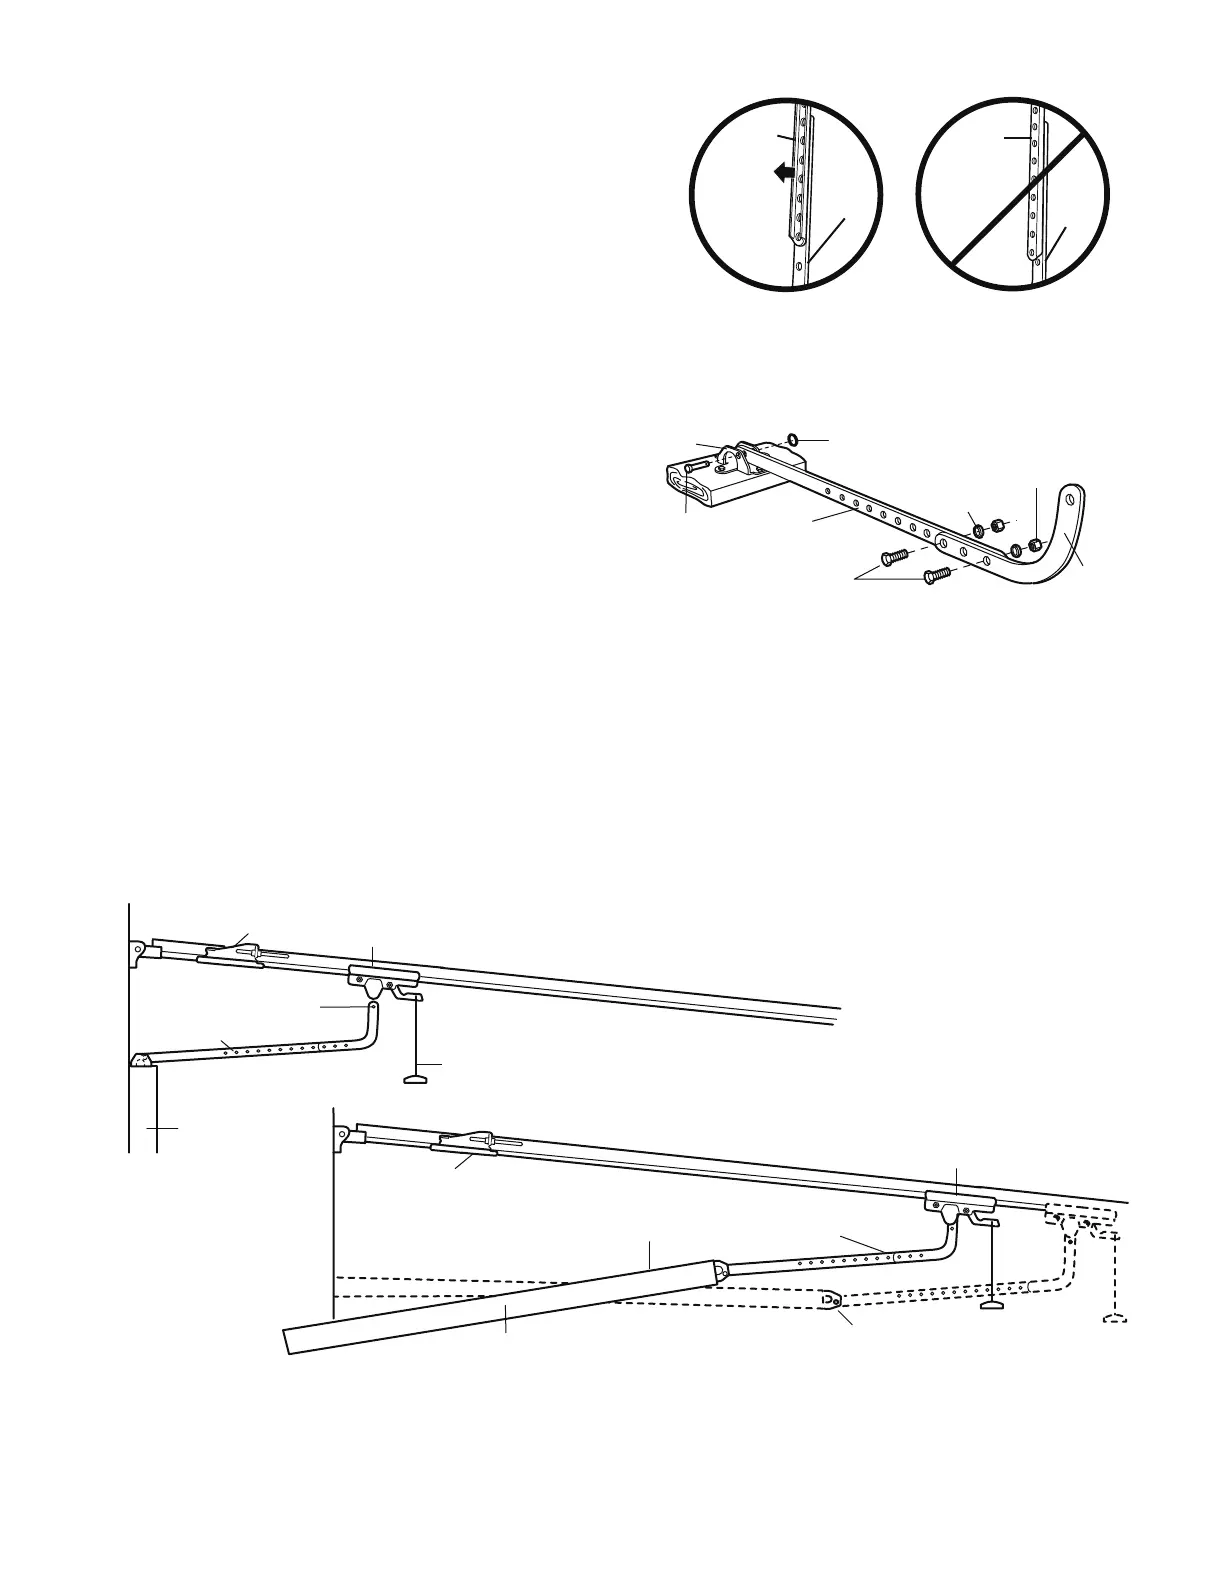
IMPORTANT:
The groove on the straight door arm MUST
face away from the curved door arm (Figure 5).
• Fasten the straight and curved door arm sections
together to the longest possible length (with a 2 or 3
hole overlap).
• Make sure the garage door is fully closed. Connect the
straight door arm section to the door bracket with the
5/16"x1-1/4" clevis pin.
• Secure with a ring fastener.
• Pull the emergency release handle, disconnecting the
outer trolley from the inner trolley by pulling straight
down on the emergency release handle and sliding the
outer trolley back toward the motor unit.
• Connect the curved door arm section to the trolley
using the 5/16"x1-1/4" clevis pin and ring fastener.
NOTE:
Adjusting the limits on the following page:
• The trolley will automatically connect. If not, review the
trolley lockout feature on page 33.
• When setting the up limit on the following page, the door
should not have a “backward” slant when fully open as
illustrated below. A slight backward slant will cause
unnecessary bucking and/or jerking operation as the
door is being opened or closed from the fully open
position.
28
Door Arm
Door Arm
Connector Hole
Closed
Door
Outer Trolley
Emergency Release Handle
Inner Trolley
Outer Trolley
Open Door
Door Arm
Correct Angle
Door with
Backward Slant (Incorrect)
Inner Trolley
Nuts
5/16"-18
Lock
Washers
5/16"
Ring
Fastener
Straight
Arm
Bolts
5/16"-18x7/8
Door
Bracket
Clevis Pin
5/16"x1-1/4"
Curved
Door Arm
Straight
Door Arm
Curved
Door Arm
(Groove
facing out)
Straight
Door Arm
Curved
Door
Arm
CORRECT INCORRECT
Figure 5