ChamSys QuickQ Series Service Document
Page 15 of 17 www.chamsys.co.uk
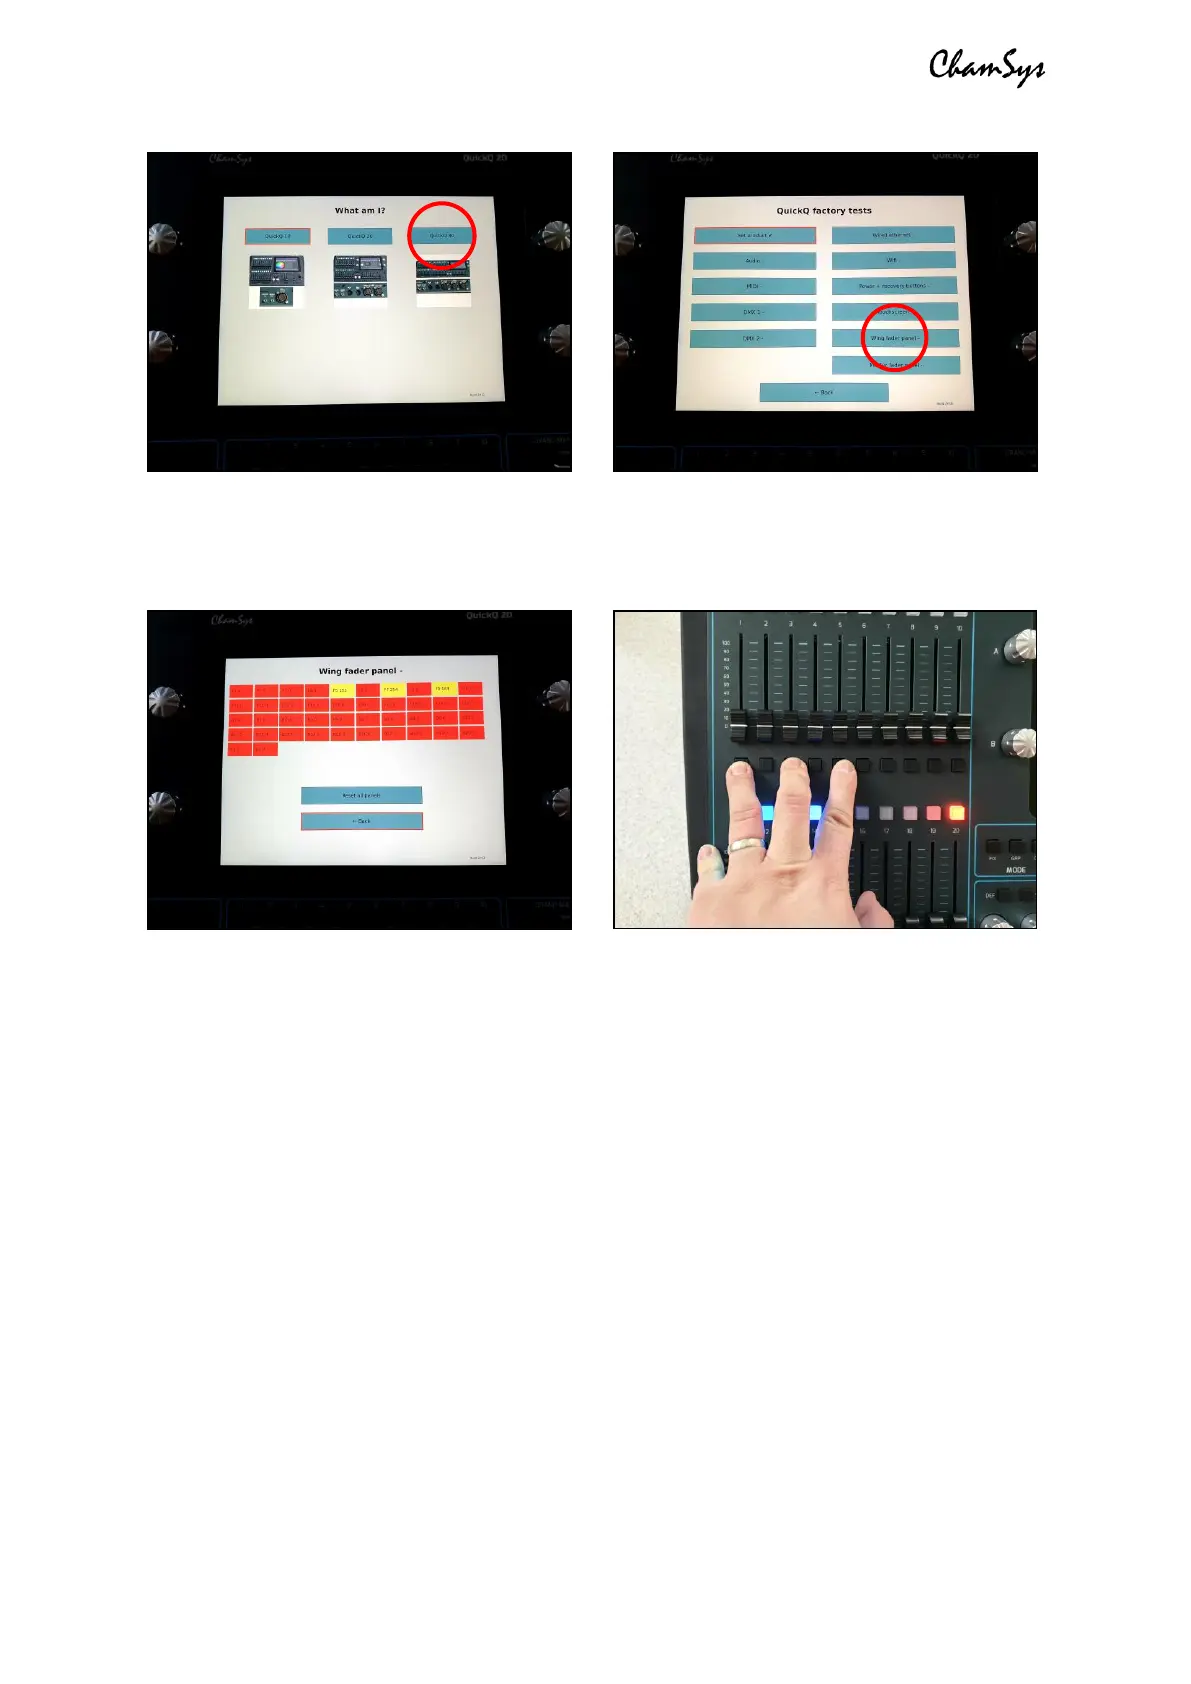
5. You should now see the test screen, as shown below, left.
6. Hold down the UPPER fader bank select/flash keys 1, 3 and 5 of the panel you
wish to reprogram as shown below, right.
7. While holding these 3 keys down, press the ‘Reset all panels’ menu option shown
on the touch screen. The PCB will now enter ID selection mode.
8. Using the lower select/flash keys, select the PCB ID. Use key 1 for QuickQ 10,
QuickQ 20, or the left-hand fader panel on a QuickQ 30, or key 2 for the right-
hand fader panel on the QuickQ 30.
9. Press the lower right-hand flash key (the LED should be lit RED above it – see the
right-hand image above) to store the setting.
10. Go back to the main test screen menu and then re-enter the fader panel test to
prove setting has taken correctly.
 Loading...