EasyManua.ls Logo

Char-Broil KETTLEMAN User Manual

Char-Broil KETTLEMAN
28 pages
To Next Page IconTo Next Page
Page #1 background imageLoading...
Page #1 background image
MODEL NUMBERS
29104670• 10/19/2015
© 2015 Char-Broil, LLC • Columbus, GA 31902 • Printed in China • Assembly Instructions © 2015
Assembly Instructions, 22
Instructions d’assemblage, 22
Montageanweisungen, 22
Istruzioni per il montaggio, 22
Montage-instructies, 22
Montering, 22
Kokoamisohjeet, 22
Instrucciones de armado, 22
Instruções para Montagen, 22
Monteringsvejledning, 22
Montering, 22
Instrukcje, 22
Smalamálsskipana, 22
Instrucțiuni de asamblare, 22
Montážní návod, 22
IE
CH
AT
CH
LU
SE
FI
ES
PT
DK
NO
IS
RO
CZ
BE
NL
IT
CH
DE
FR
GB
SK
PL
Návod na montáž, 22
הבכרה תוארוה
HE
22
16309001
tm
KETTLEMAN
57cm (22.5”) CHARCOAL GRILL/BARBECUE
Question and Answer IconNeed help?

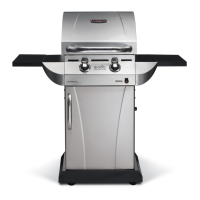
Do you have a question about the Char-Broil KETTLEMAN and is the answer not in the manual?
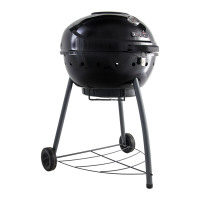
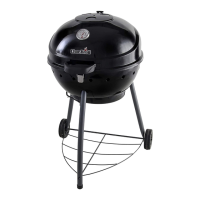
Char-Broil KETTLEMAN Specifications

General IconGeneral
TypeCharcoal Grill
Cooking Surface360 square inches
LidYes
GratePorcelain-coated cast iron
Airflow ControlYes
Lid Mounted Temperature GaugeYes
MaterialSteel
ColorBlack
Warranty1 year
Ash BowlRemovable ash bowl

Summary

KETTLEMAN 57cm (22.5") Charcoal Grill/Barbecue

Safety Information and Symbols

Explains safety symbols and provides critical warnings for safe operation and use.

Hardware List

Details all screws, nuts, and washers needed for assembly, with quantities.

Parts Diagram

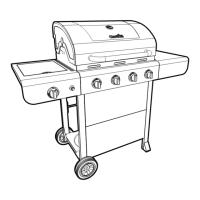
Visual representation of all grill components with corresponding part numbers.

Parts List

Comprehensive list of all components, their descriptions, and quantities.

Assembly Step 1: Attach Legs

Attaching the front and rear legs to the firebowl using specific hardware.

Assembly Steps 2 & 3: Wheels and Ash Catcher

Instructions for attaching the wheels and ash catcher supports to the grill.

Assembly Step 4: Secure Legs

Final tightening of leg bolts to ensure secure attachment to the firebowl.

Assembly Steps 5 & 6: Lid Handle and Charcoal Grid

Attaching the lid handle and placing the charcoal grid into the firebowl.

Assembly Step 7: Handle Hot Grates

Cautionary advice on handling hot cooking grate handles during assembly or use.

Assembly Step 8: Install Grates and Damper

Final step involving placing the cooking grate and the damper.

Important Notes and Specifications

General notes regarding specifications and contact information for support.

Related product manuals