Do you have a question about the Check Point 1590 and is the answer not in the manual?
Steps to install a single 1530/1550 or 1570/1590 appliance in the middle of the shelf.
Instructions for mounting two 1530/1550 appliances next to each other on the shelf.
Steps to install a single 3000 appliance in the middle of the shelf with ports facing front.
Instructions for mounting two 3000 appliances next to each other on the shelf.
This document outlines the installation, maintenance, and replacement procedures for the Check Point 1500 and 3000 Appliance Series Universal Rack Mount Shelf. It serves as a user guide for setting up these appliances in a rack environment, whether as a single unit or in a side-by-side configuration. The guide emphasizes ease of installation and provides clear instructions for various appliance models within the series.
The primary function of this device is to provide a universal rack mounting solution for Check Point's 1500 and 3000 series desktop appliances. This allows these compact security appliances to be integrated into standard server racks, optimizing space and improving organization in data centers or network closets. The shelf is designed to accommodate either one appliance or two appliances side-by-side, offering flexibility based on deployment needs. It ensures that the appliances are securely housed and properly oriented for optimal operation and access to ports and indicators. The rack mount shelf itself is a passive component, acting as a physical support structure rather than an active electronic device. Its robust design is intended to provide a stable and secure platform for the appliances, contributing to the overall reliability of the network security infrastructure.
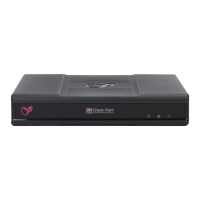
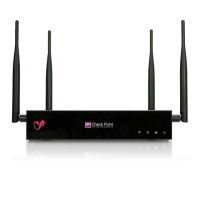
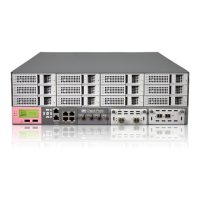
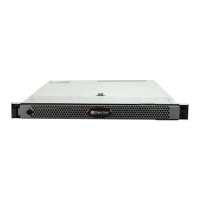
For usage features, the guide details the installation workflow, starting with placing the appliance and power supply on the shelf, followed by installing the shelf in the rack, and finally attaching the necessary cables. The installation process is broken down into specific steps for different appliance series (1500 and 3000) and configurations (single or side-by-side). For single appliance installations, the guide specifies that the appliance must be placed in the middle of the shelf. For 1500 series appliances (models 1530, 1550, 1570, 1590), there are options for port orientation: LEDs can face the rear with ports facing the front, or LEDs can face the front with ports facing the rear. The guide includes visual aids and a "Legend" to help users identify the correct screw holes for their specific appliance model and desired orientation. The attachment process involves using black screws and washers, with a fixator to prevent overtightening. The appliance is slid onto the screws and then tightened from underneath the shelf to secure it. For 3000 series appliances (models 3100, 3200, 3600, 3800), the guide specifies that LEDs should face the rear and ports should face the front of the shelf only. These appliances are secured with four black screws.
Side-by-side installations follow a similar procedure, with each appliance placed on one side of the shelf. The guide provides specific instructions for both 1530/1550 and 1570/1590 side-by-side setups, indicating the recommended orientation of LEDs and ports. For 3000 series side-by-side installations, it is noted that the rack may slightly bend in the middle, but this has no functional impact. The installation of power adapters is also covered, with instructions to attach the DC jack to the appliance, place the adapter on the shelf, and secure it with a bracket and black screws. Cable ties are recommended for organizing cables and holding them in position. The power adapter LED should always face up for proper visibility. The guide emphasizes that the 1500 series appliances use a single power adapter, while the 3000 series can utilize up to two power adapters for redundancy, enhancing the reliability of the security solution.
Regarding maintenance features, the document outlines a clear "Uninstalling the appliance" procedure, which is crucial for any servicing, upgrades, or replacements. This procedure applies to all models and both single and side-by-side installations. The steps include unplugging cables from power adapters and the appliance, loosening screws from adapter brackets, removing the brackets and adapters, and then removing the appliance itself. For 1530/1550 and 1570/1590 appliances, removal involves moving the appliance back slightly and lifting it off the screws. For 3000 series appliances, it requires loosening four screws and then removing the unit. If a second appliance is present in a side-by-side setup, the uninstallation steps are repeated for that unit. This structured approach to uninstallation ensures that the process is performed safely and without damaging the equipment or the rack.
The "Replacement Procedure" section specifically addresses how to replace a faulty unit in a side-by-side installation. This involves first following the uninstallation steps for the faulty appliance, then removing it, and finally installing the replacement appliance and its power supply by referring back to the "Appliance Installation" procedures. This systematic approach to replacement minimizes downtime and ensures that the new unit is properly integrated into the existing rack setup. The guide also highlights the importance of maintaining proper ventilation for the 1500 series appliances, which have venting holes on their top surface. Users are advised not to block these holes and to maintain a standard gap of 1U (rack unit) to ensure adequate airflow and prevent overheating, which is critical for the long-term performance and reliability of the security appliances. The ambient temperature range for all installations is specified as 0 to 40 °C, providing an environmental guideline for optimal operation.
Overall, the document provides comprehensive instructions for the physical deployment and basic upkeep of Check Point 1500 and 3000 series appliances within a rack environment. It focuses on practical steps for installation, configuration, and removal, ensuring that users can effectively manage their network security hardware.
| Brand | Check Point |
|---|---|
| Model | 1590 |
| Category | Network Hardware |
| Language | English |