Do you have a question about the Chef's Choice Diamond UltraHone 312 and is the answer not in the manual?
Essential safety guidelines for using the appliance to prevent hazards and ensure proper operation.
Instruction to retain the manual for future reference and safe usage.
Explanation of the sharpener's two-stage process using diamond abrasives for edge refinement.
Detailed instructions for the initial sharpening of straight edge knives, covering Stage 1 and Stage 2.
Guide for sharpening serrated blades, focusing on Stage 2 and specific use cases.
Techniques for achieving specific edge qualities for gourmet, game, fish, and fibrous food preparation.
Guidance on resharpening, cleaning, and best practices for optimal sharpener performance.
Steps for cleaning internal components and the exterior to ensure longevity and performance.
Instructions for returning the sharpener for repair or service outside the warranty period.
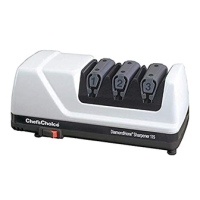
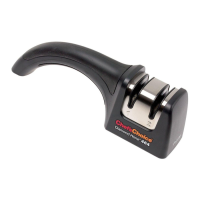
The Chef'sChoice Model 312 Diamond UltraHone® Sharpener is an advanced two-stage sharpening system designed to restore and maintain razor-sharp edges on both straight and serrated knives. This device is engineered for professional chefs and serious home cooks, offering a consistent, foolproof performance that creates ultra-sharp edges on quality cutlery with minimal metal removal. Its design incorporates the latest technology, utilizing micron-sized diamonds to achieve astonishing sharpness quickly and simply.
The Model 312 features a unique two-stage sharpening process. Stage 1 employs fine diamond-coated conical disks to create microgrooves along the facets on each side of the knife edge, establishing the first angled bevel. This initial stage is crucial for duller knives or for the first-time sharpening of a straight-edge blade, as it prepares the edge for the subsequent honing process. The sharpening rate in Stage 1 is carefully controlled by the size of the diamonds and internal springs, which limit the pressure applied to the edge by the abrasive disks.
Stage 2 utilizes precision disks coated with ultrafine diamonds. In this stage, the device gently hones and polishes the facets immediately adjacent to the edge, creating a microbevel. This microbevel results in a microscopically thin, straight, and highly polished edge. The honing action simultaneously polishes and sharpens the boundaries of the microgrooves created in Stage 1, transforming them into sharp micro flutes. These micro flutes are particularly beneficial for assisting the cutting action with "difficult to cut" materials. The two-stage design, with its slightly larger sharpening angle in Stage 2, ensures that knives not only achieve an extremely sharp edge but also retain their sharpness longer than those sharpened by conventional methods.
The Model 312 is versatile, capable of sharpening household knives, pocket knives, and selected sports knives. It is not designed for sharpening scissors, ax blades, or any blade that does not fit freely in the slots. The use of diamonds, the hardest known material, allows the sharpener to effectively sharpen knives made from any metal, including hard carbon, stainless, and super alloy steels.
To achieve optimal results, users must follow specific procedures. Before sharpening, it is essential to clean the knife blade thoroughly, removing any dirt, oil, or food. The sharpener should always be operated from the front side, with the power switch facing the user.
For straight-edge blades, especially when sharpening for the first time, the process begins in Stage 1. The knife blade is slipped smoothly into the left slot between the angle guide and the plastic spring, ensuring it is held horizontally and level. The blade is then pulled towards the user at a uniform rate, making contact with the diamond disk. For curved blades, the handle should be lifted slightly as the tip approaches the disk to maintain audible contact. Each pull should cover the entire blade length, taking approximately 6 seconds for an 8-inch blade and 3-4 seconds for shorter blades.
After the initial pull in the left slot, the process is repeated with one full-length pull in the right slot of Stage 1. It is crucial to alternate pulls equally between the left and right slots to ensure symmetrical edge facets. Generally, 3 to 5 pairs of slow pulls are sufficient for most knives, though duller knives may require more. Throughout this process, only light downward pressure should be applied, just enough to maintain contact with the disk, as additional pressure does not accelerate sharpening.
Before moving to Stage 2, it is imperative to confirm the presence of a "burr" along one side of the edge. The burr, a rough and bent extension of the edge, can be detected by carefully sliding a forefinger across and away from the edge (never along it to avoid injury). If no burr is present, additional alternating pulls in Stage 1 are needed. Developing a burr in Stage 1 is a necessary prerequisite for effective honing in Stage 2.
In Stage 2, the goal is to refine the edge. Typically, two pairs of slow pulls (4-6 seconds each) followed by two pairs of faster pulls (1-2 seconds each) are sufficient to achieve a razor-sharp edge. Again, alternating pulls in the left and right slots are essential. For gourmet food preparation, where the finest and smoothest cuts are desired, an additional couple of pairs of fast pulls through Stage 2 will further refine the second facet, creating remarkably smooth and sharp edges. For cutting fibrous materials like limes, lemons, or meat, fewer fast pulls in Stage 2 (only two or three alternating pairs) are recommended after developing a burr in Stage 1. This leaves sharpened microflutes that aid in cutting such materials.
Resharpening straight-edge knives should primarily be done in Stage 2. If, after multiple resharpenings, it takes too long to achieve the desired keenness, or if the knife is very dull, the user should return to Stage 1 for 3 to 5 pairs of slow alternating pulls, check for a burr, and then proceed to Stage 2 with two pairs of slow pulls followed by two or more pairs of faster pulls. This method ensures sharp knives daily with minimal metal removal, prolonging the life of the knives.
Serrated blades are sharpened exclusively in Stage 2, except when severely damaged. For most serrated blades, two to six pairs of slower (3-6 seconds) alternating pulls in Stage 2 will sharpen the teeth and develop sharp microblades along their edges. If a serrated knife is severely damaged, one fast pull (2-3 seconds for an 8-inch blade) in each of the right and left slots of Stage 1 can be performed before proceeding to Stage 2. Excessive use of Stage 1 on serrated blades should be avoided to prevent unnecessary metal removal.
The flexible plastic springs positioned over the sharpening disks in each stage securely hold the knife blade against the precision guides during sharpening, ensuring consistent angles. Users should avoid stopping the pull in mid-stroke and maintain uniform blade movement through each stage. The device is designed to allow sharpening of the entire blade length, up to 1/8 inch from the bolster or handle. For chef's knives with heavy bolsters, a commercial grinding service may be needed to modify the bolster if it interferes with sharpening the entire blade length.
The Chef'sChoice Model 312 requires minimal maintenance. No lubrication is needed for any moving parts, motor, bearings, or sharpening surfaces. The exterior of the sharpener can be cleaned by wiping it with a damp cloth; detergents or abrasives should not be used on exterior surfaces.
Periodically, typically once a year or as needed, accumulated metal dust inside the sharpener should be removed. This is done by removing a small rectangular clean-out cover located on the underside of the sharpener. Metal particles adhere to a magnet attached to the inside of this cover. Users can simply rub or brush off these filings with a paper towel or toothbrush and then reinsert the cover. If significant amounts of dust have accumulated, any remaining dust can be shaken out through the bottom opening once the cover is removed. The cover must be securely replaced with its magnet in place after cleaning.
It is critically important to keep the ultrafine diamond abrasives in Stage 2 clean. Food, fat, and foreign materials can accumulate on these disks, causing the sharpener to operate more slowly. If this occurs, the power cord should be unplugged, and the gray plastic spring in Stage 2 (marked #2) should be removed. This spring is held in place by two black plastic "spring-pins," which can be pried up with a small screwdriver. Once the spring is removed, the Stage 2 diamond disks can be cleaned using a small children's toothbrush and a weak solution of household dish detergent (e.g., Dawn). Only a few drops of detergent solution should be applied to the brush, and the sharpening faces of the disks should be scrubbed while rotating them by hand to cover all areas. After scrubbing, the disks should be lightly rinsed with water on the brush, minimizing the amount of water used. A small piece of paper towel can be used to pat the disks dry, and sufficient time should be allowed for them to dry completely before turning on the power. The plastic spring and spring-pins are then reassembled.
The manual emphasizes that there is no need or advantage to using a "sharpening steel" on knives sharpened with the Model 312. Instead, users are encouraged to keep the Model 312 readily accessible and resharpen knives often, as described in the usage sections, to maintain optimal sharpness.
| Type | Electric Knife Sharpener |
|---|---|
| Sharpening Stages | 3 |
| Abrasive Material | Diamond |
| Diamond Abrasives | Yes |
| Power Source | Electric |
| Voltage | 120V |
| Sharpening Angle | 20 degrees |
| Suitable for | Straight edge knives |
| Intended Use | Sharpening |