Page 9>"-&#$95<19)(&?2$+#1"<+@&,($)+$&9)((&ABCCCBCDDBEFGF/ITEM 56708
HI>;JKLM;NIJOL!PIO!J;!I!Q; H;JRM
H$#2,&B&'$7"-$&R+$%
N$)*$&;!JON;&OPMLNJI!J&HI>;JK&O!>LNPIJOL!&+$9#1"<&&
)#$&4$81<<1<8&"73+&:)<2)(&1<9(2*1<8&)((&#$Z#&2<*$-&+245$)*1<8+$-$1<&&
4$7"-$&+$#&2,&"-&2+$&"73+&,-"*29#/
SIN!O!T
JL&MN;0;!J&H;NOLRH&O!jRNK&>NLP&IQQOV;!JIU&LM;NIJOL!%&
J2-<$&M"3$-&H31#95&"7$&#""(&#"&1#+&kL>>l&,"+1#1"<&)<*&2<,(28$&#""(&7-":&1#+&
$($9#-19)(&"2#($#&4$7"-$&)++$:4(1<8&"-&:)X1<8&)<.&)*]2+#:$<#+&#"$&#""(/
!"#$% For additional information regarding the parts listed in the following pages,
refer to the Assembly Diagram near the end of this manual.
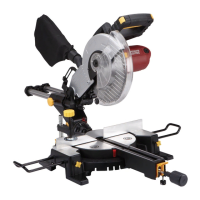
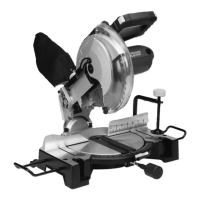
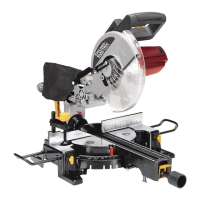
I++$:4(.
I##)951<8$&;Z#$<+1"<&H2,,"-#+&
)<*&P1#$-&U"9X&_)<*($
1. Insert the ends of the Extension Supports into
the holes in the sides of the Base. Tighten the
Wing Screws to hold the Extensions in place.
The upper edge of the Extensions will be level
with the surface of the saw. This provides a
wider base for the work material to rest on.
2. Thread the Miter Lock Handle into
the Plate until securely in place.
I##)951<8$&V2+#&Q"(($9#1"<&')8
3. The Dust Collection Bag slips over the Dust Outlet
behind the Blade Housing Assembly. Sawdust
created by cutting is captured in the bag.
P"2<#1<8$&H)3
1. The Miter Saw must be mounted on a support
before use. This may be a commercially
available support or home made saw table.
2. There are bolt holes provided in each of the
four legs of the base. These should be firmly
mounted using bolts (not included) to your
saw stand or saw table (not included).
3. This will help prevent tipping or movement of
the saw, preventing injury. Also, the use of a
saw table will make it easier to efficiently handle
work materials and make more accurate cuts.