15
using the product without reading the instructions.
• Keep this manual with the product.
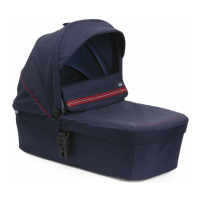
• For use in the car, fasten the carrycot using only the sup-
plied kit for car transportation; the kit can be used only to
fasten the carrycot.
• No car safety product can guarantee the total safety of
your baby in the event of a crash; however, the use of this
product reduces risks of injury and death.
• Incorrect use of the product increases the risk of serious
injuries to your baby, not only in case of a crash, but also
in other situations.
• If the product is damaged, deformed or worn, it must be
replaced: as its original safety features may have been
compromised.
• This product must not be modied in any way unless the
modication has been approved by the manufacturer. Do
not install accessories, spare parts, or any component not
supplied by the manufacturer.
• Never leave the child unattended in the carrycot.
• Never leave the carrycot on the car seat unfastened: it
might knock against other passengers injuring them.
• If the car has been left in the sunlight, check the carrycot
before placing your child in it, making sure that none of its
parts are too hot: in this case, let the car seat cool down
rst before placing the child into it, in order to avoid burns.
• After an accident, even a slight one, the carrycot and CAR
KIT may have been damaged, even if it is not visible. They
must be replaced.
• Never use used safety products: they may have suered
structural damage, even if this is not visible.
• ARTSANA declines all responsibility for the improper use
of its product.
IMPORTANT WARNING
• This is a “Universal” child retention device, homologated
according to Regulation no. 44, amendments of series 04.
suitable for general use in vehicles and compatible with
most but not all vehicles' seats.
• For perfect compatibility, check that the manufacturer of
your vehicle has indicated in the car manual whether your
vehicle foresees the installation of Universal child reten-
tion devices for the age group in object.
• This child restraint device has been classied as “Universal”
under more stringent conditions than those that were ap-
plied to earlier designs that do not display this notice.
• Only suitable if the vehicle is tted with 3-point static or
3-point retractor safety belts approved according to UN/
ECE Regulation No.16, or other equivalent standard.
• In case of doubts, contact the restraining device's manu-
facturer or reseller.
CAR SEAT REQUIREMENTS
17. The car seat must meet the following requirements in
order to let the carrycot be fastened to it:
- it must be positioned forward-facing (g. 17A);
- the rear seat must be equipped with at least two 3-point
seat belts (g. 17B), approved according to standard UNI/
ECE 16 or other equivalent standard.
FASTENING AND REMOVING THE CARRYCOT IN THE
CAR
To install the CAR KIT, following the assembly instructions
below before positioning the carrycot in the car:
BUCKLES FOR CAR SEAT BELTS
18. To fasten the two buckles on the pins located at the
ends of the carrycot (g. 18A), insert each buckle in the
pin pushing it (g. 18B) and pulling the buckle down
until you hear a click (g. 18C).
WARNING: Do not assemble the buckles backwards! (g. 18D).
The carrycot is now ready to be positioned in the car.
FASTENING THE CARRYCOT IN THE CAR
19. To fasten the carrycot to the rear seat, position it at the
centre, aligned with the car seat, and fasten it using the
seat belts of the two outer seats (g. 19).
20. If the rear seat of your car has a 3-point seat belt in the
middle seat too, the carrycot can be fastened also shift-
ed to one side occupying the middle seat and lateral
seat using the seat belts of these two seats (g. 20).
21. Pull and fasten the two seat belts in the seat's buckles
(g. 21).
Recline the carrycot backrest completely
WARNING: Never use the carrycot in the car with the back-
rest raised! Safety is not guaranteed!
Follow the steps below on both sides:
22. Take the seat belt and make a loop (g. 22);
23. Take the car kit buckle and rotate the buckle's red bar
outward (g. 23).
24. Insert the loop you've made in the seat belt in the buck-
le (g. 24A – 24B) and rotate the red bar to its initial po-
sition so that it ts inside the loop (g. 24C).
25. Pull the seat belt toward the retractor pressing the car-
rycot against the seat so that it is fastened well (g. 25A).
WARNING: Make sure that the carrycot is t against the
backrest and seat.
WARNING: Make sure that the belts are tensioned (g. 25B).
REMOVING THE CARRYCOT FROM THE CAR SEAT
Follow the steps below on both sides.
26. Unfasten the buckle from the carrycot pulling the buck-
le's red tab outward and pushing (g. 26) to release the
carrycot from the seat belt. The buckle is left fastened
to the seat belt.
WARNING: Never use the seat belt to fasten passenger
without removing the CAR KIT buckle: it can be dangerous!
27. To remove the buckle from the belt, loosen the loop in
the belt (g. 27A) and rotate the red bar so that it comes
out (g. 27B).
FASTENING THE CARRYCOT TO THE STROLLER
Prepare the stroller to assemble the carrycot according to
the stroller's instructions.
For use with the stroller, make sure to remove the safety
belts following the steps in paragraph CARRYCOT SAFETY
HARNESS AND COMFORT KIT in reverse order.
WARNING: The restraint system must be removed when
the product is used outside the car.
WARNING: To fasten the carrycot to the stroller structure,
remove the seat rst.
28. Hold the handle in carrying position (vertical) and posi-
tion the carrycot in the vertical joints making sure that
the two vertical mechanisms are outside the carrycot
until you hear the click conrming fastening. Place the
carrycot with the baby’s feet end facing the stroller’s
handle (g. 28A). To facilitate fastening the carrycot on
the stroller, there are labels with instructions on both
sides of the fabric showing you the correct alignment of
the carrycot with the fasteners (g. 28B).
WARNING: Before using, make sure that the carrycot is
properly locked on by pulling on it upwards.
REMOVING THE CARRYCOT FROM THE STROLLER
29. Position the handle in the carrying position (vertical),
pull the button on the front of the carrycot outwards
(g. 29A) and while keeping the button raised remove
the carry out from the stroller structure by pulling it up
(g. 29B).
WARNING: The fastening and releasing operations can be
carried out also with your child inside the carrycot; howev-
er, these operations may be more dicult to execute due
to the child’s weight. Pay attention when carrying out the
above mentioned operations.
Important Note: The images and instructions in this manual
refer to a single carrycot version. Some of the components
and functions described here may vary depending on the
model purchased.
WARRANTY
The product is guaranteed against any conformity defect
in normal conditions of use as provided for by the instruc-
tions for use. The warranty shall not therefore apply in the
case of damages caused by improper use, wear or acciden-
tal events. For the duration of the warranty on conformity
defects please refer to the specic provisions of applicable
national laws in the country of purchase.
 Loading...