24
MI300T 220V
qj
STARTING THE MACHINE
• Start the machine by switching the switch on ON (Fig 1 - 7), and stop it by switching to OFF. Warning! Never disconnect the power supply
when the welding electrical distribution is in operation. The PCB inside the machine starts a test cycle and initiate the settings which takes
around 10 seconds. At the end of that cycle, the machine is ready to be used.
• As soon as the machine is powered, the liquid starts circulating in the cables. check for potential leaks.
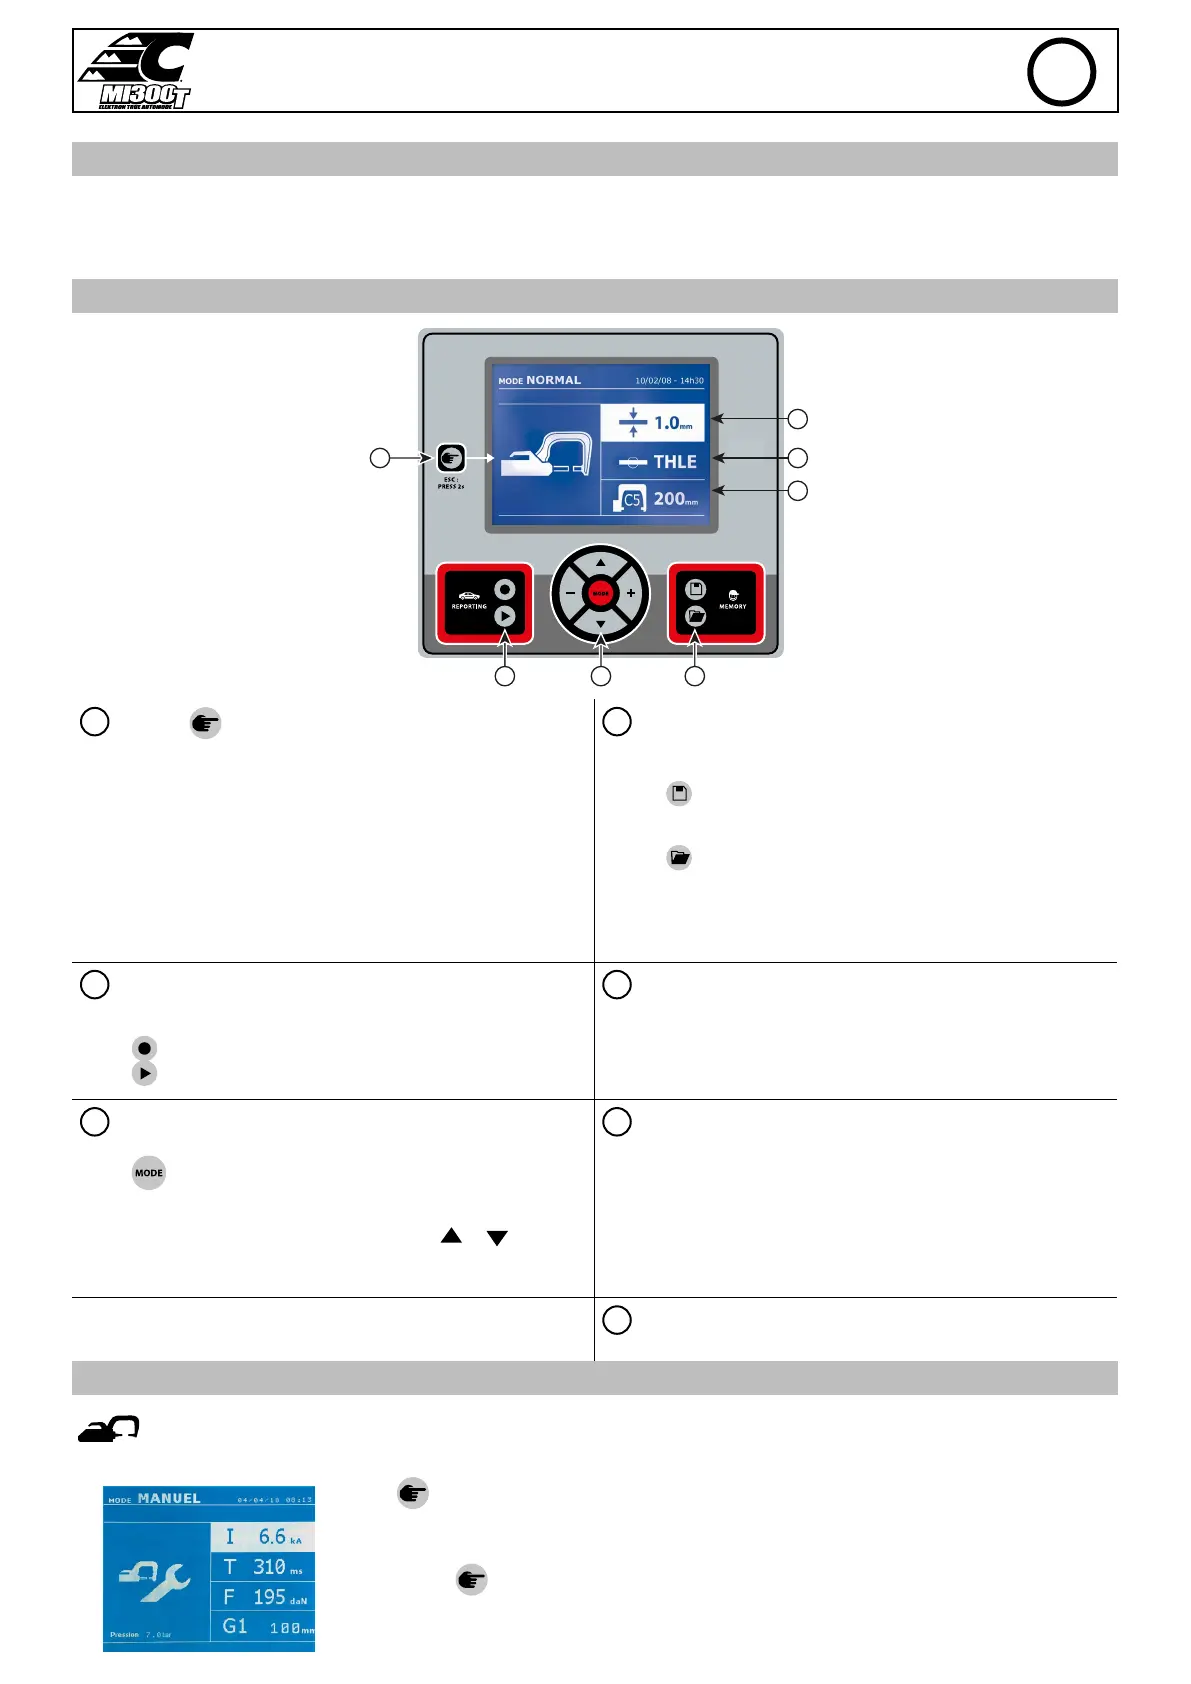
MAN TO MACHINE INTERFACE
2
5
7
6
3 4
1
1
Button
4
Saving the settings
• Push briey the button to choose between the modes clamp, gun or
«clamp settings».
• Push the button for 2 seconds to return to the «normal» mode from
all the other modes.
• Push the button for 2 seconds to reset the spot count when it is on
display.
• Push the button for 2 seconds to return to the «Settings» menu.
• Push briey twice to erase the log displayed in the log view mode.
• Push briey the button, in the programs saving mode, erase the
program selected.
• Button
is used to save a machine setting (these are the settings
that have been adjusted through the manual mode : current, duration
and tightening).
• Button
is used to re-establish a setting saved previously under
the same name. The machine starts automatically in manual mode
using the welding settings (current, duration and tightening) and the
tool (clamp or gun saved).
2
Saving a report
5
Setting the thickness of the plate
This function is detailed in the corresponding chapter.
Button activates or deactivates the creation of a report.
Button is used to view the points completed.
The value to be entered is in relation to the thickness of the sheets
being welded on. The selection of the thickness is done using the +
and - buttons, the dierent thicknesses available are 0.6, 0.8, 1.0, 1.2,
1.5, 1.8, 2.0, 2.5 and 3.0 mm.
3
Using the dierent modes
6
Setting the type of plate
Button is used to move through the dierent welding modes. A
prolonged push on the mode button activates the settings mode used
to select the language, set the date and activate the warning sound for
«current too low» or «pressure too low». Buttons ( or ) are used
to navigate through and select the value that needs to be adjusted,
and then buttons + and - are used to increase or decrease that value.
This setting is used to specify the type of metal plate being welded on,
the dierent choices are : coated steel, HLE/THLE steel, UHLE steel
and bore/USIBOR steel. This setting can also be adjusted using the +
and – buttons.
7
Setting up the arm
SETTING UP THE G CLAMP
Lock the G arm in place using the lever (FIG 2 - 1).
Use the button in order to select the clamp setting function. The «clamp setting» function is used to
close the clamp and to apply the pressure pre-selected at the electrodes without power going through. The
clamp remains closed while the trigger is pressed. This function is designed to verify the centering of the end
bits.
Push the button
for 2 seconds to return to the AUTO mode.
For the MI300T, always ensure to be in that mode to stop the pump when changing the arms. The electrode
retracts into the clamp. The red indicator on the button (FIG 2 - 12) lights up when the pump stops.
EN