- 118 -
13-3. COM Port Settings “COM1” and “COM2”
COM port 1 and COM port 2 can be set separately to use them simultaneously. These ports are mainly used to set the unit
using PLC or PC, and load measured data.
This section describes the things related to settings only. For general handling information, refer to the instruction manual
for “Communication Interface” provided separately.
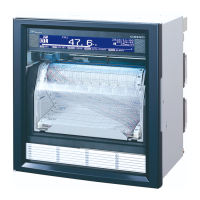
(1) Pressing the key displays the
menu window (list of setting items).
(2) Select “COM1” or “COM2”.
(3) Move the cursor to the parameter to be set
with the /// keys.
(4) Press the
key to make it available
for setting and then select or enter a value.
(5) After completing the settings of this item,
move the cursor to Set .
(6) Press the key to register the
settings (when chart recording is ON, a
setting change mark is printed). To cancel
the settings, press the
key.
[List of COM1 and COM2 setting parameters]
Parameter Function Default Set value
Mode Communication mode Low (To PC etc…) Fixed to Low (To PC etc…)
Protocol Select communication
protocol
MODBUS RTU MODBUS RTU, MODBUS ASCII, PRIVATE1 (without
connection sequence), PRIVATE2 (with connection
sequence)
Address Set communication address
of the unit
01 01 to 99
Baud rate Set communication speed 9600 PRIVATE: 1200, 2400, 4800, 9600bps
MODBUS: 9600, 19200, 38400bps
Changes to “9600” when changing from PRIVATE to
MODBUS or vice versa.
Character Set transmission character 8N1 7E1, 7E2, 7O1, 7O2, 8N1, 8N2, 8E1, 8E2, 8O1, 8O2
Check SUM Select whether to add
checksum code
* OFF, ON
Settable only when Protocol is set to “PRIVATE”.
Note: Actual windows are separated. Use the / keys to
scroll and continue settings.
Codes are used to represent character type.
Code Character length Parity Stop bit Code Character length Parity Stop bit
7E1 7-bit Even 1 8N2 8-bit Non 2
7E2 7-bit Even 2 8E1 8-bit Even 1
7O1 7-bit Odd 1 8E2 8-bit Even 2
7O2 7-bit Odd 2 8O1 8-bit Odd 1
8N1 8-bit Non 1 8O2 8-bit Odd 2
Character selection
Reference
 Loading...