EasyManua.ls Logo

Chord ULTIMA 3 User Manual

Chord ULTIMA 3
2 pages
To Next Page IconTo Next Page
Page #1 background imageLoading...
Page #1 background image
Connecting speakers to ULTIMA 3 4.0
The binding posts on ULTIMA 3 are designed to accommodate bare
wire, spade connectors and banana plugs.
Banana plugs: can be inserted into the middle of the binding posts,
as shown below, to achieve a reliable connection. Align a banana plug
with the binding post and push the connector confidently until it stops.
You must pay attention to the polarity, making sure that a positive
connection on ULTIMA 3 matches the positive connection on the wire
and speaker. You must also pay careful attention to the left and right
channels.
Chord Electronics
ULTIMA 3 | Quickstart Manual
The Pumphouse, Farleigh Lane, East Farleigh, Kent, ME16 9NB, United Kingdom
info@chordelectronics.co.uk
chordelectronics.co.uk
Quickstart Manual
Introduction 1.0
Welcome to the ULTIMA 3 Quickstart Guide. This shortened guide is
supplementary to the main manual which should be referred to for full
safety and operational information.
Please note, more information on any of these topics is listed within the
full manual found under the product page:
chordelectronics.co.uk/product/ultima3
Warranty 1.1
The ULTIMA 3 comes with a comprehensive 5-year warranty. To
activate this warranty, please register your device via the Chord
Electronics website:
chordelectronics.co.uk/register-product
Connecting ULTIMA 3 to a preamp 3.0
First, ensure that ULTIMA 3 mono, and any connecting equipment, is
turned o. Any volume controls/attenuators should also be at their
lowest setting. Both ULTIMA 3 mono amplifiers need to be connected
the same way, RCA or XLR. Connect the preamp output to each
ULTIMA 3 mono left input denoted by a black band round the RCA
input. Your connected device must have preamplifier capabilities to
prevent damage to connected equipment.
Input
Please ensure there is sucient ventilation around ULTIMA 3 at all
times. Avoid placing ULTIMA 3 in enclosed spaces, on soft surfaces,
near sources of heat and never cover its ventilation holes. For optimum
operation and ventilation leave some space around the unit.
Placement 2.0
Question and Answer IconNeed help?

Do you have a question about the Chord ULTIMA 3 and is the answer not in the manual?

Chord ULTIMA 3 Specifications

General IconGeneral
Frequency Response-1dB 0.2Hz to 46kHz
Total Harmonic Distortion0.0008% @ 250W into 8 Ohms
Input Impedance100k Ohms Unbalanced/Balanced
Dimensions420mm (W) x 355mm (D) x 141mm (H)
Signal to Noise Ratio117dB (A weighted)

Summary

Introduction and Warranty Information

Introduction to ULTIMA 3 Quickstart Guide

Overview of the shortened guide, supplementary to the main manual for safety and operational info.

ULTIMA 3 Warranty Details

Details the 5-year warranty and registration process via the Chord Electronics website.

Physical Setup and Connectivity

Optimal Placement for ULTIMA 3

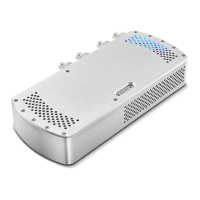
Ensures sufficient ventilation, avoiding enclosed spaces, soft surfaces, and heat sources.

Connecting ULTIMA 3 to a Preamp

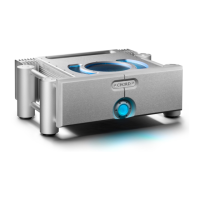
Connects preamp output to ULTIMA 3 mono left input using RCA or XLR; requires preamp capabilities.

Connecting Speakers to ULTIMA 3

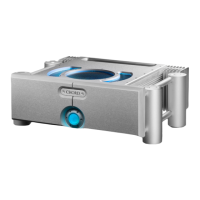
Guide for connecting speakers using binding posts with banana plugs, spade connectors, or bare wire.

Connecting Power to ULTIMA 3

Instructions for connecting the power cable to the ULTIMA 3 unit after audio connections are made.

Operation and Registration

Powering Up the ULTIMA 3

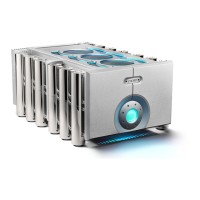
Step-by-step power-on sequence, including button color indicators and safety checks.

Product Registration

Advises registering the product for enhanced support and to protect the investment.

Related product manuals