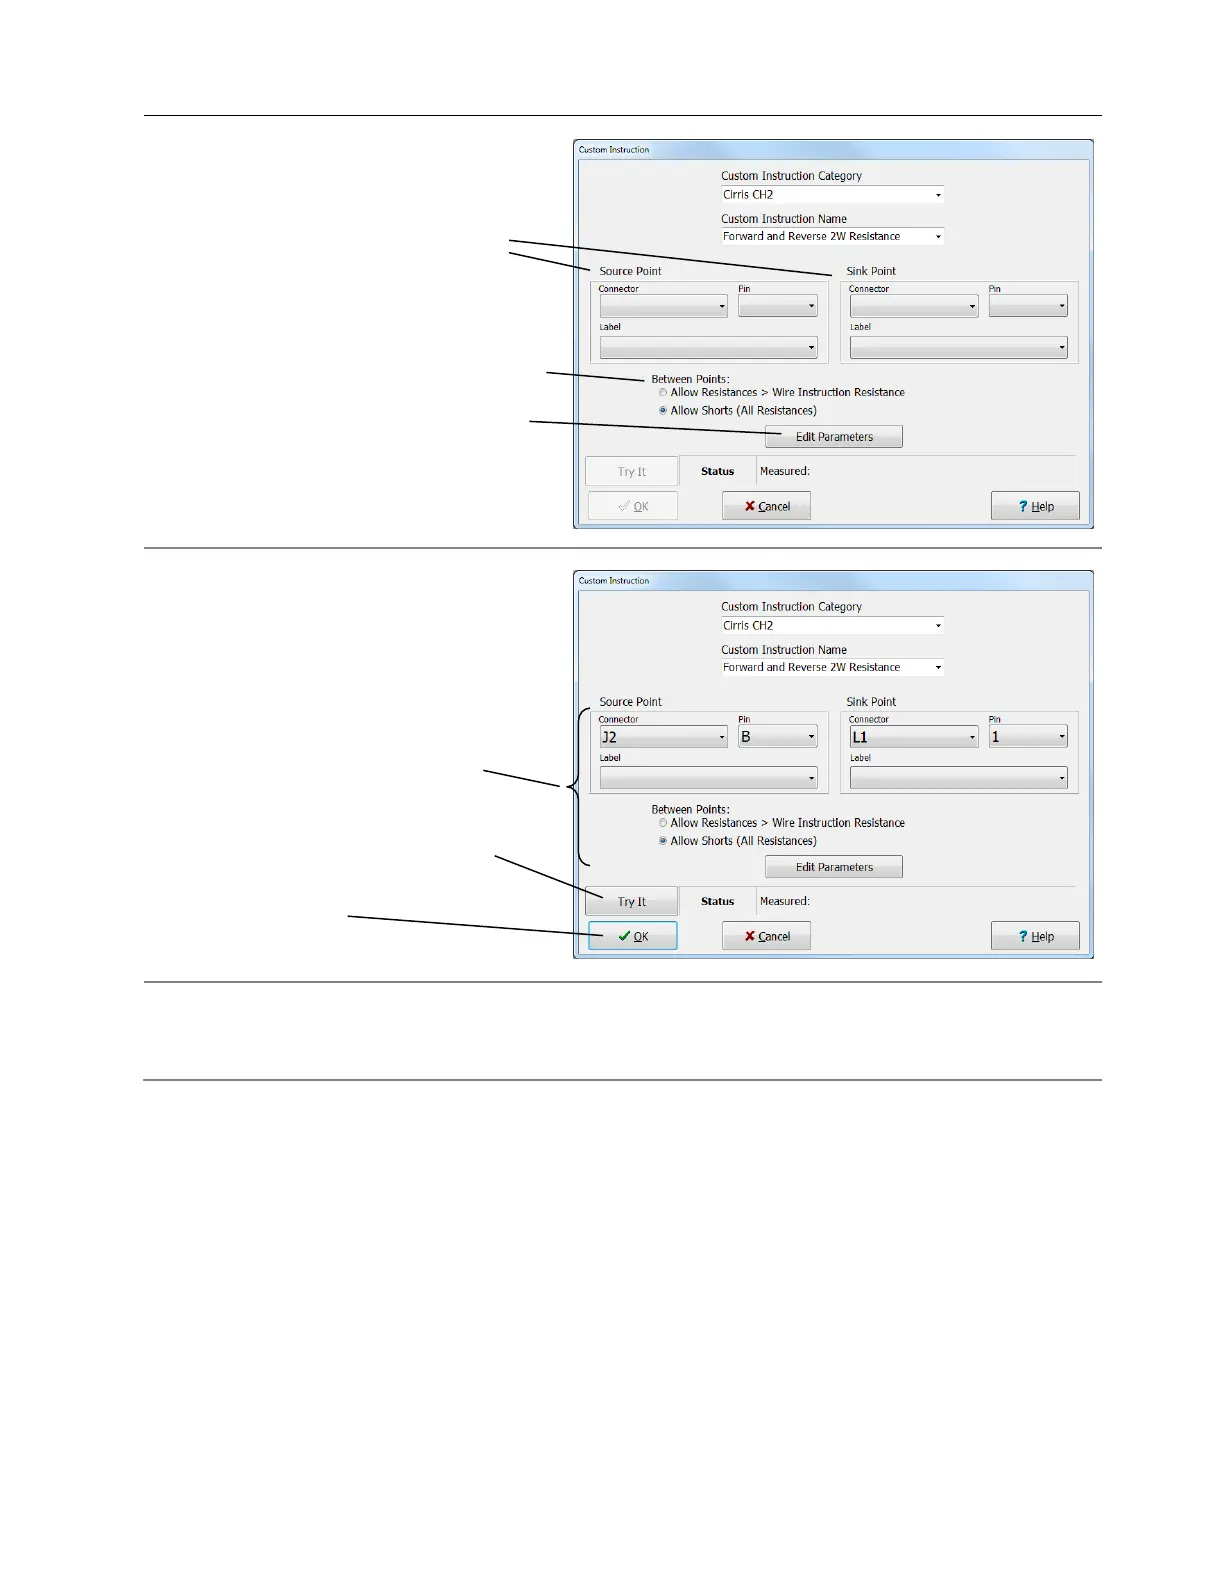
After choosing the particular test instruction,
other selections appear in the Custom
Instruction window.
In this example, this particular Custom
Instruction requires you enter two test
points.
When a Custom Instruction requires you
enter two points this Between Points
selection is presented. This selection will be
explained in the next section.
Typically the Edit Parameters button will
appear in the window. You will use this
button to setup the details of the test
instruction.
After selecting connector information and
selecting Edit Parameters,
you can click Try It to test the Custom
Instruction with the device to be tested
connected to the tester *.
Once you are satisfied with the custom
Instruction, click OK.
* If you are using a custom instruction to control an external instrument, Try it will not work until you
correctly set up the external instrument and use an Attach Instruction to establish communication with the
external instrument. These steps will be documented in the following pages.