3-10
Cisco 2600 Series Routers Hardware Installation Guide
OL-2171-02
Chapter 3 Installing the Router
Setting Up the Chassis
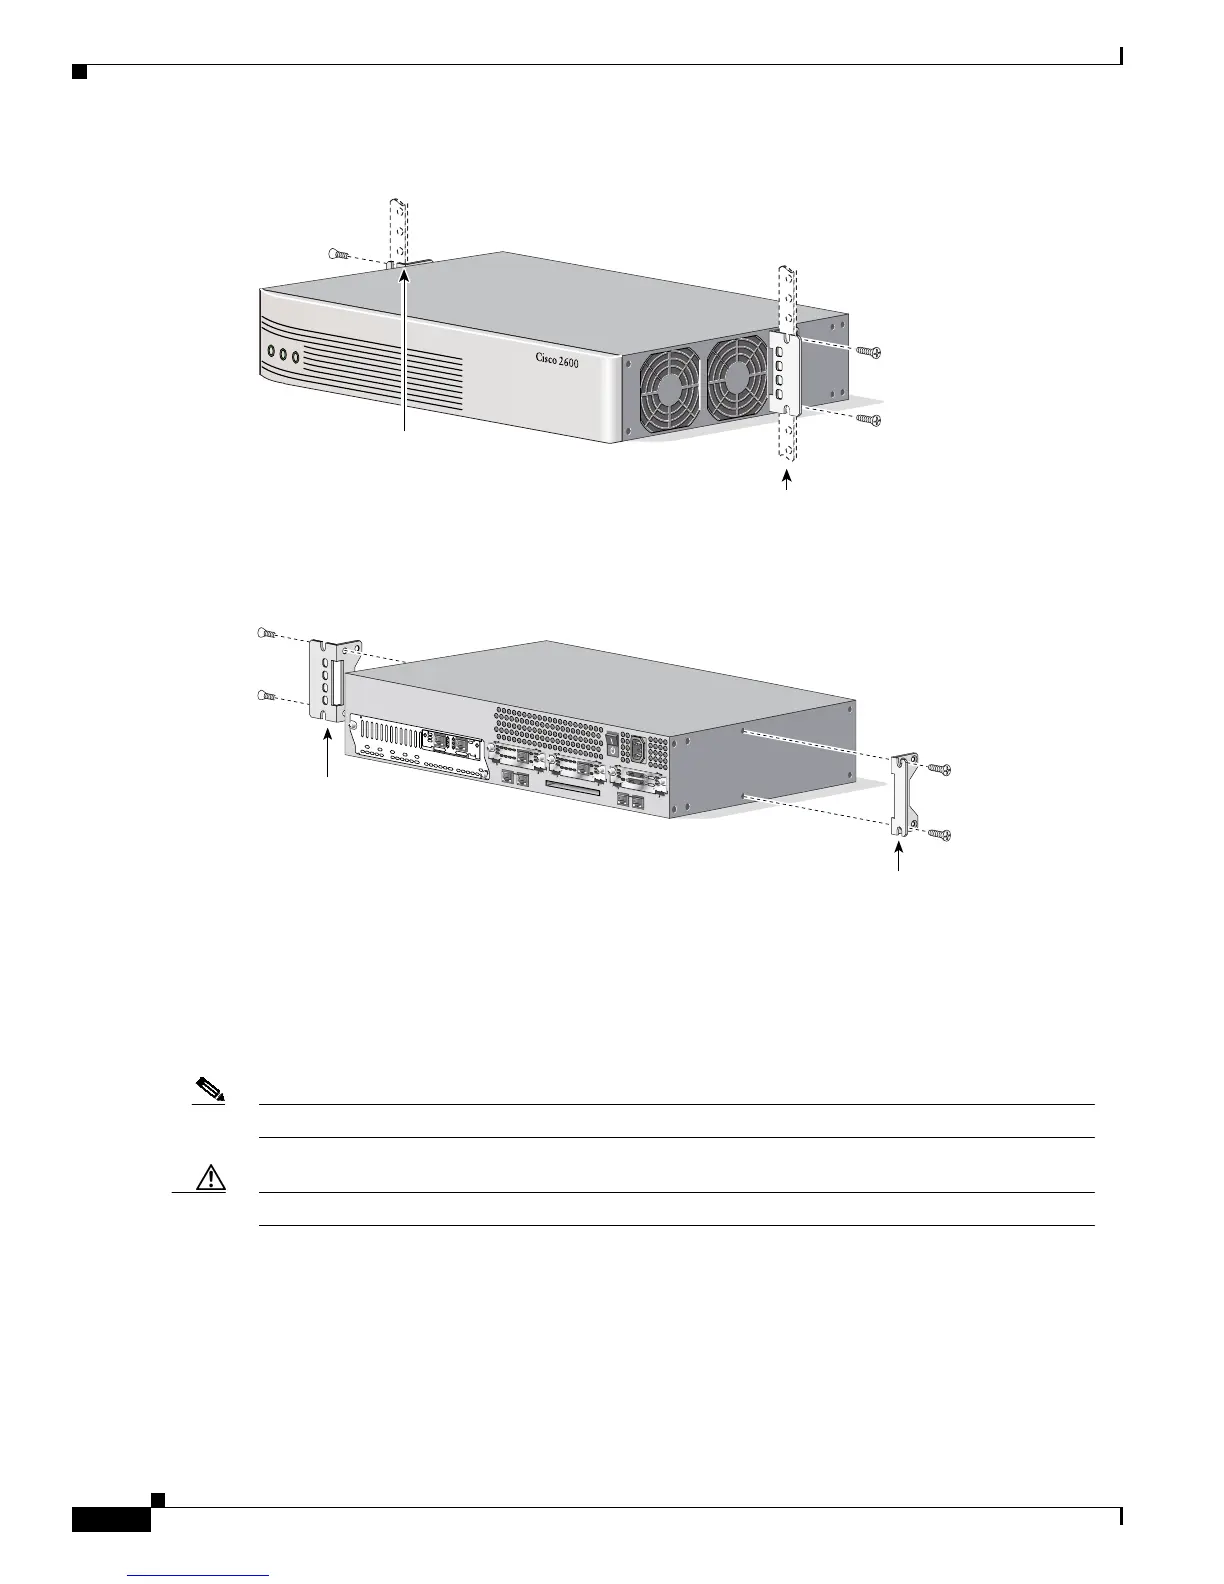
Figure 3-15 Center-Mount Bracket Installation—Front Panel Forward (19-Inch Rack)
Figure 3-16 Center-Mount Bracket Installation—Rear Panel Forward (19-Inch Rack)
Installing the Router in a Rack
After the brackets are secured to the chassis, you can mount the chassis in a rack. Use the illustrations
in the previous section as a guide to attaching the brackets to the rack.
Note The screws for attaching the brackets to the rack are not included with the router.
Caution Always use two screws to attach each bracket to the rack.
Mounting the Chassis on the Wall
Cisco 2600 series routers with a chassis height of 1RU can be attached to a wall. Mounting a 2RU chassis
to a wall is not recommended and brackets are not provided for mounting to a wall.
LEFT
Wide bracket
(marked RIGHT)
62677
RIGHT
SERIES
SERIES
Narrow bracket
(marked LEFT)
RIGHT
Wide bracket
(marked RIGHT)
62108
SEE MANUAL BEFORE INSTALLATION
Narrow bracket
(marked LEFT)
AL
CD
LP
RD
TD
SEE MANUAL BEFORE INSTALLATION
DSU
56K
AL
CD
LP
RD
TD
SEE MANUAL BEFORE INSTALLATION
DSU
56K
LEFT
EN
V0
BANK 4
BANK 3
BANK 2
BANK 1
BANK 0
NM-HDV
VWIC
2MFT-E1
SEE
MANUAL
BEFORE
INSTALLATION
CTRLR E2
CTRLR E1
AL
LP
CD
 Loading...