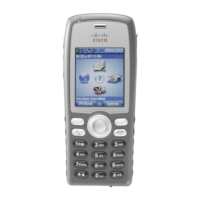
18
4. Scroll to the number that you want to dial and press OK.
5. Press OK again to dial the number.
Delete a PAB Entry
1. Search for a PAB entry.
2. Scroll to the listing and press Select or .
3. Choose Options >Delete.
4. Press OK to confirm the deletion or Cancel.
Edit a PAB Entry
1. Search for a PAB entry.
2. Scroll to the listing and press Select or .
3. Choose Options > Edit to modify a name or mail address.
4. If necessary, choose Options > Phones to modify a phone number.
5. Press Update.
Add a new PAB Entry
1. Access Personal Address Book.
2. Access the Search page and choose Options > Submit. (You do not need to input search information first.)
3. Choose Options > New.
4. Use the keypad to enter a name or nickname.
5. Press Phones and use the keypad to enter phone numbers. Be sure to include any necessary access codes such as a 9 or 1.
6. Press Submit to add the entry to the database.
Assign a Fast Dial Code to a PAB Entry
1. Search for a PAB entry.
2. Scroll to the listing and press Select or .
3. Choose Options > Fast Dial.
4. Scroll to the Fast Dial code that you want to assign to the number and press Select or .
Add a new Fast Dial Code (not using a PAB Entry)
1. Choose (Services)> Personal Address Book.
2. Select Personal Fast Dials.
3. Scroll to a Fast Dial code that is unassigned and press Select or .
4. Press Assign.
5. Enter a phone number.
6. Press Update.
Search for Fast Dial Codes
1. Choose (Services) > Personal Address Book.
2. Select Personal Fast Dials.
3. Scroll to the listing you want and press Select or .
 Loading...