Before you begin
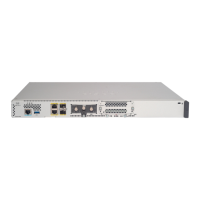
Before you install the Cisco 809 Integrated Services Router on a table, wall, or DIN rail, install the antennas
on the back panel. It is difficult to install the antennas after the router is installed.
In some cases it is necessary to install two antennas:
• Sierra Wireless MC73xx modem series supports MIMO on LTE. WCDMA UMTS HSPA DC-HSPA+
is diversity only, without MIMO.
• The IR809 must be installed with 2 antennas (Main & Aux) to guarantee the best performance level.
Using a single antenna may impact downlink performance by a minimum of 3dB, and can be much more
(10-20dB) due to multipath fading (destructive interference between direct and reflected radio waves).
• In case of 3G UMTS, a solo antenna would not be able to switch to the diversity port.
Step 1 Manually screw the antenna tight to the TNC connectors on the back of the router.
Step 2 Orient the antennas. For optimum wireless performance, antennas should be generally perpendicular to each other.
Mounting on a Wall, Table, or Other Flat Surface
To mount the router on a wall, follow these steps:
Before you begin
The Cisco 809 ISR has mounting holes on the bottom of the chassis for mounting the unit on a wall or other
vertical surface.
When choosing a location for wall-mounting the router, consider cable limitations and wall structure.
Tip
Read the wall-mounting instructions carefully before beginning installation. Failure to use the correct hardware
or to follow the correct procedures could result in a hazardous situation to people and damage to the system.
Statement 378
Warning
When mounted from the back using #10 screws, the torque is 22-30 in-lbs. When mounted from front using
#6 screws the torque is 8.3-11 in-lbs.
Note
Step 1 Locate the mounting holes on the router. There are 4 holes shown by arrows in the following figure:
Dimensions noted by 1 in the graphic are 4.7 in (11.9 cm). Dimensions noted by 2 in the graphic are 3.5 in (8.9 cm).
Cisco 809 Industrial Integrated Services Router Hardware Installation Guide
24
Installing the Router
Mounting on a Wall, Table, or Other Flat Surface