5
Access Point Mounting Instructions
OL-166451-01
Mounting an Access Point Below a Suspended Ceiling
Mounting an Access Point Below a Suspended Ceiling
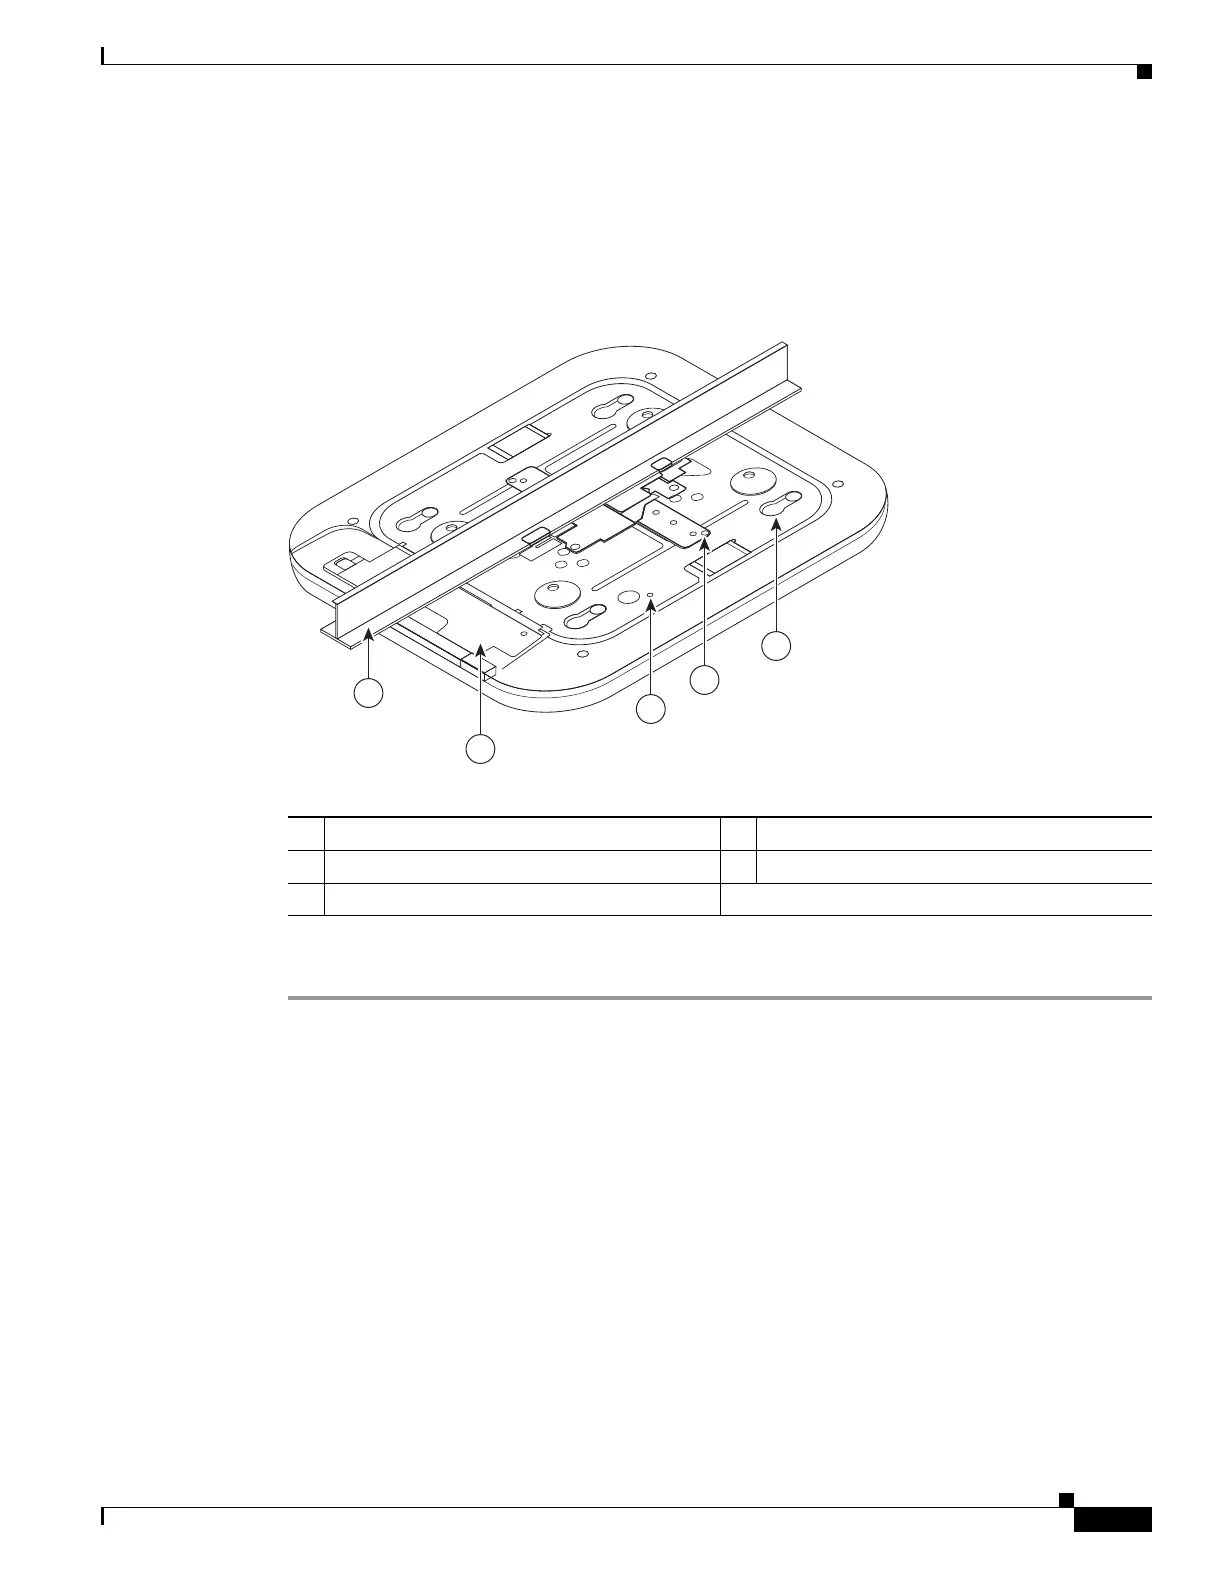
Follow these steps to mount the access point below a standard or recessed suspended ceiling. Figure 6
shows an access point mounted on a T-rail ceiling rail using a ceiling grid clip.
Figure 6 Suspended Ceiling Mounting Details
Follow these steps to mount the access point below a suspended ceiling.
Step 1 Decide where you want to mount the access point on your suspended ceiling.
Step 2 Open the ceiling grid clip completely.
Step 3 Place the ceiling grid clip over the T-rail and close it to the appropriate detent (A, B, or C).
Step 4 Use a screwdriver to tighten the two ceiling grid clip locking screws to prevent the clip from sliding
along the T-rail.
Step 5 Observe the ceiling grid clip width detent letter (A, B, or C) that corresponds to the T-rail width.
Step 6 Align the corresponding holes (A, B, or C) on the mounting bracket over the mounting holes on the
ceiling grid clip.
Step 7 Hold the mounting bracket and insert a 6-32 x 1/4 in. screw into each of the four corresponding holes
(A, B, or C) and tighten.
Step 8 If necessary, drill or cut a cable access hole in the ceiling tile large enough for the Ethernet and power
cables. Pull the cables through the access hole until you have about 1 foot of cable protruding from the
hole.
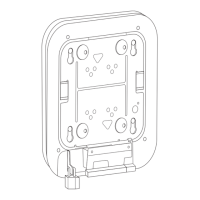
1 Access point mounting keyhole 4 Access point cable access cover
2 Ceiling grid clip 5 Ceiling T-rail
3 Grounding point
272375
5
4
1
2
3